Monday, August 30, 2010

Baby Daniels & Mama Kang's Oreo Mint Nibs

This past weekend, I attended the Daniels baby shower. Plenty of good food and even better company. We kicked it in the back yard with some beats floating in the summer air. I chased after their handsome cat, Othello, and Jess' sister's dog, Sunny. It was a delightful, chill evening.

Congratulations Jess and Erik! Your daughter is blessed to have you as parents. Jess can change a car tire in stilettos while wearing a white business suit and not get it dirty. Erik can remodel an entire townhouse from dry wall to demolition without breaking a sweat. You're both brilliant and kind. I just hope she gets Jess's eyes. No offense Erik- but you cannot compete with that green.

Jess made delicious mint tea. Part tea, part earl grey, very yummy. One of the ladies present is an actual chef that studied in France so you know I was trying to mooch what knowledge I could from her! I was eager to share what I made and then realized... I forgot the cooler full of food. Thanks mom for coming to my rescue!

I baked some Rhubars... then made another batch because the first was not 'pink' enough for public display. A pitcher of Raspberry Lemonade and a heaping of Mama Kang's Oreo Mint Nibs for good measure.

Ah yes.... Mama Kang's Oreo Mint Nibs. Every time I go to my boy Peter's house, his mom serves these delicious, addictive, sinful nibs. They're bite size and perfect for parties. You can make them in all sorts of varieties. I used Andes mints, but you can substitute by using half regular oreo and half mint oreo. Whichever works for you! Plus, you only need 4 ingredients. Special thanks to Peter for hooking me up with the recipe. Make these at your next social- you won't regret it.


1 package reduced fat Oreos
8 ounce light or fat-free cream cheese (regular is too greasy)
14 Andes Mints
1 (11.5 ounce) chocolate chips - white or semisweet

In a food processor or by hand, smash the Oreos and Andes into fine bits. Place wax paper on baking sheet and make room in the freezer!

In a large bowl, mix the Oreo/Andes with the cream cheese. Wear a plastic glove if it helps keep it from sticking! Roll into small balls. These suckers are rich so don't make them too big. Line them on the baking sheet and allow to sit in the freezer for at least 30 minutes.

Fill a medium sized bowl with water and ice. Melt the chocolate chips (microwave carefully or double boiler). Set up your station with the ice water, melted chocolate, and another plate lined with wax paper. It's like the cake drop production line.

Insert a toothpick into the frozen oreo ball and dip into melted chocolate. Rotate evenly to allow excess chocolate off. Dip into ice water for a few seconds, until chocolate hardens. Gently pull out toothpick. Place on lined plate. Repeat until all are done. I find it's easier to add the dipped balls in batches as I go. This will help prevent melting.

Serve. I prefer to fill a larger bowl with ice and then place a smaller serving bowl inside. Again, this is to make sure they do not melt.

Thursday, August 26, 2010

Edna Mae’s Sour Cream Pancakes

Why do I do these things to myself? I don't like sour cream. We've established this. A smidge is okay on a burrito- just a smidgey. I use it in some cupcake recipes. It's in pound cake. So it only makes sense to be in a pancake- right? That was until I realized just how MUCH sour cream we're dealing with: 1 cup. That's a good bit of sour cream! My boyfriend was cringing the moment he saw what I was up to (he doesn't like sour cream either). I'm sorry hun! :D You know I learn the hard way in the kitchen.

If you are down with the sour creamness- MAKE THIS. Go. Run to your kitchen. I brought one into work and my coworker was absolutely enamored. He thinks sour cream makes everything divine- even eggs. These pancakes are soft and melt in your mouth. I love the added banana topping! Thanks goes to the notorious pioneer woman for this recipe.

I made a quick batch of standard issue buttermilk pancakes for the rest of us pancake eaters. You can see the difference between the two by how they cooked on the griddle. The sour cream pancakes kept a nice solid circle with distinct browning. The buttermilk pancakes spread out more and were more flimsy.


Edna Mae’s Sour Cream Pancakes

1 cup sour cream
7 tablespoons all purpose flour
2 tablespoon sugar
1 teaspoon baking soda
1/ 2 teaspoon salt
2 large eggs
1 teaspoon vanilla extract
Butter
Maple syrup
1 banana (optional)

Warm up your griddle, iron skillet or frying pan at a medium heat. Get it nice and hot but not smoking. Test with a drop of water to see if it simmers.

In a bowl combine sour cream with sifted dry ingredients (flour, sugar, baking soda, & salt).

In separate bowl, whisk the eggs and vanilla together

Pour egg mixture into sour cream/flour mixture. Stir gently until all ingredients are mixed well.

Melt about a tablespoon of butter onto griddle. Using a ladle pour about 1/4 cup of pancake batter onto the pan, making about a 4 inch in diameter pancake

Cook one side of the pancake for about 1 to 2 minutes, placing a few thin slices of banana on top. Flip when the edges start to brown and cake begins to bubble. The bananas will caramelize a little. Yumm...

Remove from heat and stack high, top with a pad of butter and drizzle with lots of maple syrup!

A few scrambled eggs and bacon don't hurt either. The boy took care of these things. He uses soy sauce to make scrambled eggs. Maybe I can stalk him closely enough next time to get some actual measurements- because they're pretty freaking tasty. Bet you were in my house on a Sunday morning, huh?

Thursday, August 19, 2010

Tiny Cherry Almond Teacakes

My eyes dart back and forth between the oven and the clock. I need to leave the house. Soon! Whyyyyyy do I do this to myself? I have a one hour break between work and break dance session. Time to chill, get ready, and unwind. But what do I do? Make teacakes. Genius!

It's not my fault someone bought cherries. They were sitting on the counter, staring at me as I nibbled on some cereal. Alas, they would go to waste if I didn't use them. I had just the recipe in mind and it would give my new cookbook a chance to redeem itself.

These teacakes are fantastic. The texture is delightful and unique! They're not like mini cupcakes or muffins. They're dense but not heavy; moist but thick. The center holds a warmed cherry oozing with sweet natural flavor. You can remove the cherry stem if you want, but I think it makes them look like little bombs from Mario Kart. The boys at session loved them. Plus, the are super simple and quick.

The directions say use mini-muffins pans to yield 30. I have mini cupcake tins, which I hope are the same thing. These are the perfect snack and breakfast nibble.

1 1/4 sticks (10 tablespoons) unsalted butter
1 cup all-purpose flour
1 cup finely ground unblanched almonds or almond mead
1 cup sugar
1 teaspoon coarse salt
5 large egg whites
4 teaspoons kirsch (cherry brandy)or substitute with
30 sweet (Bing) cherries

Preheat oven to 400 degrees. Grease tins (butter + flour, spray, etc).

Melt butter in small skillet over medium-high heat. When it begins to sputter, reduce heat to medium. Cook, swirling skillet occasionally, until butter has lightly browned and has a slight nutty smell. Skim foam from top, and remove skillet from heat.

Whisk together flour, ground almonds, sugar, and salt in a bowl. Add egg whites, and whisk until smooth. Stir in kirsch/juice. Pour in butter, leaving any dark-brown sediment in skillet, and whisk to combine. Let stand for 20 minutes.

Spoon 1 tablespoon batter into each buttered cup, filling about halfway. Push a cherry into each, keeping stem end up. With a small spoon, smooth batter over cherries to cover.

Bake until a toothpick comes out clean and cakes are golden brown, 12 to 15 minutes. Let cool 10 minutes. Run a knife around edges to loosen, and unmold.

Cakes can be stored in airtight containers at room temperature overnight.

Monday, August 16, 2010

Gingerbread Cupcakes with Vanilla Frosting

Martha Stewart, I got a bone to pick with you. What the hell is up with the Gingerbread cupcake recipe printed in your cook book? I rarely, oh so rarely, am willing to purchase a recipe book when there are so many free resources. Followed the recipe to a 't'- and was stunned by the results. They're buttery. Ewwy. And heavy as rocks. I could throw them at small children and they would cry.

I made these cupcakes twice. Why? Because I needed to know beyond a shadow of a doubt it was not me. First round, I used Blackstrap Unsulphured Molasses. They were dark and flat. Okay- maybe it's the "Blackstrap" part.

I found another Unsulphured molasses, the cupcakes were lighter in color and rose a little. They were still dense. And 3 sticks of butter for the alleged 22 cupcakes (I only came out with 17 both times)? Hot damn that's a lot of butter. The 'gingerbread' taste was there... sorta... but at least they were easy to make.

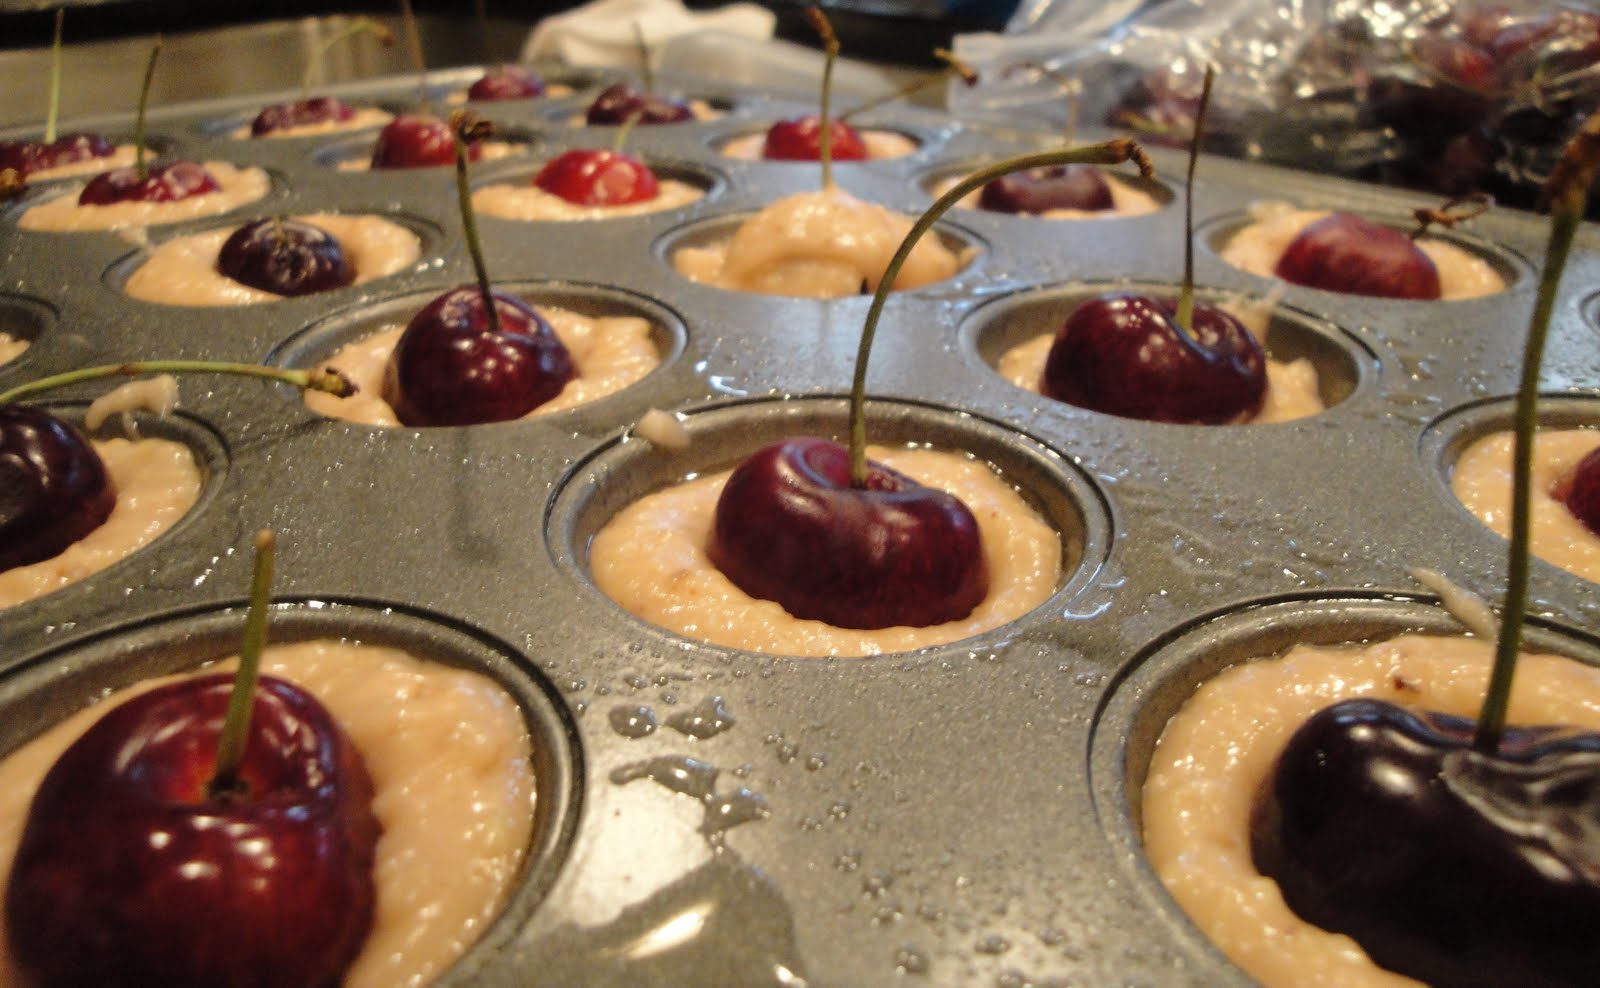
So I go online to the Martha Stewart website, and there's a 2nd version of Gingerbread cupcakes that sounds so much more logical. Say what now? Why publish this awful thing then? This is the second disappointing recipe from this book. The first was the Orange-Vanilla Bean (the cupcake is good but the pain-in-the-ass candied oranges were pointless. I could make these cute without spending 20-40 minutes watching oranges in a saute pan).

As for the frosting, it is absolutely inoffensive and polite. Your taste buds don't get excited. It's like going to church. If your'e looking for a plain, smooth, fluffy frosting- here's your guy! I am much more intrigued by these Lemon based frosting's I'm seeing other people use for their Gingerbread cupcakes.

I will try the gingerbread cupcake again- but NOT with this recipe

Cupcake

1 1/2 c flour
2 Tbsp ground ginger
2 tsp cinnamon
1/4 tsp freshly grated nutmeg
1/4 tsp ground cloves
1 1/2 c (3 sticks) unsalted butter, at room temp
1 1/2 c sugar
3 Tbsp molasses
4 eggs, at room temp
1 tsp vanilla extract

White Fluffy Vanilla Frosting

1 1/2 (3 sticks) unsalted butter, at room temp
4 cups confectioner's sugar
1 teaspoon vanilla extract

Preheat oven to 350. Line muffin tins with paper liners.

Sift flour and spices together and set aside.

Cream butter and sugar until light and fluffy. Add molasses and beat until combined. Add eggs, one at a time, beating until combined. Beat in vanilla. With mixer on low, add flour mixture until just combined.

Fill each muffin tin 3/4 full. Bake 25 minutes until a toothpick comes out clean. Move to wire rack. Cool completely.

For the Frosting... Cream sugar until fluffy. Add a medium speed, add 1/2 a cup of confectioner's sugar at a time, making sure it's incorporated with each addition. Increase speed to high for about 10 seconds after each full cup of sugar has been added to aerate (so 1/2 cup, mix, another 1/2 cup, mix-- high speed mix for 10 seconds, repeat until finished with sugar). Add vanilla and mix until well incorporated.

Friday, August 13, 2010

Strawberry Rhubarb Pie with Buttermilk Crust

The Legendary Strawberry Rhubarb Pie- we meet at last. After learning what all the hype was about with Rhubarb (thanks to my beloved RhuBars), I wanted to make something else with the mysterious ingredient. This was the verdict.

I got the filling from Smitten and the crust from Joy the Baker. I'm going to be brutally honest- it was not the talk of the town as I had hoped. Every one's opinion was different. Too sweet; crust and filling didn't compliment each other; too watery. As for me? The angels did not sing- even though I loved all the fresh fruit. I ended up eating most of the filling, woops.

The buttermilk pie crust did not win me over- that's just me. For more photos and even a video, please visit Joy's site. It was an absolute pain to make. The dough is hella shaggy. I was practically begging it to stay together while rolling it out. That's how it is meant to be- don't panic. I prefer the pie crust from the Peach Pie earlier this summer- that one caused less heart ache and stress.

The filling was yummy- but a lil sweet. Next time I make this, I am cutting the amount of sugar in half. It wasn't even a lot! But I think these two elements are perfectly sweet as they are. I was intrigued by Smitten's use of tapioca/boba balls to soak up the juice- but not impressed with the results. Hey man- i LOVE bubble tea, don't get me wrong. However, I recommend using tapioca flour as a substitute.... Hm. I just may create a bubble tea pie!

Note: It's always good to make the pie crust the day before. Space things out and better distributes the amount of time you spend in the kitchen.

Happy Friday Everybody! Song of the day (ignore the video, just enjoy the beat)....


Buttermilk Pie Crust

2 sticks (8 ounces) cold unsalted butter
2 1/2 (12 ounces) cups all purpose flour
1 Tablespoon sugar
1 teaspoon salt
1/2 cup (5 to 6 ounces) buttermilk

Cut the butter into 1-inch pieces and place in the freezer to chill for 15 minutes.

Sift together the flour, sugar and salt in a large bowl. Take the cold butter from the freezer and toss it with the flour mixture.

Dump the cold butter cubes and flour mixture onto a large work area for rolling. With a rolling pin, roll the mixture, flattening the butter cubes with the flour into long, thin, floured butter sheets. Work quickly to ensure that the butter stays cold.

Place the flour and flattened butter back in the large bowl and chill for 10 minutes. When the butter is cold, remove the bowl from the refrigerator, make a small well in the center of the flour and butter mixture. Add cold buttermilk to the bowl all at once. Begin to bring the dough together. Moisten all of the flour with the milk, using your hand to break up large clumps of milk and flour. The dough will be rather shaggy, but you can add another tablespoon of buttermilk, if you see that all your flour isn’t moistened. Split the dough in half and form into two disks. Disks will be rough, and hard to shape together.

Chill the dough for at least an hour in the refrigerator. At this point, the dough will keep in the fridge for up to three days, or in the freezer for up to three weeks. For freezing, roll the dough out into sheets and wrap them in plastic film.

Roll one disk so it's large enough to cut out a 12-inch circle. Gently press one disk into baking pan. Transfer the pie filling mixture to the pie shell annnnddddd......

Filling

3 1/2 cups (about 1 1/2 pounds, untrimmed) rhubarb, in 1/2-inch thick slices
3 1/2 cups (about 1 pound) strawberries, hulled and sliced if big, halved if tiny
1/2 cup granulated sugar
1/4 cup light brown sugar
1 tablespoon lemon juice
1/4 teaspoon salt
1/4 cup quick-cooking tapioca or tapioca flour
2 tablespoons unsalted butter, cut into small pieces
1 large egg yolk beaten to blend with 1 teaspoon water (for Glaze)

Preheat oven to 400 degrees.

Stir together rhubarb, strawberries, sugars, lemon, salt and tapioca in a large bowl.

Mound filling inside bottom pie crust and dot with bits of unsalted butter. Roll second half of pie dough into an 11-inch circle. Moisten the border of the bottom crust by brushing it lightly with Glaze and place the top crust over the filling. Trim top and bottom pie dough so that their overhang beyond the pie plate lip is only 1/2-inch. Tuck the overhand under the bottom crust boarder and press down all around to seal it. Crimp the border using a fork or your fingers and make about 5 evenly spaced 2-inch slashes starting about 1 inch from the center of the pie and radiating toward the edge. Brush more glaze on top.

Cover the pie loosely with plastic wrap and refrigerate it for 1 hour before baking. This will chill and relax the pastry, preventing shrinking.

Bake for 25 minutes then reduce temperature to 350 degrees and bake for an additional 25 to 30 minutes, until the pie is golden and the juices bubble visibly.

Transfer pie to wire rack to cool. When full cool (several hours later) the juices gel.

Tuesday, August 10, 2010

The Single Lady Pancake

I'll let you in on a tragic secret of my life.

Please now. Don't laugh.

I... hate... flipping pancakes.

The other issue I have with pancakes is you can't just make one- you have to make an entire army of them. You can save the batter for later use but still... me vs 12 pancakes? Not even I can win that battle. Hence, why I'm so charmed with this recipe from Joy the Baker.

This is a single, delicious, yummy pancake. Okay, you light weights out there could probably make it into 2 pancakes. The recipe is crazy simple- you don't need eggs or butter! Plus, oats? Bananas? Chocolate chippies? How can you NOT try this? Slap the recipe on the fridge, leave some ingredients out, and let your guests customize their own pancakes while you sleep in. Love it!

Note: Don't have vanilla extract on hand? A dash of maple syrup in the batter will fix that.

Pancake

1/3 cup all-purpose flour
1 Tablespoon dried oats (quick cooking or regular)
2 teaspoons sugar
1/2 teaspoon baking powder
1/4 teaspoon baking soda
pinch of salt

1 Tablespoon plus 2 teaspoons vegetable oil
1/4 cup plus 2 Tablespoons buttermilk
dash of vanilla extract

Optional

handful semi sweet chocolate chips
15 thin banana slices
toasted pecans

In a small bowl, whisk together flour, oats, sugar, baking powder, baking soda and salt. In a separate bowl whisk together oil, vanilla extract and buttermilk. Combine the wet and dry ingredients and stir to combine. The mixture will be thick. Fold in the chocolate chips and half of the banana slices.

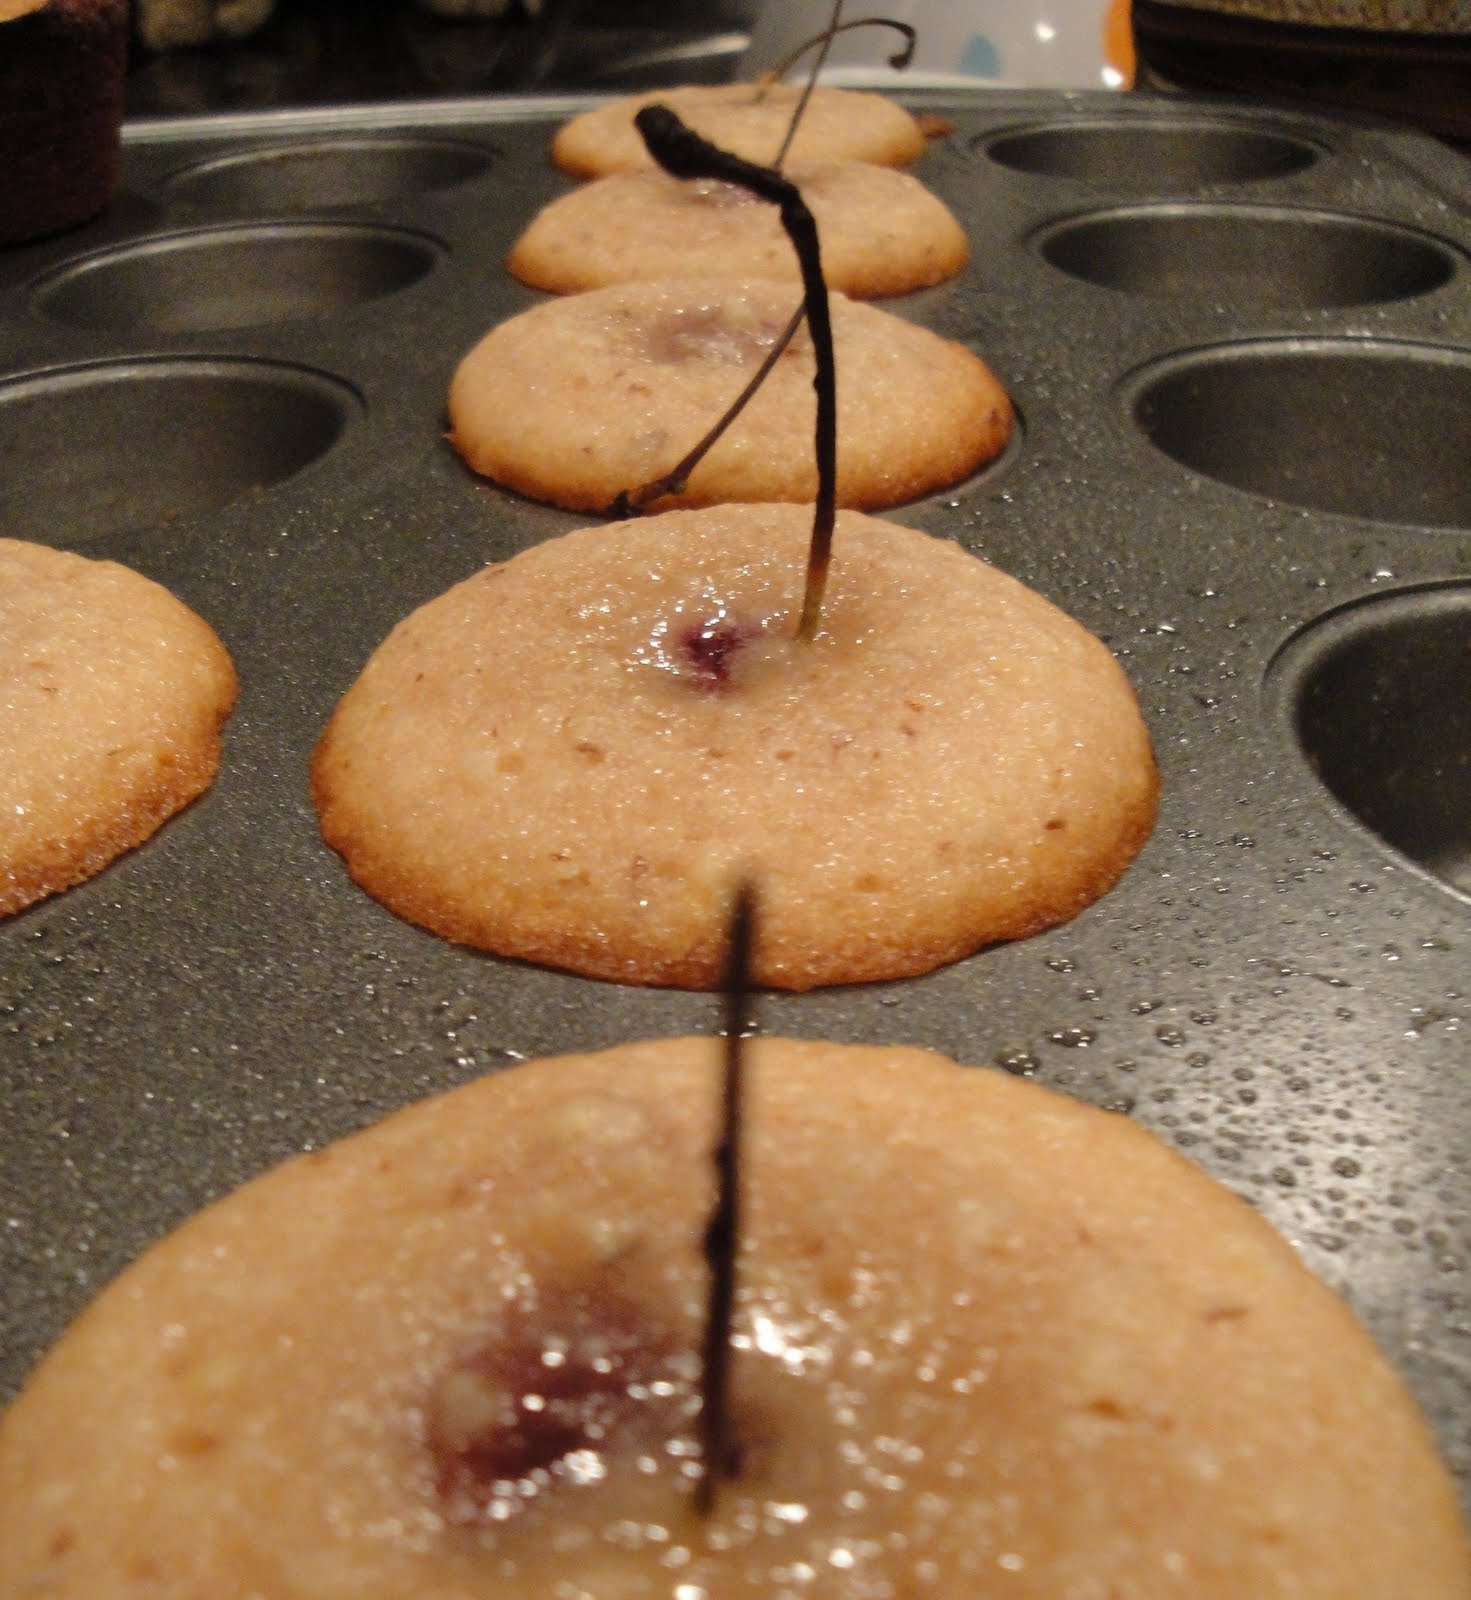
Heat a small frying pan with a teaspoon of oil. Pour in the pancake batter and spread some with the back of a spoon so it's even. Cook over medium heat until bubbles form and pop on the surface of the pancake.


Flip. *twitch*

Cook until golden brown (grumble grumble). Remove from pan and onto a plate. Top with the remaining banana slices, toasted pecans and maple syrup.

Destroy.

Saturday, August 7, 2010

Hot Pockets

Nada but an Empanda! That was my brother's cheer as I decided to tackle on this recipe. I wanted to make Jamaican Beef Empanadas, like the one's at Julia's in DC. Oh- I made the recipe to a T for the crust. I used a different recipe for the filling. I put sweat and love into this empanada. And what did I get? A HOT POCKET.

That's right. A Hot Pocket. I banged my head into the wall. Don't get me wrong, it tasted good. Everyone liked them! But it was not an empanda. I made the patties bigger to stuff more meat and yummyness. I made adjustments to the filling to avoid a sodium catastrophe. It baked nice, thick, and toasty. For a Hot Pocket. And if I had read the entire post, that's exactly how Smitten described it.

See below for my version.

Jamaican Beef Hot Pocket

Dough

4 1/2 cups unbleached all-purpose flour (I swapped 1/2 cup with whole wheat flour)
3 teaspoons salt
2 sticks (1 cup) cold unsalted butter, cut into 1/2-inch cubes
2 large eggs
2/3 cup ice water
2 tablespoons distilled white vinegar

Egg Wash

1 egg, lightly beaten
1 tablespoon water
1 teaspoon curry

Filling

1 tablespoons oil (whatever you want to brown the meat)
1 pound ground beef
1 small onion, finely diced
1 teaspoon curry powder
1 teaspoon dried thyme
1 teaspoon smoked paprika
1 teaspoon pepper
1/2 cup beef broth
1/2 cup panko bread crumbs
1 potato, boiled

For the dough.... Sift flour with salt into a large bowl and blend in butter with your fingertips or a pastry blender until mixture resembles coarse meal with some (roughly pea-size) butter lumps. Beat together egg, water, and vinegar in a small bowl with a fork. Add to flour mixture, stirring with fork until just incorporated. Mixture will look shaggy. Turn out mixture onto a lightly floured surface and gather together, then knead gently with heel of your hand once or twice, just enough to bring dough together. Split in half. Form dough into two flat rectangles about 1/8 inch thick and wrap in plastic wrap. Chill in freezer for at least 1 hour. Dough can be chilled up to 6 hours total. While chilling, make the filling.

For the filling... On medium-low heat, cook the ground beef until lightly brown with the onion. Add spices and stir until will combined. Remove from heat to let flavors mingle. Once cool, add the panko bread crumbs and beef broth.

In a small pot, boil water with a dash of salt to cook the potato. Peel and cut potato into medium chunks. Once water reaches a boil, add potato chunks. Remove when the potato is slightly softened- enough to prick with fork gently but not fall apart. Drain from water and set aside.

Form Hot Pockets... Put oven racks in upper and lower thirds of oven and preheat oven to 400. Place dough on lightly floured surface. Cut dough with cookie cutter or whatever round tool you have on hand about 8, 7 inch round pieces.

Spoon about 3 tablespoons filling onto center, a little bit of potato, and fold dough in half, enclosing filling. Press edges together to seal, then crimp decoratively with your fingers or tines of a fork. Transfer to a baking sheet. Make the rest in same manner, arranging on 2 parchment-lined baking sheets.

Lightly brush empanadas with some of egg wash and bake in upper and lower thirds of oven, switching position of sheets halfway through baking, until golden, about 25 minutes.

Transfer to a rack to cool at least 5 minutes. Serve warm or at room temperature.

Tuesday, August 3, 2010

July Birthdays and Raspberry Lemonade

July is bumpin with birthdays- including my own. I like to keep it low key and have dinner with my family. This is NEVER good enough for my mom. She tries to sneak over friends. She means well and I love her for caring. In this regard, some people would call me spoiled. I don't think I'm spoiled because that implies I do not appreciate my family. On the contrary, I am all too aware of my luck and am grateful beyond words. I feel loved and for some reason that makes me want to cry. Ack, tearing up. Anyways. We'll get to the raspberry lemonade in a second....

The boyfriend went out of his way- brought a whole box of Georgetown cupcakes. Thank you babe! I also made a new friend, Big Jack. My Bust-A-Move video game obsession is heightened with my new Nintendo DSS. I'm a dork. The brother was, as usual, ridiculously thoughtful. My new Yoshitaka Amano art books and ebelskiver are perfect.

For the weekend Asako, flew down from Michigan. We surprised Yen-Nei, the other third to our trio. Ako and Nei were my apartment-mates in college. The funny little scream from Yen-Nei was well worth the stress of planning the weekend. We went rafting and had a nice get together that night. It was great to see old friends. Thanks for coming out guys! Brandon- I heart biters!

To help unwind, I made some raspberry lemonade to kick it. I found this from Joy the Baker. The flavor is on point and 100% natural. Yes, I'm sold! You can even make this into a cocktail! Make the lemonade as follows and top with champagne/prosecco. Serves 6.

Simple Syrup

1 cup sugar, for a less sweet lemonade, take the sugar down to 3/4 cup
1 cup water to make the simple syrup

Lemonade

1 cup fresh lemon juice
4 cups cold water

Raspberry Sauce

6 ounces fresh or frozen raspberries
1 tablespoon water
1 tablespoon sugar

Make simple syrup by heating the sugar and water in a small saucepan until the sugar is dissolved completely.

While the sugar is dissolving, use a juicer to extract the juice from 4 to 6 lemons, enough for one cup of juice.

Add the juice and the sugar water to a pitcher. Add 4 cups of cold water, more or less to the desired strength.

Place the raspberries in the bowl of a food processor fitted with a blade attachment. Add sugar and water and mix until the raspberries form a smooth puree. Transfer raspberry puree to a fine mesh strainer fit over a bowl. Press the puree through the strainer, until only the raspberry seeds and a bit of pulp remain the the strainer, and a beautiful raspberry sauce is all that’s in the bowl. You don't have to throw it away, save it to top on some plain yogurt or ice cream!

Add 2 tablespoons- 1/4 cup of the prepared raspberry sauce and stir to combine. It's however strong you want the raspberry flavor.

Refrigerate 30 to 40 minutes. If the lemonade is a little sweet for your taste, add a little more straight lemon juice to it. Too tart, add some more sugar.

Serve over ice. Enough for 6. Kick back on a warm summer night.

Monday, August 2, 2010

Ginger Peach Muffins

At times, there are alarming parallels between my place of business and the television program "The Office." We have our Angela. Michael. Nothing quite like Dwight- thank God. We do the awkward monthly birthdays, ice cream cake included even though one person is lactose intolerant. I think the writers could get some material off of us. That's not necessarily a bad thing... necessarily.

One of these characters happens to be a six foot giant who loves food. We talk about cooking all the time. In the winter, he rolled up to the office with fresh oysters in the back of his truck for a makeshift tail gate party. He's a little rough around the edges but cooking is his idea of unwinding. You can imagine my delight when he showed up with a basket of fresh, white peaches.


White peaches are exquisite. They're sweet and fall right off the pit when you cut them. They don't need any fan fair or frippery- they're perfect as they are. I took a handful home and they were gone in seconds. I stared at the remaining peach. How could I make this love affair linger? If I ate it, it would be over- a one night stand. I needed to create something with this romance so it would last. Thank you Good to the Grain.

These muffins are delicious. I didn't think I would like them so much! Hell, I didn't know what to expect- muffins are not really my thing. These though? Oh wow. It's got a healthy base- wheat and oats. It's moist and soft. The peach on top is like instant jam- gooey and smooth. Every bite is a little different because of the brown sugar and crystallized ginger. There's just a touch of honey on top too! Ginger hearts Peach.

This recipe is an adaptation from Good to the Grain. The original version can be found on White on Rice. I substituted the Oat Flour with Wheat Flour + Almond Meal and compensated with a few tablespoons of oat.

Note: Remember the muffin mantra.... Thou shalt not over mix.

Peach Topping

1 large White Peach
1 tablespoon unsalted Butter
1 tablespoon Honey
1 teaspoon freshly grated Ginger

Dry Mix

1 1/4 cups whole wheat flour
3/4 cups all-purpose flour, unbleached
1/4 cup almond meal
2-3 tablespoons oats (instant or regular)
1/4 cup sugar
1/4 cup light brown Sugar
1 teaspoon baking powder
1 teaspoon baking soda
3/4 teaspoon sea salt or kosher

Wet Mix

3/4 stick (85g) unsalted butter, melted and cooled slightly
3/4 cups milk
1/2 cup sour cream
1 large egg
2 tablespoons freshly grated Ginger
3 tablespoons crystallized ginger, finely chopped

Preheat oven to 350°F. Grease baking tins and set aside. I used large muffin tins and came out with 8 muffins.

For the Peach Topping.... Halve the peach and remove pit. Slice into 1/4″ slices.

Add 1 T butter, honey, and 1 t fresh ginger to a medium saute pan. Place pan over medium heat. When warm, stir to combine & gently simmer for @ 2 min. Add peach slices, carefully toss to combine & set aside.

For the muffin... In a large bowl, sift together all of the dry mix ingredients. After working flours through sifter, pour any remaining dry ingredients.

Combine all of the wet mix ingredients together in a bowl, whisking until well combined. With a spatula, gently combine the wet mix with the dry mix, stirring until just combined.

Using an ice cream scoop or two large spoons, fill baking tins until slightly mounding. Lay a couple peach slices on each muffin, pressing them slightly into the batter.

Spoon the peach topping juices over the peaches and place tray into middle rack in the oven. Bake for 24-28 minutes, or until golden, peaches caramelized, and a toothpick comes our clean from testing the center of the muffins. Mine took exactly 24 minutes. Remove from oven.

While still hot, gently pop each muffin out of the tins and lay them on their side in the cups to allow them to cool. And ta da- heavenly muffins!