Showing posts with label Pie. Show all posts

Tuesday, August 20, 2019

Samosa Empandas {Baked, Vegetarian}


In celebration of the latest addition to our family, we threw a little shindig to hang out while we still had the energy. I didn't want to expend too much energy so the majority of snacks were outsourced in the most spectacular fashion possible. Mini pies from Pie Sisters. Cupcakes from Baked and Wired. Fresh rolls from Bangkok 54. Mint Tea from Al Zaytoun. It was like the greatest hits of Noms + Bun gastronomy.

There was one item missing.... samosas.

Monday, June 10, 2019

Nailed It: Panda Creme Puffs with Nutella-Mascarpone Filling


Not going to lie... these creme puffs had me and my husband laughing for a good 5 minutes straight. They didn't come out exactly how I had pictured them. Maybe next time - it's always a learning experience! In the interim, I'll take the "A" for effort and enjoy their delicious flavor.

Monday, May 9, 2016

Not-So-Bad-For-You Squash Pie


This healthy and delicious pie comes from the lovely chefs of True Food Kitchen. The first time we ate at True Food was last year in San Diego, CA. We found it by chance during a day trip and were immediately hooked on the concept: a menu built around an anti-inflammatory diet. This is a dream that I've been hoping would come true! Being able to walk into a restaurant and knowing that whatever you pick has actual nutritional benefits. What a relief!

The hubs and I are all about healthy eats so it's not wonder my in-laws are hooked as well. My father-in-law had a slice of the Squash Pie and raved about it for days after. Much to my delight and surprise, True Food Kitchen was kind enough to actually publish the recipe for public consumption!


This pie is "not-so-bad for you" which is not license to eat the whole thing in one sitting though you may be tempted. There's still a 3/4 cup of sugar in the mix. It's dessert after all people! 

What makes this pie less evil than other traditional pies is the lack of ingredients like condensed milk, half-and-half, and heavy cream. Instead, the recipe calls for coconut milk which has much more nutrients. The crust skirts away from butter and uses tahini (sesame paste) as a binding agent with a hint of sweetness from maple syrup, a natural sweetener. What I really enjoyed was the use of brandy because it smells so heavenly - it's like concentrated vanilla. Play with the spice ratio until you love the flavor of the mix - you know me and the cinnamon!


The other perk is that if you use the vegan graham crackers in the crust - than you can serve this pie to a vegan audience! Don't wait for Thanksgiving to enjoy a slice! It tastes great with a scoop of vanilla gelato or a big dollop of coconut whipped cream. Personally, I enjoyed it after a thorough chilling in the fridge.

Have a fantastic week!

Not-So-Bad-For-You Squash Pie
from True Food Kitchen

Crust
1 packages vegan graham crackers, pulverized
2 tablespoons sesame tahini
 2 1/2 tablespoons maple syrup
1/2 tablespoon water
1/2 tablespoon grape seed oil

For the crust, blend all ingredients until well combined. Press the crust into a pan and up the sides.  Bake crust for 15 minutes at 325 degrees, until the crust is dry and crisp. Set aside.

Filling
3 cups pureed squash — chef Cory Holland recommends butternut
1/4 cup light brown sugar
1/2 cup granulated sugar
1/2 teaspoons salt
1/3 teaspoon ground ginger
pinch of ground cloves
3/4 teaspoon cinnamon
2 tablespoons brandy
3/4 cups coconut milk
2 tablespoons arrowroot powder
scant dash of nutmeg, if desired

For the filling, bake a whole squash (butternut, buttercup, Hubbard, Tahitian, etc.) at 375 degrees wrapped in aluminum file until it is soft enough to pierce easily with a toothpick (about an hour). Cool, cut in half, remove the seeds, and scoop out the flesh. Mash the flesh and measure out three cups.

Blend the squash with the remaining ingredients until smooth and pour the mixture into the baked crust. Bake the pie at 400 degrees for 50 to 60 minutes, until browned and set. Cool at room temperature and then chill overnight in the refrigerator. Serve cold or cool with a dollop of sweetened, whipped coconut cream. Holland adds vanilla bean paste to his whipped coconut cream.

Wednesday, March 11, 2015

Rum-Kissed Banana Butterscotch Cream Tart in a Cocoa-Buckwheat Crust {Gluten-Free}


This has been one the most frustrating posts to put together in terms of pictures. Each one is vastly different than the other with no theme and consistency. This is the struggle of a commoner having a food blog! There's not enough time or resources to create a picture-perfect post. I rarely have the opportunity to share meals because that's exactly what they are - a meal! Hubby is eager to get his grub on after a hard day at work. Could you imagine telling that oncoming train to ease up - just one more picture while your food gets cold? No thanks! 

A lovely pie such as this, however, could not go with it's song unsung. 


I decided to switch it up on 'em this year for the big brother's birthday. In the past, I have stuck with his love for peanut butter with treats like the Chocolate Covered Peanut Icecream Cake and ghetto fabulous Peanut Butter Cake. Recently, he has been testing out a more gluten-free lifestyle which won't fly with the traditional fare. 

There are millions of awesome options these days for the gluten-free masses. I was lucky enough to stumble upon this beautiful recipe from Bonjon Gourmet for a Rum-Kissed Banana Butterscotch Cream Tart in a Cocoa-Buckwheat Crust. The title alone is daunting but no worries, it's surprisingly easy to make.

A quick break down of its composition:

Gluten-Free Cocoa-Buckwheat
Rum Butterscotch Custard
Lots of banana slices
Whipped cream
Dark chocolate shavings

I will say that this pie crust is not for everyone because of the buckwheat.  People commented that they could taste it which was a turn off. It didn't even strike my radar - I thought that it gave a more earthy, dark chocolate flavor.  Then again, I don't like anything super sugary so it was a nice balance for my palette.

If you opt for a different crust, make sure it's not super sweet. Paired with the butterscotch filling, the combination may be overpowering. I see this working a cinnamon-based crust or a traditional butter-based one with chocolate like this Brûléed Bourbon-Maple Pumpkin Pie.

This was the first time that I've ever made butterscotch and I was very pleased with results. The texture is creamy and dreamy while the flavor is humbled by the use of rum. You can switch it out for bourbon or omit it entirely. This recipe called for black rum which sounds tasty for baking but we would never use it otherwise. I went with what we had in-house: a little bottle of Captain Morgan's.


Making the butterscotch takes a degree of patience and persistence because you got to WHISK WHISK WHISK until it thickens. Roll up them sleeves and don't lose heart - it will get there eventually. This is all butter, milk, sugar, and cornstarch.

Lastly, the whip cream topping. Take your liberties as needed. This recipe adds some filler like marscapone, creme fraiche, or sour cream. The use of marscapone is always welcome but again, using what was available, I added sour cream. The result is a heavier topping that doesn't whip quite as high. If you want a super fluffy topping, keep the extras out and use only heavy cream.


A personal touch was the addition of these cute pennants. The hubby took some sticks from an art project and sharpened the tips. I tied on some baker's twine and attached pennants made out of two-sided stationary paper for an alternating pattern. Simply cut a diamond shape and fold in the middle to create simple flags and hang from the twine. Slip in a smidge of tape if you're worried about them falling off.

The birthday boy enjoyed the pie and even the cute pennants! Love you, broseph!

Please enjoy this recipe for Rum-Kissed Banana Butterscotch Cream Tart in a Cocoa-Buckwheat Crust {Gluten-Free} on Bonjon Gourmet's site!

Monday, December 8, 2014

Snapshot of Thanksgiving 2014


Sending love and hoping you had a very happy thanksgiving spent with friends and family! Oh, and lots of tasty treats of course! 

Special thanks to my wonderful tia, cousin, and his wife for visiting from NY,
it's always a holiday when you're around.

Recipes pictured above:

No Corn-Syrup, Pecan Pie (middle row, second in) with Smitten's Pie Crust
Pumpkin Cheesecake Mousse (bottom left hand corner, *omit the orange zest)
Hazelnut-and-Chocolate Meringue Cake (bottom right hand corner)

Tuesday, March 25, 2014

The Red Truck Bakery


Several months back, the husband and I had the opportunity to explore the quaint town of historical Warrenton, VA, thanks to our friends, Harold and Yen. As a wedding gift, we got to enjoy a one night stay at the Airlie, a conference/wedding venue tucked away in the lush shadow of the Shenandoah.  There were so many pictures from this tiny trip, it only made sense to break it down into segments. There's magic everywhere, it's just a matter of appreciating it. 

The first thing that we do when visiting a new area is scope out the local bakeries. I'm forever curious to see life in someone else's kitchen. After a quick internet search, the top hitting spot in this area stood out loud and clear:

The Red Truck Bakery

What's the fuss about this bakery? Oh I don't know... to start, there is the mountain of praise it has received from sources like The Washington Post, New York Times, Andrew Zimmerman, and the Oprah Magazine. Plus, there is the matter of the prestigious "Best Pumpkin Pie" award from the Washingtonian. Sounds like it's all the rage and should be teeming with hipsters, right?

Much to my delight, it's a down to earth, ol' fashioned bakery. It's nestled near the center of the historic section of town in a renovated 1921 Esso filling station. The iconic, Red Truck is parked right outside. When we arrived on a Saturday afternoon, there were no other customers and it was still as a church. This quiet, laid back store is the cause of so much fuss? Turns out this was the eye of the storm since it's usually bumpin on the weekend.

The variety of baked goods was dazzling, especially for the simplicity of the set-up. There are no frills- this a real kitchen. There was a myriad of breads distributed across the counter plus loaves, pies, and cookies. I wanted to try everything in the display window when the coffee cake caught my eye. There's a nostalgia associated with coffee cake as my mother often served the Entemann's version to her Portuguese rosary group. Goodness gracious... 

Just look at this beauty! 


A slab of Red Truck's coffee cake is bigger than Mike's fist, and I don't call him Monster Mitts cuz it sounds cute. It was moist, lightly sweetened, and heavenly. There must be some sour cream in this bad boy because it was really nice texture. Honestly, this is one item that I would not mind purchasing through their online delivery service. They ship nation-wide and their spring flavor, a meyer lemon cake, is teasing for a tasting. 

We took the famous pumpkin pie to share with the family as a thanks for watching Autumn during our excursion. It is indeed a solid, all-American pumpkin pie! The filling is smooth and mild with a clean crust. What's the cause of this magic? Instead of dumping in white sugar, the owner, Brian Noyes, uses a caramel of sugar, water, and cream then adds orange zest to brighten things up. Pretty slick, no? 

There are so many other confections to try- we just scratched the surface! Check out their online store or make it a day to visit Old Town Warrenton. 

The Red Truck Bakery
22 Waterloo St, Warrenton, VA 20186
(540) 347-2224

Sunday, March 2, 2014

No Bake, Peanut Butter Mousse Pie with Cookie Crust and Hot Fudge


Peanut butter makes for a lousy cake. At least that's been my experience to date. It's fantastic as a frosting or filling but in the actual batter, it tends to make the consistency crumbly. That's never a good thing. 


Bearing this in mind, I threw convention to the wind for my brother's birthday. That man's palette is hard to peg; he's surprised me more than once with his commentary on desserts.  There is one thing I know to be true and I have relied on heavily on this fact: his love for peanut butter. 

Sorry traditional cake... not this day! Or should I say, not this birthday! This Peanut Butter Mousse Pie won the spotlight this year. It's from Baked: New Frontiers in Baking, one of my favorite cook-books for sweet treats. This pie don't play.


For starters, the crust consists of smashed chocolate waffers mixed with butter. Yes, cookies are built in! There's a thin coat of chocolate ganache spread on top to ensure that the filling doesn't moisten the crust. The filling is a sinful mousse comprised of creamy peanut butter, dark brown sugar, whipped cream, and cream cheese. I feel heavier just typing that list. As if all this isn't trouble enough, the fellas of Baked go hard and add a thick, luscious hot fudge topping. These elements combined make for a sincerely awesome pie. Not too heavy... smooth and balanced. 

Oh, and did I mention that this is a no-bake recipe? Measure, mix, and pop it in the fridge. Grab a tall glass of milk and attack. Doesn't get any better!


This pie was a hit. The birthday boy and the rest of the family gave high praise; it's in the husband's Top Five of Squirrel's and Sweets. That should tell you something since he gets to taste everything that I bake! 

Happy birthday again Joey! You are loved! 

Out of respect for the hard work the authors of Baked: New Frontiers in Baking put into their craft, it doesn't feel right to post this recipe. However, it can be found on the internet from other sources. If you like this pie, you'll love the entire book. 

Sunday, December 15, 2013

Apple Cider Cream Pie


One of my favorite pies is a good old fashioned, mile high apple pie. I love the natural sweetness of the fruit paired with the bite of cinnamon; it's a match made in heaven. Per the previous post, I was tasked with making an apple pie for round two of Thanksgiving. My thoughts drifted to recipes past, like the awesome Cranberry Ribbon Apple pie, when it hit me. 

Apple Cider Cream Pie. I had the recipe marked on my "to make" board on Pinterest and this was the perfect opportunity to try it out. The idea was pitched to Mike for quality control and passed inspection as a "technical" apple pie. Game on!

After reading reviews for this recipe via Lottie + Doof as well as its originator, Food & Wine, I was a little apprehensive of the crust. Either you love this crust or you hate it. I was not a fan of working with the dough because it was stubborn and refused to bake pretty. As it came out of the oven, I growled at the loss of the pretty crimped edges.Should you make this, I recommend using a fork to crimp and leaving it at that.  In terms of taste, however, the crust had the husband swooning! It's flakey and light- the poster child of flavor. 

The filling is sort of like a custard. Take two cups of apple cider reduced to half a cup and mix in some sour cream, eggs, and sugar. The key ingredient here is the cider! The brand that I selected, Martinelli's, was very mild in flavor and was a light gold shade. For this recipe, go for the dark ciders- you can even sneak a pinch of applie pie spice into the mix.

And of course, the cherry to the figurative sundae is a layer of freshly made whipped cream with just a touch of cinnamon. That little bit of spice goes a long way and Mike was highly pleased with the subtle nuisance it provided. It's amazing how such minor details make a difference. This was the Thanksgiving winner for the hubby and, in this case, I'm pretty sure he actually did eat half of the pie!


Apple Cider Cream Pie 
by Allison Kave via Food & Wine, November 2011

Crust
1 cup all-purpose flour
1 tablespoon cornstarch
1 tablespoon sugar
1 teaspoon kosher salt
1 stick unsalted butter, cut into 1/2-inch dice and chilled
3 tablespoons cold milk
1 teaspoon apple cider vinegar

Filling and Topping
2 cups apple cider- the dark variety, not juice
1 cup sugar
1/2 cup sour cream
1/4 teaspoon salt
4 large eggs
1 cup heavy cream
1/2 teaspoon cinnamon

In a food processor, combine the flour, cornstarch, sugar and salt. Add the butter and pulse in 1-second bursts until the mixture resembles coarse meal. If you don't have a food processor (mines too small), the good old fashioned way with a pastry cutter works! Combine the milk and vinegar and drizzle it on top of the flour mixture. Pulse in 1-second bursts until the dough just comes together. Turn the dough out onto a work surface, gather up any crumbs and pat into a disk. Wrap in plastic and refrigerate until chilled, about 30 minutes.

On a floured work surface, roll the dough into an 11-inch round, a scant 1/4 inch thick; ease it into a 9-inch glass or ceramic pie plate. Trim the overhanging dough to 1 inch and fold it under itself. Crimp decoratively and chill the crust until firm, about 15 minutes.

Preheat the oven to 425° F. Line the crust with parchment paper and fill with pie weights or dried beans. Bake in the lower third of the oven for about 15 minutes, until the crust is barely set. Remove the parchment and pie weights. Cover the edge of the crust with strips of foil and bake for about 10- 15 minutes longer, until the crust is just set but not browned. Remove from oven. Press the bottom of the crust lightly to deflate it as it puffs; let cool. 

Lower the oven temperature to 350°.

In a medium saucepan, boil the cider until it’s reduced to only 1/2 cup, about 10-20minutes.  Transfer to a bowl and let cool. Whisk in 3/4 cup of the sugar, the sour cream and salt, then whisk in the eggs.

Pour the custard into the pie shell without removing the foil strips. Bake the pie in the lower third of the oven for 35 to 40 minutes, until the custard is set around the edge but the center is slightly jiggly. Let the pie cool completely.

In a medium bowl, using an electric mixer, beat the heavy cream with the remaining 1/4 cup of sugar and the cinnamon until firmly whipped. Mound the whipped cream on the pie, cut into wedges and serve.

The pie is best eaten the day it is made, but it will keep for up to two days in the fridge. If you plan on making it in advance, do not top with the whipped cream until you are ready to serve.

Sunday, December 8, 2013

Brûléed Bourbon-Maple Pumpkin Pie


This past Thanksgiving was filled with family and food- just the way I like it! My culinary assignment was pie on pie on pie: pumpkin pie for my mom's house and apple pie for the in-laws (post to follow). As much as I like cooking, I do appreciate being in the dessert category for the holidays. Things can get rowdy with too many chefs in the kitchen and being the Pie Person enables one to bake in the comfort and familiarity of their own kitchen. The plan of attack was simple. 

Step 1: pick a recipe and read the directions all the way through to avoid any last minute surprises. For example, planning to leave the house as soon as the pie is fresh out of the oven when it needs to cool completely. Trust, it's no fun trying to keep a hot pie stabilized in the car when you're, inevitably, running late. 


Step 2: buy all the ingredients the week prior to the event (pending expiration) and take inventory. There is nothing worse than putting on the final touches for dinner and oh woopsy- the recipe says thyme but you bought rosemary (this happened recently- can you tell?). 

Step 3: prep work is your best friend. If it can be done the day before, heck yes make it. The time formula goes, "expected time needed + 30 minutes = time to completion." In this instance, I made the pumpkin pie the night prior as well as the pie crust for the apple pie. The directions on the apple pie stated best served the day made so I wanted to hold off on making the filling. 


Step 4: have fun and relax. If baking or cooking gets stressful then you're better off ordering take out. I hate being rushed and have learned to stop myself before diving into a project that's going to simply piss me off. 

Much to my excitement, there were two pies that I had been itching to make! First up is this awesome Brûléed Bourbon-Maple Pumpkin Pie courtesy of Bon Appetit. What intrigued me about this recipe was the chocolate crust. I've seen chocolate paired with sweet potato and it was delish- bets were it would go well with pumpkin too. We enjoyed this crust so much, Mike and I were actually eating it raw. That's a first!


The filling is pumpkin laced with maple syrup. The recipe calls for "grade B" maple syrup, which I had no idea existed and required a trip to Trader Joe's. Apparently the flavor is more potent in this version and adds a slightly caramel dimension. Either way, maple syrup in and of itself is a winner. Oh! And don't forget there's a mild shot of bourbon in the filling to help balance the sweetness.

Finally, there's the brûléed top- a generous sprinkling of sugar that is torched! I don't own a brûlée torch and ghetto rigged it using the oven broiler. It's not necessary but it does add a visual dynamic with a touch of texture to the pie. Left to my own devices, I could have easily eaten this entire pie solo. It was deceivingly not sweet so you could just keep going. Gobble to you wobble!

For the Brûléed Bourbon-Maple Pumpkin Pie recipe, check out Bon Appétit's post on their site! It's a delightful and welcome twist to tradition. 

Wednesday, November 20, 2013

Country Blueberry Pie


The story behind this pie is simply necessity. The office had a power outage and my frozen bag of blueberries for breakfast fell victim. It would have been such a pity to throw away a bagful of mushy but otherwise perfectly fine berries. But what the heck requires three cups of fruit? Mike and I ran through a list of options on the drive home.

Blueberry muffins? Nah. Blueberry crumble? Maybe. Blueberry jam? We wouldn't eat that. What about  pie? In the middle of November?

Sure- whatever gets the job done and tastes yummy in the process. In a pinch, I grabbed a recipe from the Food Network and was pleasantly surprised.


This is the first time that I have made a pie crust with shortening instead of butter (my go-to is Smitten Kitchen's version). While I wasn't jumping up and down at the big difference, the husband complimented the crust for its flaky texture. Point there! The filling is thickened with a little corn starch rather than tapioca pearls which I appreciated as one less thing to grab at the grocery store. My favorite aspect, however, was the hit of lemon juice in the filling- it really makes this pie pop! The citrus really brings out the flavor. I can't wait to make this again with fresh berries in the spring. 

Quick. Simple. Easy. And tasty. Sounds like a winner to me!

For the recipe, check out Cheri Garnett's Country Blueberry Pie

Wednesday, July 3, 2013

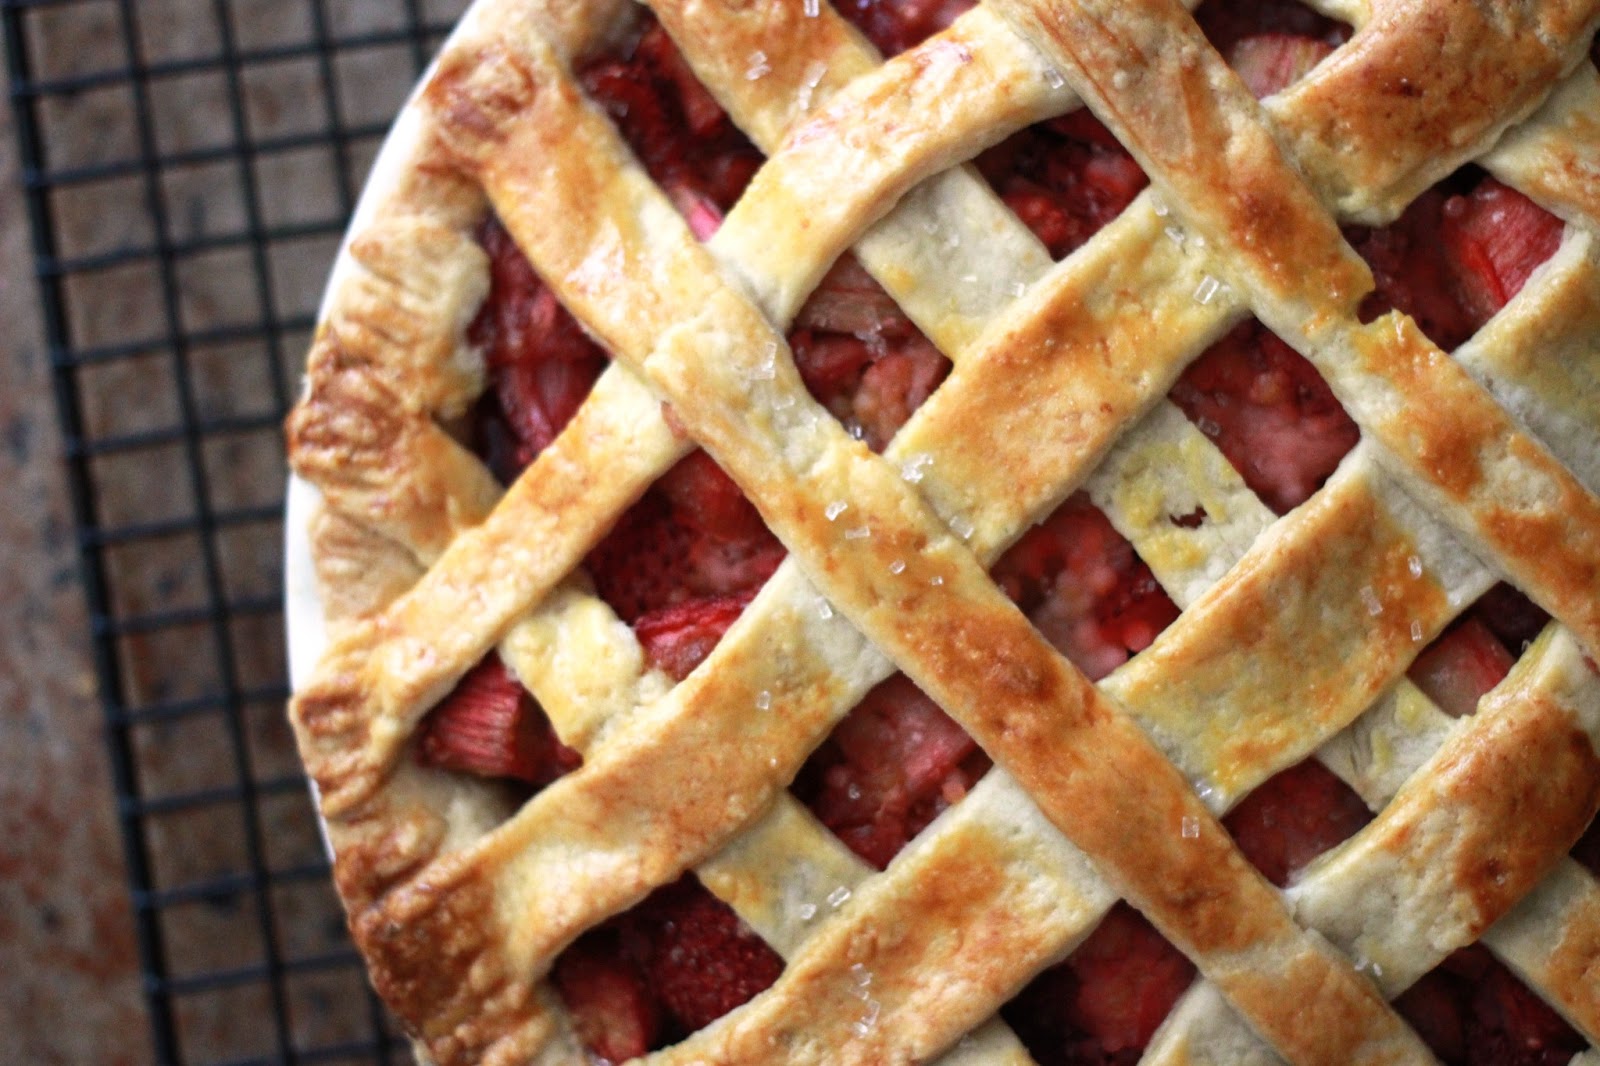
Strawberry Rhubarb Pie


Let's be honest here... this pie was purely a guilty pleasure. Blame it on the vegetable that draws me in like a moth to a flame: rhubarb! The second I saw it at the grocery store, I feverishly shoved it into the shopping basket with no vision in sight. Seasonal delights! I managed to resist the urge to cook it until Board Game Night at my friends' place (we're wild folk!) over the weekend.

The one and only other time I tried to make Strawberry-Rhubarb Pie was an amazing failure. Wow, I can't believe it was three years ago. The Achilles heel to that pie was the tapioca- I didn't know about the baking variety and ended up buying bubble tea tapioca pearls at the Global Market. Oh my goodness what a mistake; the poor pie was practically soup. Dear Past Self, I send this with love: *smacks upside the head.*


Make sure that if you do use tapioca pearls in your pie to buy the correct variety. There are instant and standard pearls; the regular tapioca needs to sit in water for at least two hours before being used or else they will not have enough time to gel. Check the box and recipe before you bring it home! If you're not into this method, you can substitute with corn starch or even tapioca flour to thicken up the natural fruit juices. Nobody likes a soggy bottom pie!


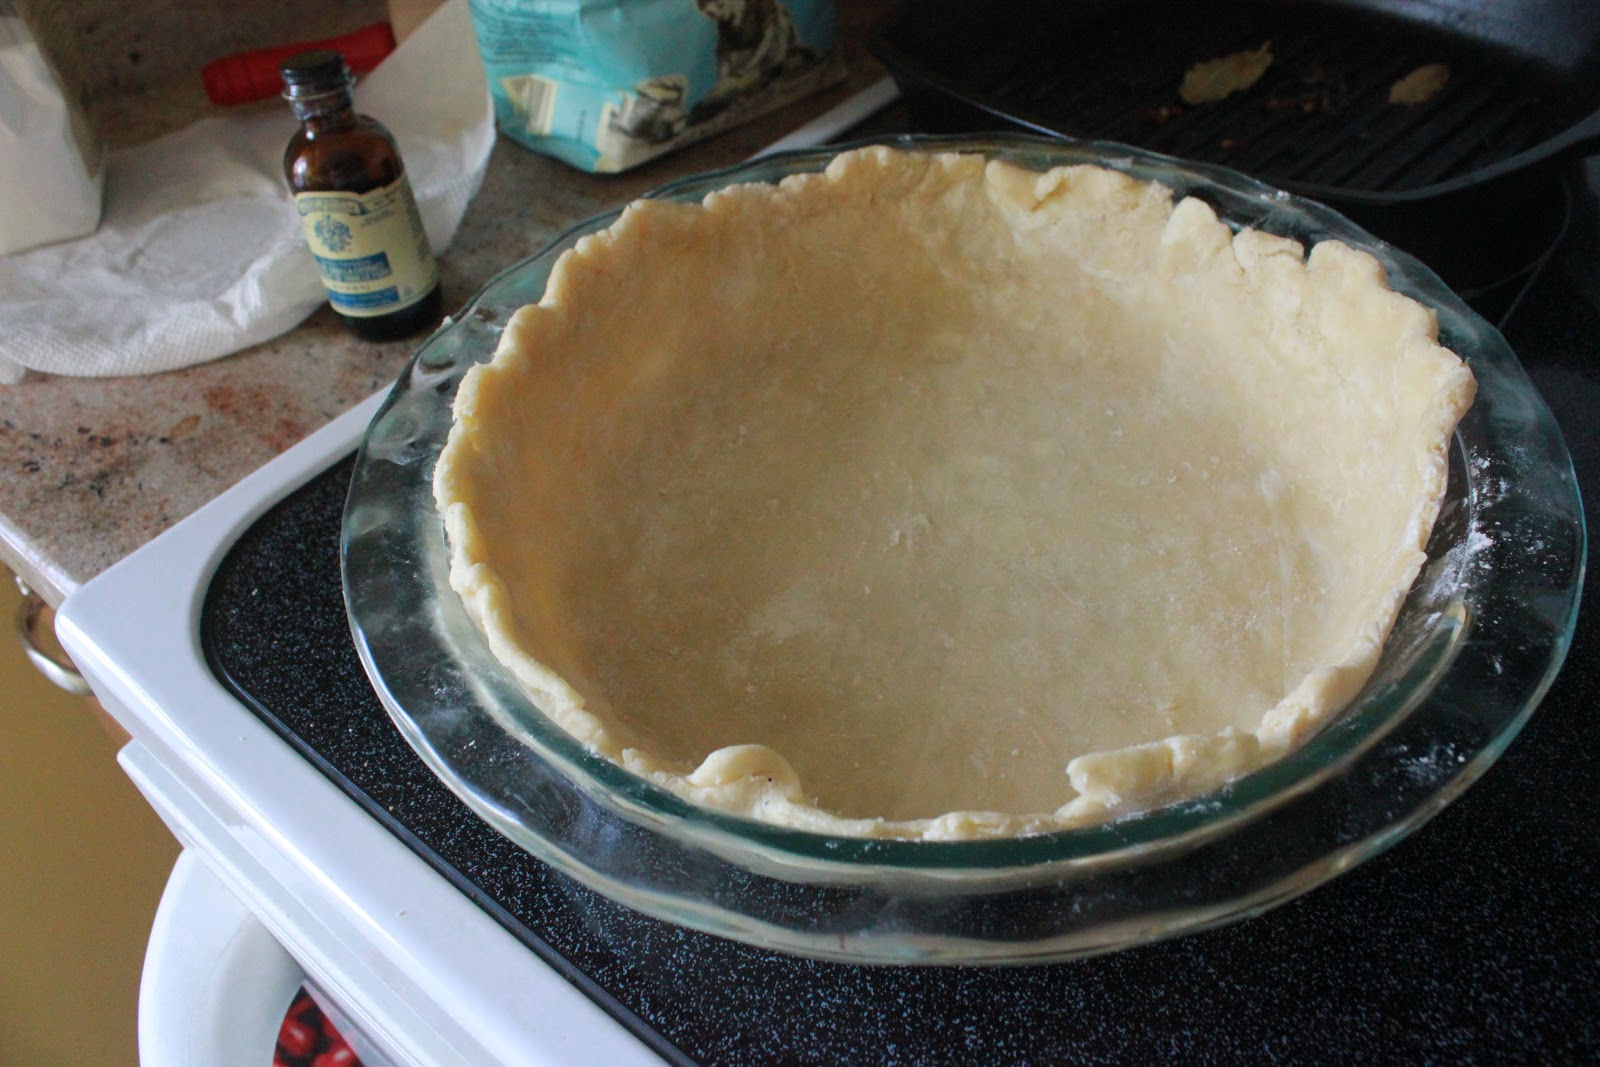
This round, I used the correct tapioca and played it safe with Smitten's version of pie crust.  Honestly I don't know if I can ween myself away from this crust- I have used it in every pie. I listened to the Past Self and reduced the amount of sugar in the pie drastically. Don't underestimate the tartness of the rhubarb. I think it's safe to reduce the sugars by half but that's just a preference. I like to taste the fruit more than the granulated sugar. Plus, if you keep it a lil more towards the tart end of the spectrum, it pairs incredible with vanilla ice cream! Make the crust however you feel comfortable; this version is a basic lattice pattern.


Worried about killing time when you're pie dough is firming up in the fridge? Take a lesson from Autumn's book, just kick it! As always when making pie, I strongly recommend making the crust the day before to save some time. You can even prep the filling and have it ready to assemble the next day. Or you can just use it as an excuse as time to cuddle!

For the full recipe, check out the awesome Smitten Kitchen

Monday, March 11, 2013

"Make it Again" Chocolate Pudding Pie


Never underestimate the power of pie.

The other night, Mike and I went out to dinner with hopes of scooping up some teensie pies from the Pie Sisters on our way back home. My favorite is their mixed berry rendition while he surprised me with Chocolate Pudding pie. Alas, it was too late and the store was closed. Mike had been really stocked too... I did not realize that this was a thing for him! 


A week later, the pudding craving set in again. This time, the sheer thought of driving in Northern VA on a weekend that deterred us. (Seriously- it's that traffic that's going to make us move in a year or two.) It's a little extra work... but I much rather bake a pie from scratch than deal with 395. Besides. I couldn't have my man... liking somebody else's confection! 

I jest. Heaven help the person that tries to take away my mint milanos. 


I took my favorite elements from recipes past and combined them into this lovely luscious treat. The crust is my go-to recipe from Smitten Kitchen; the pudding is my own concoction; and the topping can be basic whip cream or cool whip. Simple elements that create a simply wonderful pie!


There were a few lessons learned the first round
  1. Grease the pie dish before putting the dough in. You don't want to find some tiny section that doesn't want to let go of the pan after it's been in the fridge!
  2. There's no such thing as too much pudding. I doubled the amount to make sure I used the entire dish and had just enough for a little cup on the side.
  3. I used a 9"inch round- but I think a 10" inch would have worked just as well. 
Needless to say, it was a smash hit. Mike was very much in love with this recipe. When we went to visit his parents, he declared, "make it again!" How on Earth could I ever say no to that sweet mug of his? He gives me a honey glow something awful!


This time, I got it 100% and used the spare dough to cut out some pastry hearts as decoration. I have a feeling that is going to be a weekend staple!


"Make it Again" Chocolate Pudding Pie

Step 1: Make the Crust

The Pie Crust is from Smitten Kitchen and I strongly recommend rolling it out the night before to save time. I halved the recipe for a single pie crust.

Once you have made the dough, you must chill it, roll it out (remember to butter the pie pan before setting in dough), place into a 9"inch round pie pan, crimp the edges, and chill again. If you have any hanging left over pie dough, roll them out and make some shapes to decorate the final product! 

Now that the dough is ready and in the pie pan, grease a sheet sheet of aluminum foil and gently mold to the uncooked pie crust. Fill crust with pie weights to make sure it doesn't puff up. You can also use dried beans or coffee beans. I like dried coffee beans for the fragrance!

To fully blind bake, bake it at 425 degrees 15 to 18 minutes or until the sides begin to brown. Remove the pan from the oven. Gently remove your pie weights. Reduce oven to 375 degrees and continue to bake the crust for several minutes until it's golden.

Step 2: Make the Filling
The filling is my Choco-Coco Latte Puddin, but doubled (see below)


1/4 cup + 1 tablespoon cornstarch
1/2 cup coconut sugar 
Pinch of salt

1 1/2 cups unsweetened coconut milk
1 1/2 cups milk
7 ounces semi-sweet chocolate (60% and higher)
1 1/2 teaspoon vanilla extract
1-2 teaspoons instant espresso (how strong you want it? I used 1 teaspoon) 

Heat the water of your double boiler. If you don't have one (like me), heat about an inch of water in a small pot just to a nice simmer.

Combine the cornstarch, coconut sugar, and salt in a heat proof bowl. Slowly whisk in both milks. Place over gently simmering water and give a it a good whisk occasionally, scraping the bottom and sides. Make sure all the dry ingredients are incorporated. After 10 to 15 minutes, the mixture will being to thicken. Add the chocolate and espresso. Continue whisking just a few more minutes, until the pudding is smooth, thick, and all the chocolate is melted. Remove from the heat and stir in the vanilla. 


Allow the crust too cool to room temperature. Pour into fully cooked pie crust and place in fridge to firm up, about 30 minutes.

Step 3: The Topping
For the topping, use a basic whip cream recipe or some store bought cool whip! Honestly, all whip cream recipes are made up of the same ingredients: sugar + heavy whipping cream. 

Step 4: Make it Pretty
Garnish with any leftover pie crust cut outs, shaved chocolate, or fruit!

Sunday, December 9, 2012

Sweet Potato Pie for Mr. Worthington


Years back, I was a camp counselor for a summer program called Rec-Pac. If you're a Fairfax County, Virginia kid, you're probably familiar with this program. It gave kids a structured summer and parent's an all-day babysitter. I did it for several summers during college. It was an interesting job filled with stress, laughter, and drama. I found that it was possible to overcome any obstacle, so long as the staff worked together. Sound cheesy? You try getting a gymnasium full of screaming 3rd graders to sit down and shuddap solo.


Supporting the counselors were counselors in training (CIT). They were basically Rec-Pac's version of unpaid interns! Most were high schoolers looking for a way to build their resume or whose parent's didn't want them playing video games all summer. Due to the age difference, CIT's and counselors didn't really interact like that.


And then there was Brandon, the CIT that managed to wiggle his way into my heart. In this blog, I typically reference him as "Kuya" which means brother in Tagalog (neither of us are Filipino).

The day before the kids arrived, the staff set up their assigned school. There was the usual awkwardness as a bunch of strangers were brought together. I was in the art room when Brandon showed up. He was very quiet but had all the markings of a break dancer. The shoes. A hat. The arm band. I was wearing Adidas shell toes, a popular dance shoe back in the day. We both kept giving each other the up and down. Does he break? Does she break? Then I caught him doodling someone break dancing and the ice was broken. 


From that moment on, Brandon found his new punching bag. He hit me with dodge balls, chased me with food carts, and tripped me using cheesy kung-fu movie moves (leaf whirl wind kick). At the same time, he was one of the sweetest, most level-headed people I'd ever met- regardless of our age difference. To be this awesome, his parents must have been doing something right.


And no joke, his parents were strict. They were just as bad as my mother. I remember walking over to the van to ask his dad if Brandon could go to a break dance competition one weekend. Mr. Worthington was just like his son: sweet, polite, and level headed (and the answer was "no"). The entire family makes you feel welcome and loved. You can't walk in the door without a happy greeting and a hug. Who would have thought 7 years later, I'd be making birthday pie for his pops? Madness.


This is a basic sweet potato pie. Honestly, I didn't see much variation from one version to the next online. The key difference seems be the use of evaporated milk vs. whole milk and the presence of brown sugar. The crust I used is buttery and flaky (thanks again Smitten!) while the filling is smooth and spiced.I tried to create a pie merging the best traits of all versions. Hope you enjoy!


Sweet Potato Pie
adapted from allrecipes.com

1 unbaked chilled pie crust- store bought or my favorite my Smitten!
1 lb sweet potato
1/2 cup unsalted butter, softened
3/4 cup granulated sugar
1/4 cup brown sugar
1/2 cup whole milk
2 eggs
1/2 teaspoon nutmeg
1 teaspoon cinnamon
1 teaspoon coriander
1 teaspoon vanilla extract
2 tablespoons of brown sugar on the side


Make sure your pie crust is ready to go and in a 9-inch round pan. Set in the fridge to chill. If you're making it from scratch, I always recommend making it the night before to save time.

Preheat oven to 375. Bake sweet potatoes  wrapped in aluminum foil with skin for 60-90 minutes, or until tender. Let cool and then peel off skin.

Break apart sweet potato in a mixing bowl. Add butter, and mix well thoroughly. Stir in sugar, milk, eggs, nutmeg, cinnamon and vanilla. Beat on medium speed until mixture is smooth. Set in fridge.

Preheat oven 350 degrees F (175 degrees C). Once it's hot, take out the chilled pie crust and sprinkle the 2 tablespoons of brown sugar on top. Pour the pie crust on top. Bake for 55 to 60 minutes, or until knife inserted in center comes out clean. Pie will puff up like a souffle, and then will sink down as it cools.

Tuesday, November 27, 2012

Pumpkin Pie with a Cinnamon Roll Pie Crust


Happy Post Thanksgiving! I hope you had a relaxing and cozy weekend, filled with good food and better company. We were definitely on the move in our household.  Thanksgiving lunch was spent with my side and dinner with his. I'm grateful that our parentals live only 25 minutes apart!


The food was the traditional meal of turkey, mashed potatoes, veggies, and (my all time favorite) stuffing. The older I get, the more I realize that turkey really isn't as magical as I remember from childhood.  Funny how nostalgia makes things taste better.  The giant bird is very hard to do well; plus my family keeps trying that turducken stuff which has been unimpressive. I think you need to be a true Carnivore to appreciate the art of turducken.


Usually, my mom doesn't want me to cook anything on holidays. Strange, right? Her philosophy is the less I do, the more I can relax. It's a bit of a catch 22. The kitchen is one of my favorite ways to relax. The stress sets in when I feel the pressure to be perfect. The only person creating this pressure is myself because food is a form of expression. For me, it's a tiny way to show my love. 


Hence why 6 hours were shot creating dinner rolls for Mike's family. *puts head on desk* See what happened was... a friend showed up on our front door unexpected the night before Thanksgiving. The dinner rolls were done shortly before they departed and they had come out perfect! In the midst of parting, I totally forgot that the dinner rolls were still resting in the oven. It was time to make the pumpkin pie, so I preheated the oven and... well... at about 400 degrees I smelt something toasting. Destroyed. 

Defeat?

Never.


Back at it. Measure, mix, knead, and rise for another hour. After forming the rolls, I slipped the unrisen dough into the freezer for Thanksgiving. The next day, chaos in my mother's kitchen overtook the poor dinner rolls. There was a battle between my tia's sweet potatos and my beloved rolls over oven space... and she won. Every time I turned around, she had slipped her tray of potatoes back in the oven, directly above the rolls. They never stood a chance.


Needless to say, this Thanksgiving, there was no Sprite in my red wine. Salude! Please feel free to share your favorite holiday kitchen disasters! It's all goodie though. The Spiced Pumpkin Cheesecake, specially made for my brother, came out fantastic. This year, I decided to try something a little different with the Pumpkin Pie.

The filling of the pie is from America's Test Kitchen. The spices are standard issue for a pumpkin pie. The technique is the key! You warm the pumpkin puree over the stove to deepen the flavor and then pour it directly into a half baked pie crust straight from the oven. Everything has to be hot and timed! This will prevent the pumpkin from dampening the crust. Pretty slick, no?


The other exciting aspect of this year's pie was the Cinnamon Roll Pie Crust. Yah trust me- when my girlfriend shared this concept with me, I nearly threw a chair. For your viewing ease, I flipped once slice of pie to show off it's pretty under belly. All you need is some pre-made pie crust, a little butter, and some cinnamon. Check out Taste for Adventure's post for a detailed break down of the process.


Note: when you smooth the rolls into the bottom of the pie dish- make sure they're nice and thin. Mine were a little too chubby still and made for a thicker then desired pie crust. It should cover the entire pie dish.


The baking time of the crust and the filling magically aligned. The crust needs 25 minutes to pre-bake and a total cooking time of 40 minutes. How ideal! America's Test Kitchen's Best Pumpkin Pie recipe (not the one with the yams) needs 15 minutes to bake and requires a hot, pre-baked crust! So all you have to do is bake the crust (at whatever heat it requires) for 25 minutes, then you add the warmed pumpkin pie filling and continue to bake for another 15 minutes at the filling's required temperature.

If you're feeling extra frisky, top with home-made whipped cream with a touch of rum or bourbon and toasted pepitas!


Once again, I hope you had a great Thanksgiving. It's quite obvious here as to what Autumn's grateful for! We both love this guy something fierce.

For the recipes, check out Taste for Adventure (crust) and America's Test Kitchen (pie filling).