Showing posts with label appetizer. Show all posts

Tuesday, August 20, 2019

Samosa Empandas {Baked, Vegetarian}


In celebration of the latest addition to our family, we threw a little shindig to hang out while we still had the energy. I didn't want to expend too much energy so the majority of snacks were outsourced in the most spectacular fashion possible. Mini pies from Pie Sisters. Cupcakes from Baked and Wired. Fresh rolls from Bangkok 54. Mint Tea from Al Zaytoun. It was like the greatest hits of Noms + Bun gastronomy.

There was one item missing.... samosas.

Thursday, April 23, 2015

Potatoes and Peas Samosas


Let me tell you... making samosas from scratch... is an incredibly frustrating and rewarding experience. When I first saw this recipe for Potatoes and Peas Samosas from Playful Cooking, I thought, "well that doesn't sound so bad." I've made empanadas and dumplings before, how bad can it be? 

Three attempts later and I am still baffled. 

The filling is not the issue; that part is actually easy. We used the filling from the Picky Eater Blog because it sounded more like our kind of party with the addition of red onion and fresh ginger. We like our samosas to be bold. Mike made the filling the first time and were both eating it by the spoonful from the bowl. Always a good sign! Adjust accordingly to the amount of dough you're making and flavor to your spice level.

The dough takes patience. It can be stiff so keep adding water until it's manageable. We had a small adventure locating "carom seeds" and found them at an international market. There are plenty of recipes that do not incorporate the seeds into the dough but I surprisingly enjoyed the flavor.  They smell like thyme and give a slight edge to the flavor similar to anise. 

Ensuring that the samosas hold their form while frying is the issue. A big issue. 


During round one, I let the dough rest for way too long and it became incredibly tough and elastic. Most of the samosas fell apart in the oil which was deserved. Only a handful survived and our Nepali friends kindly raved about them. Their words of encouragement fueled my determination.

The second round is the one pictured in this post. I let the dough rest the exact amount of time and was not shy about adding water. Following Playful Cooking's directions, the oil started at room temperature.  I sealed the seams meticulously with a lil extra water and pinched, pinched, pinched! I was generous with the overlap of the dough and didn't heat the oil until after the samosas were added. 

As you can see, it turned out quite lovely! Perfect, crispy samosas. My work here is done!


Not so fast, young grasshopper. The third time I made these, my ego got checked. I followed the directions to the letter and did exactly what I had done the time prior. Over half of them opened while frying thus ruining the filling and oil. What a mess! How is this possible!? There's nothing worse than watching the oil bubbles seep into the seams of the dough and gently, relentlessly push them apart. Gurus of the Samosa world, I implore you... tell me what I keep doing wrong to incur the wrath of the evil vegetable oil? 

Maybe next time, I will use a different recipe for the dough to see if there's a difference. Another option is to bake them which is healthier... and I'm sure less stressful. Until the next episode!

For the tasty combination that is "Potatoes and Peas Samosas," check out the dough and methodology from Playful Cooking and the filling from Picky Eater Blog.

Monday, April 13, 2015

Basic Hummus


There are very few places that serve hummus that I genuinely enjoy. Every time the hubby and I have bought it from the grocery store, we lived to regret it. It's hard to pin point what exactly is so unappealing; sometimes there's an unpleasant after taste... other times the vendor's attempt to "jazz" it up backfires.

I decided to take a stab at making it from scratch and was surprised by the simplicity of the ingredients and process. Chickpeas. Lemon juice. Tahini. Pinch of salt. Garlic. Zoom zoom zoom in the food processor. 

Creamy, dreamy hummus heaven.


The biggest debate that I have seen about hummus is the chickpea: is there a difference between canned and dried? It's a divided subject. Some swear there's none; others feverishly implore the use of dried beans. 

In my tiny brain, it only made sense that using the dried variety would optimize freshness. Granted, it requires a little more planning because the peas have to soak for several hours. Heck, I left them soaking for two nights out of negligence (woops). In the interest of quality, it's worth using dried beans.


The best part of making your own hummus is you're in control. This recipe truly is the most basic recipe possible and is the perfect canvas for modifications. Like it thick? Go easy on the water. Love garlic? Throw a few more cloves in there - you've earned it. Surprisingly, the second time that I made it, the hubby actually liked not having all the chickpeas totally crushed because it added texture. 

Personally... my indulgences included an extra splash of olive oil and lemon juice followed by a touch of smokey paprika on top. Serve with pita chips as an appetizer at a party, with cucumbers as a healthy snack, or as the base of a wrap/shwarma. 

For this recipe and several others, purchase, "Jerusalem: A Cookbook" by Yotam Ottolenghi and Sami Tamimi. It's an awesome book! It's the source for sinful Chocolate Krantz Cake and an incredible Salmon with Chraimeh Sauce. If your curiosity stops at the hummus, you can find the recipe here. 

Monday, June 2, 2014

Raspberry Brie Dessert Pizza with Rosemary and Candied Pecans


This Raspberry Brie Dessert Pizza with Rosemary and Candied Pecans knocks it out the park. Hard. As in the other team just threw down all their gear and is running over to join your team. It's that serious. I'm going  to let the pictures do most of the talking for this post, however there are some elements that I feel compelled to highlight. 


The home-made crust is extremely easy to make and takes only an hour to rise. For a yeast based bread, that's really good time! You can use that hour to prep everything else. Honey is used to as a natural sweetener which is great way to reduce the amount of processed sugar. There's a splash of olive oil to help balance the flavor. I'm sure there's a way to sneak in some whole wheat flour to the mix to get a honey-wheat profile. This bread is simple, quick, light, and delicious. Very impressed! 

If you don't have time to make the crust, no worries. You could easily substitute with store-bought flat bread or even a French baguette! Do what works for you, just make sure you adjust your toasting time.


Surprisingly, the raspberry jam really stood out in this recipe. All the components are important but something about that warm, gooey, berry mess tied everything together. I really enjoy the flavor and texture of Santa Cruz Seedless Raspberry jam. I'll even sneak a tiny spoonful as a mini-dessert after work. For those that don't care for raspberries, I think any other berry combination will do just as well. We used to eat brie with apples and pears straight up on college picnics so get creative.

It's smooth sailing from that point on. Chop up some brie, nestle it on the dough with globs of raspberry jam. The candied pecans are a nice touch but I saved some on the side that weren't candied; I enjoy the natural, earthy tone of pecans too much. The sprinkle the rosemary helps to give it that fresh feeling. A drizzle of honey is optional. 


Suffice to say, this pizza did not make it past the afternoon. Woops!

This Raspberry Brie Dessert Pizza would be a lovely addition to fancy-up a brunch or as a posh snack. Check out the recipe over at Completely Delicious! 

Wednesday, July 17, 2013

Swiss Chard and Chickpea Fritters


In the midst of the cloud of powdered sugar that is our kitchen, there is an abundance of healthy activity. Cakes are generally made for special occasions and thus have a few minutes of mercy before they're enjoyed. This permits a 10 minute photo shoot in whatever part of the house happens to have the best lighting.

Dinner, on the other hand, does not get to enjoy such luxuries.


Every Sunday, I try to find at least three meals to help us get through the week. It's a difficult line to walk. I don't want to get too many groceries because one of my biggest pet peeves is finding expired food in the fridge. Nothing should go to waste. It's also important to know what you're getting into before you invest. Sure, that curry looks delicious! But how long does it need to marinate? Is there a ton of prep involved? I have started meals only to throw my hands up seeing the dreaded "chill in fridge for 4 hours" in mid-saute. Get the phone Autumn- we're ordering pizza!


Once the noms have been selected, Mike and I try to prep as far in advanced as possible. We chop veggies, marinate meats, and wash everything. In the past, I've as gone as far as to mix the dry ingredients in one bowl and the wet ingredients in another so that when the time comes, all that needs to be done is the mixing. Prep work is half the battle! 

Dinner last week consisted of this lovely Swiss Chard and Chickpea Fritter from Real Simple magazine. If you have a good sized food processor, this recipe is a walk in the park and takes less than 30 minutes. Ours is on the teensy side so the chard needs to be worked in batches. 


What makes this recipe is the yogurt sauce on the side. I've been on a sauce kick after realizing the potential of Greek yogurt and canola mayonnaise. All you do is take a little Greek yogurt and mix in some sriracha- voila! A tasty condiment!

The fritters themselves are light and tasty. The feta adds a Mediterranean feeling and while the chickpeas provide a touch of density.  I incorporated a bunch of black pepper and dash of crushed red pepper to add some more heat. They can be a little difficult to form into fritters- it all depends on the moisture from the chard. Just get your hands in there and squeeze it together! Overall, a quick and easy meal that we enjoyed with a big helping of avocado on the side and a slice of pita bread! Oo maybe a slice of lemon?

For the recipe, check out the article from Real Simple Magazine!

Monday, June 4, 2012

Beautiful Black Bean and Banana Empanadas


Hear me out. I'm not getting paid to endorse this book, but I cannot stop telling you how awesome Pretty Delicious is by Candice Kumai. I will not rest till I try every recipe in this book. So far I have made the pumpkin pie pancakes with apple butter,  pearl barley with edamame, pumpkin cake cookies, crab ravioli, almond cinnamon buns, and turkey yakitori. The turkey yakitori landed me 2nd place in an office healthy cooking contest (it lost to gnocchi which is definitely not as healthy).


Hence, when Mike wanted to cook dinner this past Mother's Day I handed him Pretty Delicious as reference material. His mom is vegan so he has a difficult time finding meals the whole family will enjoy. He pointed to these Beautiful Black Bean and Banana Empanadas. My nose crinkled. Beans and bananas?


Alas, on the drive down, we forgot the bag of groceries. Figures >.<  I didn't drop the empanada idea though. Mike resisted- only picked it for his mom (he's so sweet).  I whipped up a batch since we had all the ingredients at home anyways.


Of course... they were freaking amazing.

If you like plantains, you will like this recipe. The warmed banana releases sweet juices that coat the veggies which have a touch of heat. It's not overpowering and is so much more satisfying than dumping sugar on top. We used store bought pizza dough so the most labor intensive part was rolling out the dough and forming the empanadas. The filling itself is very quick and simple! It's unique because of the use zuchinni mixed in with your standard Latin fare. Each ingredient is well paired. We ate them for breakfast and as a snack but they could easily be a meal.

Healthy. Delicious. Different. 

Need some more convincing? Try some of these free recipes shown in the Pretty Delicious preview on google books!

Saturday, November 5, 2011

Baked Coconut Shrimp

Shrimp = three dollars and touch of class. Having a nice dinner doesn't mean you gotta make it rain at the grocery store. Pick up a few shrimp (about three dollars worth), rub them down in coconut and cayenne,  then bake. It's magical.


The best part is you determine the flavor. If you don't want that heat- go easy on the cayenne. If you don't want it too sweet, mix the sweetened coconut with some unsweetened coconut. Or, you can go middle route as we did! Love that heat! Gotta make those taste buds tingle. I added extra cayenne and kept the sweetened coconut. It was a perfect balance of sweet and savory.


The only thing I did different was soak the shrimp in unsweetened coconut milk mixed with some cayenne pepper over night in the fridge.  I don't know if this made a major difference but I wanted to ensure that the coconut was an overall flavor- not just the flakes. Infuse that heat!


My favorite thing about this recipe is that the shrimp is baked. Baked! Not fried! The texture is awesome and crispy without all the oil! It bakes crazy quick too. I could chow down with a clear conscious and an easy to clean kitchen.


This can be served as appetizers or a meal. I went with a tropical theme. There was some left over rice so I made my usual fried rice (which doesn't really involve measurements) and added chunks of pineapple, mango, and papaya. You can a convenient package of this fruit all nice and fresh at Trade Joe's. It made a tasty farewell to summer meal.


Baked Coconut Shrimp

1 pound large shrimp, peeled and deveined
1/3 cup cornstarch
1 teaspoon salt
3/4 teaspoon cayenne pepper
2 cups flaked sweetened coconut (or half unsweetened)
3 egg whites, beaten until foamy

*optional: soak in unsweetened coconut milk mixed with cayenne pepper the night before

Preheat an oven to 400 degrees F (200 degrees C). Lightly coat a baking sheet with cooking spray.
Rinse and dry shrimp with paper towels.

Mix cornstarch, salt, and cayenne pepper in a shallow bow; pour coconut flakes in a separate shallow bowl. Working with one shrimp at a time, dredge it in the cornstarch mixture, then dip it in the egg white, and roll it in the coconut, making sure to coat the shrimp well. Place on the prepared baking sheet, and repeat with the remaining shrimp.

Bake the shrimp until they are bright pink on the outside and the meat is no longer transparent in the center and the coconut is browned, 15 to 20 minutes, flipping the shrimp halfway through.

Monday, June 27, 2011

Lotus Wontons

Before we talk food...

Congratulations to Brandon and Peter for graduating from college! I am very proud of both of you! It's been a joy watching you grow over the years. You're like little brother's to me- even though you try to act big and bad. No matter the age... a good person is a good person and you fellows are the real deal. Mad love.

To celebrate, Peter's family graciously had us over for a delicious dinner. Thanks again Kang fam!! Mama Kang makes some mean bulgogi, it was the highlight of the night! I'm going to have to stalk that woman in the kitchen.

I brought some sriracha chicken, rhubarb crumb cake (post to follow), and pork wontons.

My intent was to fold the wonton wrappers, but we were short on time and I wanted to use more meat. Plus, the juice from the meat was making the wont's unwrap (see above).
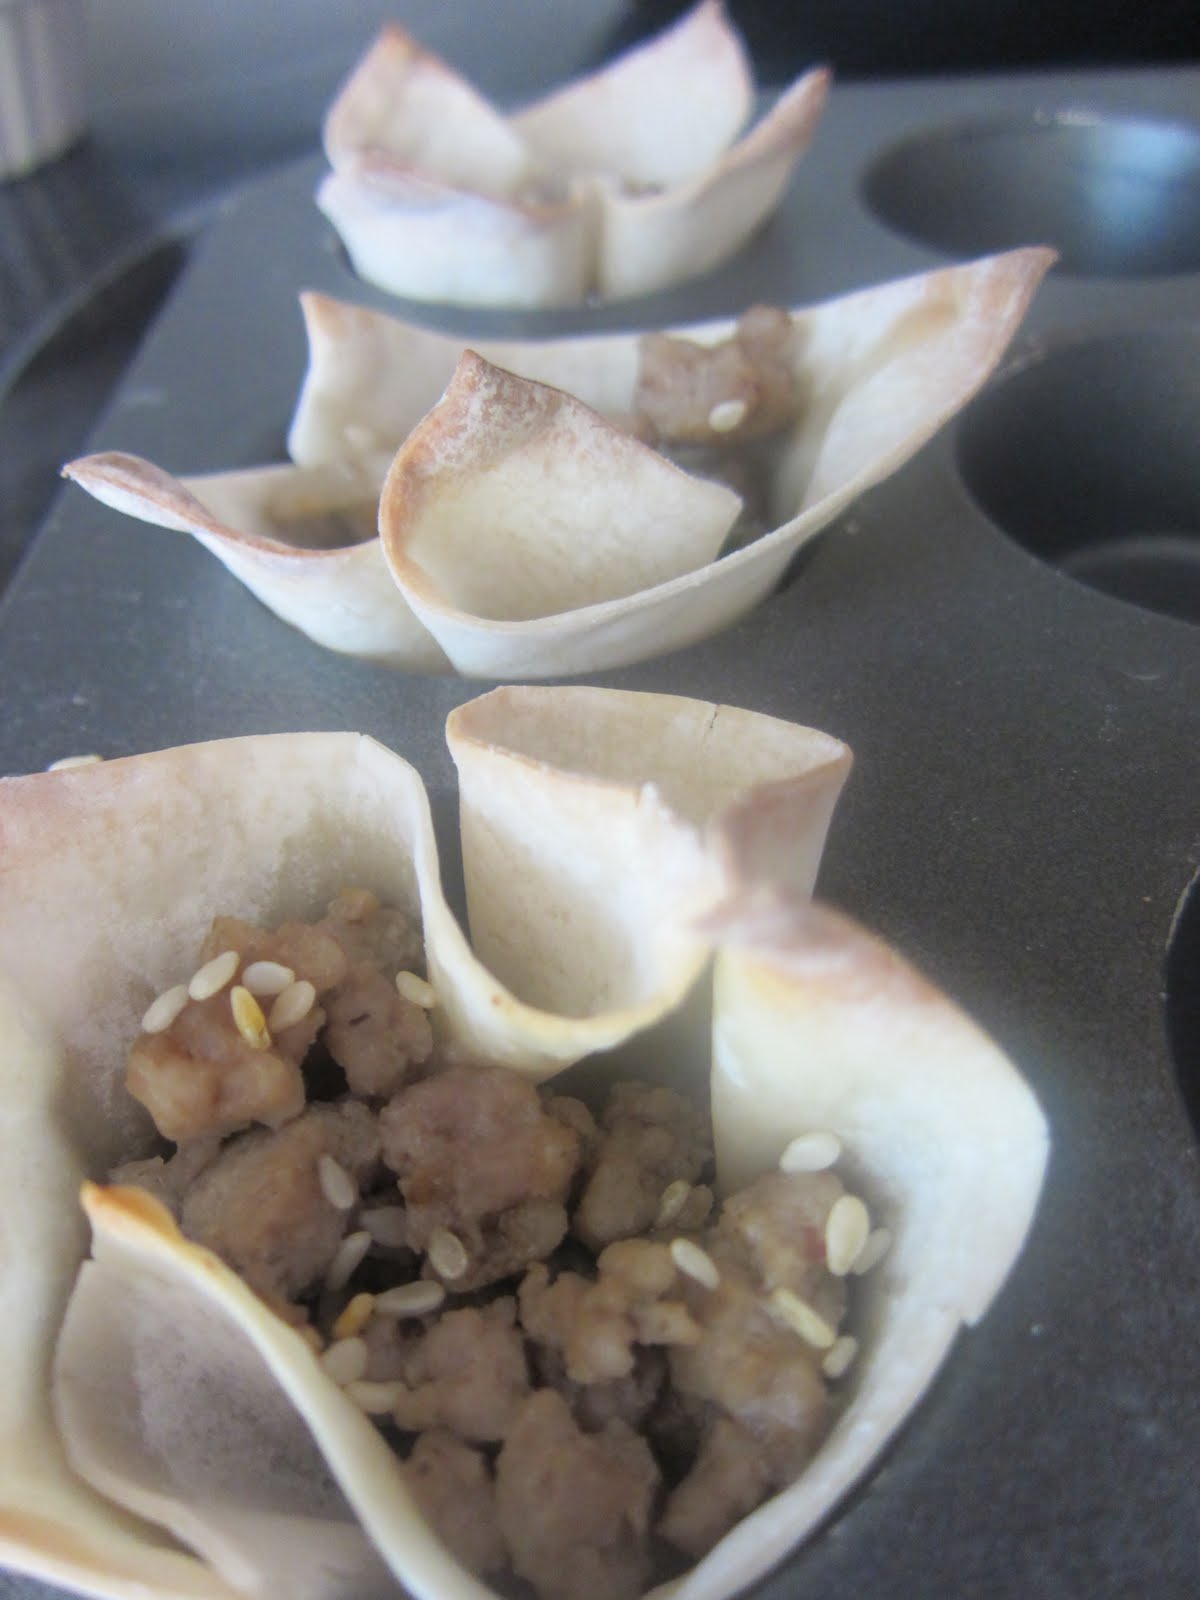
On a whim, I stuffed my mini cupcake tins with wontons and spooned in some stir fried ground pork. The pork mixture was not spicy at all- there would be enough heat with the sriracha wings! Instead, a made a more sweet flavor with honey and sesame. The result?

A yummy.

Pretty.
Appetizer!

The part is, you can take this basic wonton method, and put any filling you like! I'm sure others have done this before, but I was pretty stoked with the results.

Lotus Wontons

about 24 Wonton wrappers
half a package of ground pork
vegetable oil cooking spray
1 egg
1-2 teaspoon soy sauce
dash of sesame oil
peanut oil (to coat the pan)
3 spring onions, chopped
ground pepper
3 cloves of garlic, chopped
sesame seeds
some honey to drizzle

Preheat oven to 400.
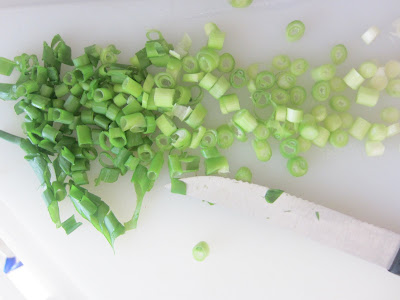
In a bowl, combine pork, a drizzle of honey, egg, and spring onions. Set aside.

In a medium skillet, warm enough peanut oil to just coat the bottom of the pan. Add chopped garlic and cook until lightly browned on a medium-low heat. Add the pork mixture. Season with soy sauce (go easy, this is your salt), a splash of sesame oil, and some pepper for taste. Once all pink is gone, set to side.

Spray mini cupcake tins with olive oil cooking spray and gently stuff with wontons. Spoon in meat mixture- leaving behind as much liquid as possible. If there's too much juice, it will sofetn the wonton.

Sprinkle sesame seeds on top and drizzle with honey. Spray again lightly with veggie oil-- this will help the wonton to CRISP!

Bake in oven for about 8-10 minutes.