This cake and cupcakes were made in honor of my friend's daughter's 2nd birthday! Happy birthday little Fernanda - we love you so much! The theme was Dora the Explorer and we went with simple cake toppers for decoration. Luckily, since it's an older show, I was able to find some on Facebook Marketplace and my brother went the extra mile to pick them up (thank you, Joey).
Showing posts with label Cupcakes. Show all posts
Wednesday, November 2, 2022
Friday, May 18, 2018
Vanilla Cake with Swiss Buttercream and Raspberry Filling
This Vanilla Cake with Swiss Buttercream was made for my girlfriend's niece's birthday party. It's always fun to collaborate with her because we have different styles. Flor is bold and fierce - she originally wanted neon shades which was like scratching a record in my brain. I love muted tones and my favorite color is gray - super fun, right? Needless to say, Flor can push me out of my comfort zone and it's awesome ♥ Thanks lady!
Thursday, June 15, 2017
Thursday, July 14, 2016
Mickey Mouse Clubhouse Cupcakes and Cake
Before I start on this post, I would like to cheer from the top of my lungs about Portugal's win in the Eurocup 2016 this past weekend! We spent the entire game riveted to the screen, flinching here and there as we volleyed between excitement and terror with a nearby table of French fans at the restaurant. I grew up with soccer blaring from the television and the love has only grown over the years. This win is a mind blower - especially since the team wasn't exactly burning things up in the matches leading up to the final and the star player was knocked out of the game by injury. What defense! Then that incredible goal in overtime that came out of nowhere! Força!
All right back to the world of confections with this fun Mickey Mouse Clubhouse adventure. It was a basic lemon cake, covered in swiss butteream, and draped in fondant. Each character from the club (Mickey, Minnie, Donald Duck, Daisy Duck, Pluto, and Goofy) has their own cupcake with a simple topper.
This creation was made specially for my
friend's son's first birthday party. I met the father back in elementary
school and the wife later on through high school marching band (yes,
the marching band). They started dating in high school and have been
together ever since! Even though we're not close, there' something
about this couple that I just like. You look at them go - yes, they
rock! You don't have to be besties to be giving.
Needless to say, when I saw the wife's inquiry online on where to find a Mickey Mouse Clubhouse themed birthday cake, I threw my hat into the ring. Consider it a happy birthday, feliz natal, and congratulations offering all wrapped into one! To my surprise, they took me up on my offer! Let the planning commence!
Then I heard the chilling word: fondant. I bleeping hate the taste of fondant and tend to peel it off. Yes yes yes... there are alternatives these days to the store bought, bland tasting stuff. You can make it yourself or use one that's marshmallow based but this was my first rodeo. It was too high risk to try making it myself for a special occasion - maybe next time when it's not a gift. Hello Wilton!
I am delighted to report that decorating the cake was surprisingly smooth sailing because I was not alone. The husband jumped right in (yay for marrying an artist) cutting shapes and coloring the frosting while our dear friend Brandon (a huge Disney fan) reviewed the overall look. The cake is covered in Decorator Preferred Fondant.
For the actual cupcake toppers, I discovered an amazing product: Shape-N-Amaze Edible Fondant. This made the creation of the toppers super easy as the fondant is stiff and holds shape. It does have limits so it's best for basic shapes. For example, I couldn't make the bows for Minnie and Daisy the standard way because when I folded the fondant, it cracked on the edges. The work-around was to shape a rectangle and then pinch in the middle. Additionally, rather than buy multiple batches in different colors, I used one white block and colored small portions with concentrated food dye.
The only thing that I regret about this cake is the actual cake. I made three... yes three... different lemon cakes. Crazy right? What I thought was a "sure thing" recipe turned out to be a dud. It was based on a box cake recipe that was doctored up. The reviews were sensational! Unfortunately, since its publication, the box cake ratio had changed. Fine cake Gods! Shame on me for taking a short cut! Alas, two from-scratch recipes and I still was bitter about the cake. It just wasn't passing my test! I'm a huge lemon lover and it simply wasn't doing it for me. If I could go back, I would do a simple white cake with lots of lemon zest (with more budget, lemon curd would be essential). Know an awesome lemon cake recipe? Please share!
Overall, I would say this cake was a success and a feather in my cap as my first foray in the world of a fondant allover cake. Special thanks to my college confidant and fabulous cake maker Dr. Vashee for all her great insights on cake decorating!
Wednesday, December 9, 2015
Espresso Bourbon Cake with Swiss Buttercream Frosting
The beauty of espresso meets the magic of chocolate. It's a classic combination that I hold very dear to my heart. A cappuccino just isn't complete without something a little sweet on the side. It can even be a small square of chocolate, as long as it melts in my mouth with a hit of rich coffee flavor. Why does it work? Beats me. All I know is the espresso brings out the subtle tones found in chocolate.
As if that's not enough reason to enjoy these cupcakes, they have a secret: a touch of bourbon. Generally, I dislike liquors. But bourbon and sweets go together. If you ever make your own vanilla extract, you'll learn it's booze that pulls out the nuisances of the vanilla. Vanilla beans are soaked in bourbon (rum or vodka- depends on the flavor you're going for) for a period of time to create that heavenly creation we call extract. Even sniffing a good bottle of bourbon brings to mind the scent of a slightly warmed vanilla. Don't sleep on the bourbon people.
Having bourbon in the actual cake batter isn't going to be noticeable. The alcohol content is burned out in the oven leaving only that warmed vanilla aroma that I mentioned. The only way it's going to to pop is if you brush some onto the top of cupcake once it's done baking. This is a sneaky trick to lock in flavor and add moisture. It's got to be right kind of cake base though- too much liquid can make a soggy cupcake and nobody wants that.
Crowing this jewel is my favorite swissbutter cream from my baking bible, Smitten Kitchen. There are other recipes that I want to try (i.e. Italian Buttercream with Golden Syrup) but in a pinch, I will always turn to this frosting. Once you master it, it's hard to turn away.
Lastly. If you want this cupcakes to sing like lush on New Years Eve, add some bourbon to the frosting. There will be no missing it then. Gauge it on whomever you bake these cupcakes. These were made for my old boss lady when she left the company. Her husband is from Kentucky and she always came back from her mother-in-law with all sorts of high-octane treats.
Those folks know how to tumble with Bourbon.
Sprinkle some pretty pretty sprinkles on top for some festivity and you're on your way!
For the Espresso Bourbon Cake recipe, check out the cook book, "Tea with Bea!" The swiss buttercream can be found on Smitten Kitchen (I halved the recipe for 9-inch cake).
Monday, October 12, 2015
Pasteis de Laranja {Orange Pastries}
When I was a kid, dessert was treated like a formality that we only experienced on holidays and at big family dinners. It was always the same spread: traditional Portuguese fare (aletria, pudding aka flan, pasteis de nata, etc.), fruit, fruit salad spiked with port wine, and a box of Pepperidge Farm cookies. We did not deviate from the formula. Heck, the only reason we ever baked cookies was thanks to the middle school Home Economics class!
That's not to say that I'm complaining about the formula. On the contrary, I feel that it gave dessert a whole different level of nostalgia. For example, these Pasteis de Laranja are a trademark of my childhood. I vividly remember visiting my madrinha (god mother) in New York and there was a platter full of them on the kitchen table. They were just above my eye level so it must have been during elementary school. Maybe because they were generic and readily accessible, but it seemed everyone served them on the same Reynold's pastel cupcake liner!
So what exactly are Pasteis de Laranja? The translation is simply "orange pastries." They are a lovely concoction of milk, plenty of sugar, eggs, flour, butter, and fresh orange juice. Honestly, I have not experienced anything quite like them.
That's not to say that I'm complaining about the formula. On the contrary, I feel that it gave dessert a whole different level of nostalgia. For example, these Pasteis de Laranja are a trademark of my childhood. I vividly remember visiting my madrinha (god mother) in New York and there was a platter full of them on the kitchen table. They were just above my eye level so it must have been during elementary school. Maybe because they were generic and readily accessible, but it seemed everyone served them on the same Reynold's pastel cupcake liner!
So what exactly are Pasteis de Laranja? The translation is simply "orange pastries." They are a lovely concoction of milk, plenty of sugar, eggs, flour, butter, and fresh orange juice. Honestly, I have not experienced anything quite like them.
For starters, they look like golden, deflated cupcakes. The edges are a subject of great debate. Some like them browned because it gives a slight caramelized flavor. They're not burnt necessarily - just slightly singed. Others like them evenly colored and softer.
The texture is unique and is a bit difficult to explain. The center is very soft, a bit dense, and does not resemble cake at all. There is no crumble and it holds moisture; you could dig it out with a spoon. The outer edge, however, has more chew and is my favorite part to nibble.
Lastly, the flavor is super subtle. Even though it has fresh orange juice, I wouldn't mind experimenting and adding the zest of the orange as well. When I eat these, I don't really taste the orange. It's more of this hybrid of custard and cake that's magically addicting.
The texture is unique and is a bit difficult to explain. The center is very soft, a bit dense, and does not resemble cake at all. There is no crumble and it holds moisture; you could dig it out with a spoon. The outer edge, however, has more chew and is my favorite part to nibble.
Lastly, the flavor is super subtle. Even though it has fresh orange juice, I wouldn't mind experimenting and adding the zest of the orange as well. When I eat these, I don't really taste the orange. It's more of this hybrid of custard and cake that's magically addicting.
The source of this recipe is my mother who never made them when she lived overseas. Instead, her best friend's cousin made them while they were visiting New Jersey many years ago. They were so smitten that they asked for the recipe and have been baking them for their families ever since. I have not been able to find them in a cookbook but have seen very similar versions listed as Queijadas de Laranja.
In keeping with tradition, I asked my mother to bake a batch with me on my birthday. She busted out her ancient binder filled with all sorts of recipes. Some are written in English, others in Portuguese, and each shares a memory. You can see time on the pages. Like many families, we don't have a "secret sauce" or one those recipes handed down generation to generation. What we do share, however, is something I would like to preserve.
Below I have included the recipe with my own notes as well as the original version that I wrote down in a Recipe Book that my mother gave me on August 12, 2003. This is the first recipe in the book. Obrigada mãe! Salude!
Pasteis de Laranja {Orange Pastries}
3 eggs (3 ovos)
2 1/2 cups granulated sugar (2 1/2 copos de acucar)
3 cups milk (3 copos de leite)
4 tablespoons unsalted butter (1/2 barra de manteiga)
1 cup all purpose flour (1 copo de farinha)
The juice of one medium sized orange ~about half a cup (sumo de 1 laranja)
*a pinch of salt is optional; you could also add a splash of vanilla extract or orange liquor
Lightly grease 24 cupcake tins. Preheat the oven to 350F.
Warm the milk either in the microwave or the stove stop to about 110 degrees. The bottom line is you want it just warmed and with no skin forming on top. Add the butter and juice. Set aside to cool completely, stirring occasionally to make sure the butter melts. Once the butter is melted, you can pop it into the fridge to chill. The key is the milk mixture cannot be warm.
In a bowl, beat the eggs and sugar. Add the flour. When the milk is completely cooled, combine the two mixtures and pour into cupcake molds. Bake at the 350F for 35 minutes. If you don't want browned edges, check in at about 25 minutes. Serve on cupcake liners so they don't stick together.
(Ferve-se o leite. Junta-se-lhe a manteiga e o sumo. Deixa-se arrefecer. Batem-se os ovos e o acucar. Junta-se-lhe a farinha. Por fim quando o leite estiver frio, juntam-se as duas misturas e poe-se em formas. Coz-se em forno a 350 por app. 35 minutos.)
Tuesday, September 8, 2015
Chocolate Blackberry Cupcakes with Chocolate Ganache Frosting
It's no wonder why these luscious Chocolate Blackberry Cupcakes with Chocolate Ganache frosting caught my attention. Just look at that silky smooth topping! I didn't think it was possible but this cupcake is seductive. It reminds me of those cheesy commercials you see on television for candy that is leaping through waterfalls of chocolate and landing in a bed of berries. You get my drift. It's a romantic cupcake.
What really matters though is taste. A monstrous pet peeve of mine is "food porn" where incredibly decadent desserts make your jaw drop at their sheer absurdity mixed with genius. Then you actually try them, make a screw face, and wonder, "what the heck was I thinking?" They either don't make any sense or come out overpoweringly sugary.
Not this cupcake. No sir.
This cupcake from Pastry Affair is a gentleman. The combination of dark chocolate and blackberries are bold and complimentary. The cocoa is very subtle and balanced while the fruit adds a slight bite to wake you up. In terms of texture, the cake is slightly dense to support the folded in blackberry bits. It has a slight crumble as you peel off the wrapper. The overall flavor is rich goodness.
What puts it over the moon is ganache frosting. This may be my new best friend in the kitchen because it's so easy to make and transport. Regular buttercreams make me nervous because they can slide or get smudged by the slightest contact. Not this kid. This is a helmet of frosting. It holds firmly, has a beautiful sheen, and can be stylized with a simple star-tip.
Other aspects to be appreciated about this recipe is it does not waste the fruit. The cake is mixed with warmed juice from blackberries that have been heated on the stove top. Rather than discard the remains, they are folded into the batter. Brains and beauty? This cupcake is a winner.
This recipe can be served vegan style with the right combination of chocolate chips and milk. I used almond milk because I appreciate it's slight nutty after taste. If you were feeling mighty frisky, you could reduce some coconut milk to thicken and enrich the flavor.
It was a bit of a bear finding these cute paper cup liners but I was smitten on sight. I tried Sur La Table and a local bake shop with no luck. And wouldn't you know it... they were at Michael's! Go figure.
Make sure that you keep a close eye on these cupcakes - they will go fast! Especially with a little fiest eagerly watching for accidents! Nice try handsome-face! I will bake you up some treats soon enough!
The recipe for these Chocolate Blackberry Cupcakes with Chocolate Ganache frosting can be found on Pastry Affair.
Wednesday, June 10, 2015
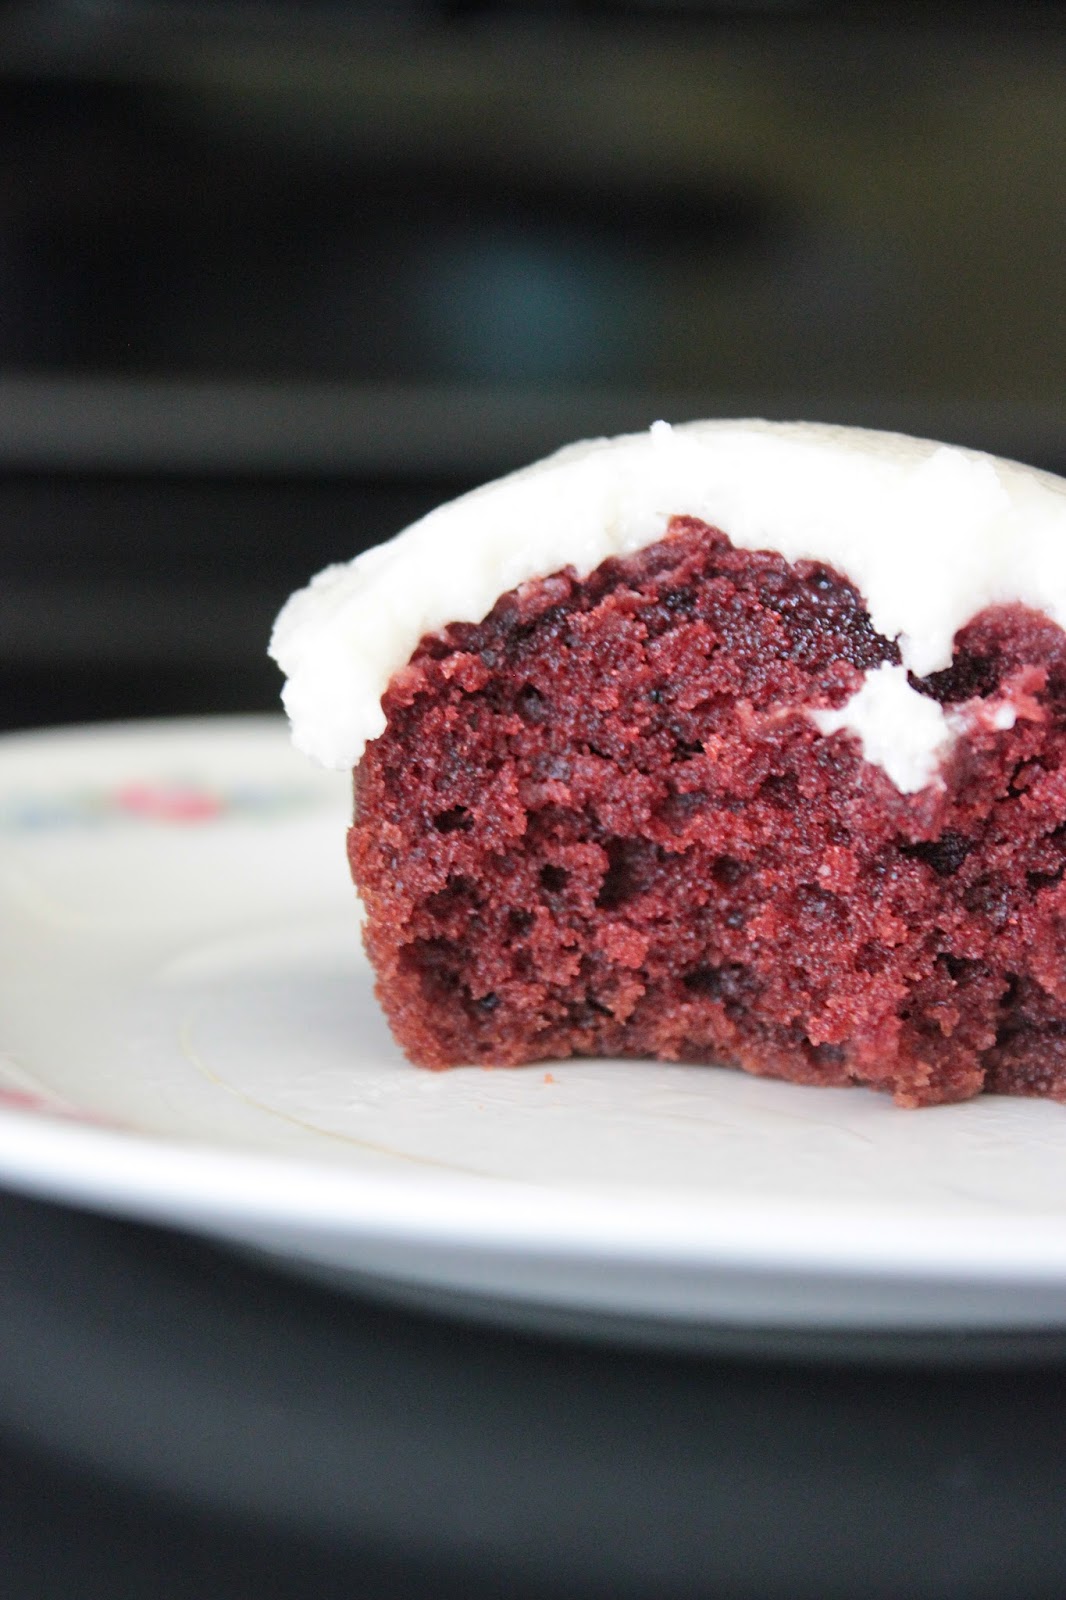
Gluten-Free, Dairy-Free Red Velvet Cupcakes
Onward we go! Bravely dipping our pinkie toe back into the mysterious jungle that is gluten-free baking! I've had very limited experience in this arena, with a roaring eight recipes under my belt! On this episode of Squirrels and Sweets, we take on Gluten-Free AND Dairy-Free Red Velvet Cupcakes!
Clearly... these parameters were not my devising. One of our friends recently has taken on a strict dietary plan in response to recent rosacea break outs. The power of diet will never cease to amaze me! By changing what we eat, we have a direct influence over our body. It sounds simple in theory but is difficult in practice.
For her birthday, her boyfriend sent me the list foods that she "can" and "cannot's." How to apply this conundrum to her favorite cupcake, the majestic red velvet?
Ladies and gentlemen of the gluten-free community - you are some crafty bastards! I was amazed by the number of options that came up on the search for gluten-free and dairy-free red velvet cupcakes. The recipe of choice for the cake is from The Dusty Baker, a gluten-free guru, because it sounded very similar to previous batches that I have baked. Check on the cocoa, baking soda, and vinegar! Could this really work? I had to find out!
These cupcakes turned out fabulous. I cringed on the first bite expecting a grainy after-taste. The difference between a regular, fully-evil cupcake and this one is barely noticeable. These came out soft with perfect texture and no crumble.
The Dusty Baker provides a break down on how to make your own gluten-free cake flour. I went the lazy route and used Bob's Red Mill gluten free baking flour. Plus, for someone who doesn't bake gluten-free on the regular, it saved a few bucks from mixing an assortment of flours.
If I was going to be a true stickler to my friend's diet, I could have substituted the eggs for chia seed or flaxseed eggs.
The other area that I skimped on was using Tofutti sour cream only because it was not at the local grocery store. Looks like this is one of those "Whole Foods" ingredients. It's only tablespoon so if you find your back to the wall.... go ahead and cheat. It's a trace amount.
If I was going to be a true stickler to my friend's diet, I could have substituted the eggs for chia seed or flaxseed eggs.
The other area that I skimped on was using Tofutti sour cream only because it was not at the local grocery store. Looks like this is one of those "Whole Foods" ingredients. It's only tablespoon so if you find your back to the wall.... go ahead and cheat. It's a trace amount.
As for the frosting, there are several options out there! I used the vanilla, gluten-free frosting from the Science Themed cupcakes. It's tasty, especially when served slightly chilled. Dusty Baker has her own plain frosting, Fluffy Vegan Frosting, that has smooth finish. A common frosting for Red Velvet is cream cheese which you could try with Mama Sophia’s, "Tofutti Better Than Cream Cheese Frosting Recipe" (Dairy Free). You could also try one of my all-time FAVORITE toppings, the Fluffy Seven Minute Frosting (Dairy Free), which tastes like marshmallow fluff without the stickiness!
The other bonus of making cupcakes was that I finally got to use this super cute ferris wheel that I bought on sale about two years ago. That last time that I made a batch of cupcakes was April 2014 for my friend's daughter's Princess birthday party! It's a little over the top but the darn thing was too fun to ignore.
The recipe for these awesome Gluten-Free, Dairy-Free Red Velvet Cupcakes can be found on The Dusty Baker's site.
Friday, April 18, 2014
Princess Cupcakes
Fellow millennials, you will feel me on this one: the day you log-on to your social media network (i.e. Facebook, Instagram) and wonder, "when the heck did everyone start having kids?" Yes, we're in the traditional time frame for weddings and starting families but goodness gracious! It's almost like people from my high school timed it! They're just pictures until it hits home and the next thing you know, you're making Princess Cupcakes for a 1-year birthday party.
The recipient of these cupcakes is an adorable cherub named Lhian. I've been homies with her father, Harvey, for over 10 years. Harvs was the quiet guy in the corner of the party, chuckling softly and egging things on safely from the sideline. He was my go-to-guy after college; we spent many a weekend carpooling in his awesome minivan to Richmond to visit our friend Heather. He loved putting me in awkward situations (the sushi chef incident, cough cough) and giggling (yes you giggle) at my brutually uncensored rants about life. Everyone teased him for not sharing details about his relationships- he's very discrete. Or sketchy. Take your pick.
You can imagine my delight when a girlfriend became a partner which led to a bundle of joy. The real cherry to my sundae was to learn that they were having a little girl. Oh Harvey. In your own words, "Girls... a million and one lessons." Lhian is going to kick your butt suckah! In all seriousness, it's been a treat watching you grow as a father. You're going to do great with your subtle but firm nature. Much love and many blessings to your beautiful family.
All right. Back to the baking.
These cupcakes were made with a lot of love, and a lot of patience. Harvs didn't give me much direction aside from making them girly. I couldn't think of anything more "girly" than a princess theme. The end result was a combination of crown-cupcake toppers, miniature flags, and elegant sugar pearls. Next time, I want to take a try at making tiaras!
A few lessons learned from this adventure:
- When you go to apply the cupcake toppers- make sure that the base frosting is at room temperature so that the toppers go on smoothly
- Apply the decorative sugar pearls while the frosting is still fresh to ensure maximum adhesion
- Seal the crown fondant as soon as possible so it doesn't lose elasticity
- Ribbon with a little metal wire is ideal because it keeps shape- getting those base cupcake bows was a pain
The crowns are made from white fondant with a few drops of concentrated purple food coloring mixed in. It took some trial and error, but we got it to work. Mike cut out a template from some card stock (similar to this style) and we got an assembly line going; he cut out the crown and then using a dab of water, I sealed the seam. The sooner you seal it, the better because the fondant quickly loses elasticity. Immediately place crowns on a parchment-lined plate in the freezer to solidify the form.
To apply the pearl tips, wait until the crowns are hardened (over-night preferable) and then dab a complimentary colored frosting at the top of each peak. Apply the sugar pearl and return to freezer to harden. The base frosting shape is made with the ever beloved 1M tip for rose-like symmetry.
The flags were made from lollipop sticks (toothpicks work just as well) purchased at Michaels. Pick a sturdy ribbon and knot at the top; trim the excess on one end and cut a v-shaped tip on the other end. It's nothing terribly fancy. I've also made them with cut-out paper when adding text to the flag. If you plan ahead, you can find some super cute options on Etsy.
Special thanks to the hubby for helping out- this process takes forever if you're trying to do it solo. Bribe a friend to pitch in! Train your cat to hold a piping bag! Every bit helps!
If you have any questions about the toppers and/or cupcakes, feel free to leave a comment and I will do my best to answer.
To apply the pearl tips, wait until the crowns are hardened (over-night preferable) and then dab a complimentary colored frosting at the top of each peak. Apply the sugar pearl and return to freezer to harden. The base frosting shape is made with the ever beloved 1M tip for rose-like symmetry.
The flags were made from lollipop sticks (toothpicks work just as well) purchased at Michaels. Pick a sturdy ribbon and knot at the top; trim the excess on one end and cut a v-shaped tip on the other end. It's nothing terribly fancy. I've also made them with cut-out paper when adding text to the flag. If you plan ahead, you can find some super cute options on Etsy.
Special thanks to the hubby for helping out- this process takes forever if you're trying to do it solo. Bribe a friend to pitch in! Train your cat to hold a piping bag! Every bit helps!
If you have any questions about the toppers and/or cupcakes, feel free to leave a comment and I will do my best to answer.
Tuesday, November 26, 2013
Black Bottom Cupcakes Again... and Again!
Yes, this is my third post on the notorious Black Bottom Cupcake. They are, after all, my favorite cupcake of all time! They're laced with sugar and fond memories of studying Health Psychology at Starbucks during college. I love the combination of dark chocolate cake with a swirl of cheesecake; it's such a unique balance of flavors. Plus, how many cupcakes can boast being awesome sans frosting? Oh Black Bottom Cupcake, you make me happy.
So far, I have tested the same recipe twice (unknowingly). This round, I paid attention and found a version on Group Recipes that is entirely different. Both the cheesecake and batter incorporate sour cream which is generally used to ensure a moist texture. There is an egg white instead of a whole egg in the cheesecake, the addition of butter to the cake, and omission of vegetable oil.
I ended up having to bake these cupcakes twice because the directions and ingredients are written so poorly. It's very rare to make a blunt negative comment but I found myself keeping track with a pen and paper. Once I got it straightened out, it yielded a true blue Black Bottom Cupcake. The cake is not as rich as the other version; it's a lighter in taste and texture which was the intent with the sour cream.
There is only thing that I would change about this recipe: do not put salt in the cream cheese filling. Salt is used as a flavor enhancer but in the cheesecake, it came screaming through. I was actually startled that it was so easy to detect. A major issue that's very easy to fix!
Overall, a solid Black Bottom Cupcake that just needs a few adjustments! See below for my tweeks.
Black Bottom Cupcakes
modified from Group Recipes
Adjust oven rack to lower middle position and heat oven to 400 degrees. Line 2 standard muffin tins with cupcake liners.
With electric mixer on medium speed, beat cream cheese and sugar in medium bowl until smooth, about 30 seconds. Beat in egg white and 1 tablespoons sour cream until combined, about 1 minute.
Whisk sugar, salt, flour, cocoa, and baking soda in large bowl. Make a well in center, add remaining sour cream, water, butter and vanilla and whisk until just combined.
Bake until tops of cupcakes just begin to crack 23 to 25 minutes. Cool cupcakes in tins for 10 minutes before transferring to wire rack to cool completely.
Filling
8 ounces cream cheese, softened
1/4 cup granulated sugar
1 large egg white, room temp
1 tablespoons sour cream
1/4 cup granulated sugar
1 large egg white, room temp
1 tablespoons sour cream
6 ounces miniature semisweet chocolate chips
Cake
1 1/4 cups granulated sugar
1/2 teaspoon salt
1 1/2 cups all purpose flour
1/2 cup Dutch processed cocoa powder
1 1/4 teaspoons baking soda
1 1/3 cups water
1 1/2 cups all purpose flour
1/2 cup Dutch processed cocoa powder
1 1/4 teaspoons baking soda
1 1/3 cups water
3/4 cup sour cream, room temp
8 tablespoons unsalted butter, melted and slightly cooled
1 teaspoon vanilla
8 tablespoons unsalted butter, melted and slightly cooled
1 teaspoon vanilla
With electric mixer on medium speed, beat cream cheese and sugar in medium bowl until smooth, about 30 seconds. Beat in egg white and 1 tablespoons sour cream until combined, about 1 minute.
Stir in chocolate chips and set aside.
Whisk sugar, salt, flour, cocoa, and baking soda in large bowl. Make a well in center, add remaining sour cream, water, butter and vanilla and whisk until just combined.
Divide batter evenly among 24 cupcake liners and top each batter with 1 rounded tablespoon cream cheese mixture.
Bake until tops of cupcakes just begin to crack 23 to 25 minutes. Cool cupcakes in tins for 10 minutes before transferring to wire rack to cool completely.
Thursday, May 30, 2013
Margarita Cupcakes - Lime & Tequila!
This past Cinco de Mayo, my girlfriend and her hubby invited us over for a delicious Mexican-inspired dinner and margaritas. While none of us are of Mexican descent, we couldn't possibly pass up an opportunity to get together and enjoy delicious food! (Plus, if you read about that day in history- the significance is inspirational) I asked Ashley what I could bring to the festivities and she threw me a curve ball: margarita cupcakes.
The issue with making a margarita cupcake is, well... I've never had a margarita! The basic elements are tequila and lime; sometimes they throw in a little citrus. I was a bit weary of using tequila only because of the fantastic stories a friend in college used to tell me. Apparently, the kid could drink with the best of them but something about tequila caused them black out every time.
Geez, that's exactly what I want to be serving friends and loved ones! Everything in moderation.
This version is a marriage of several ideas and crossed fingers. The base is from Bon Appetit and the frosting is my standard 7 minute frosting. I really liked the rimmed frosting technique by Love From the Oven but didn't want to use cream cheese out of fear it would over power. Instead, I sprinkled sea salt on top.
Mike bought two tiny bottle of tequila from the ABC store. I gingerly sniffed the bottle and shook my head. Potent! After making the mix, there was a little bit left in the bottle. Mike thought it would be good idea to take a sip; the look of disgust was priceless. And I quote, "that stuff is disgusting." I guess we're not tequila lovers.
The base is a light, soft yellow cake with just a touch of lime. It came out perfectly! I omitted the food coloring from the original recipe and used regular limes instead of key lime. I think in this scenario they're interchangeable. The frosting, as always, came out lovely. I don't know if I will ever be able to go back to butter cream! 7 minute Frosting is just so cloud like!
What really defines this cupcake, in my opinion, was the little sliver of lime and sprinkle of salt. As you eat the cupcake, suck on the lime for a hit of sour. It's fantastic with the dusting of salt on top! The crowd claimed they made the margarita flavor cut. You be the the judge! Either way, it's a yummy treat!
For the Cupakes
by Bon Appetit
1 cup all purpose flour
3/4 cup self-rising flour
1/2 cup (1 stick) unsalted butter, room temperature
1 1/4 cup sugar
2 large eggs
2 1/2 tablespoons fresh lime juice
1 tablespoon finely grated lime peel
3/4 cup buttermilk
Glaze
1/4 cup tequila
Preheat oven to 350°F. Line standard muffin pan with 12 paper liners. Whisk both flours in medium bowl. Beat butter in large bowl until smooth. Add sugar; beat to blend. Beat in eggs 1 at a time, then next 3 ingredients (batter may look curdled). Beat in flour mixture in 3 additions alternately with buttermilk in 2 additions. Spoon scant 1/3 cup batter into each liner.
Bake cupcakes until tester inserted into center comes out clean, 20 to 25 minutes. Cool 10 minutes. Remove from pan; cool.
Dip a pastry brush into the tequila. Brush on top of each cupcake. Allow it to absorb for a minute and then apply a second coat. If there's any left over, leave it for for the frosting.
7 Minute Frosting
1/2 cup plus 1 tablespoons sugar
1 1/2 large egg whites
1/4 teaspoon cream of tartar
dash of salt
1 1/2 large egg whites
1/4 teaspoon cream of tartar
dash of salt
1-2 teaspoons tequila, to taste
Garnish
1-2 key limes, thinly sliced
1 tablespoon of sea salt
In large metal bowl, whisk together 1/6 cup water, sugar, egg whites, cream of tartar, and salt. Set bowl over pan of barely simmering water and mix with handheld electric mixer at low speed. Gradually increase speed to high, beating until mixture holds stiff peaks, about 5 minutes.
Transfer bowl from pan to folded kitchen towel on counter and continue beating until mixture is cool and billowy, about 2 minutes more. Fold in tequila, tasting as you go to make there's enough for your palette.
Garnish with a light sprinkle of sea salt, about a pinch per cupcake. I focused on the edges! Add a little slice of lime; I used key limes because they looked so freaking cute.
Friday, April 12, 2013
Peach Bellini Cup
A subject of heated debate in our home has been the wedding cake. First we had to convince my mother that cupcakes are just as a good as a traditional cake. Second, find the perfect shop to make the cupcakes (post to follow). After several trials- we found our winner! And finally, picking an actual flavor. Done!
Well. Sort of.
I wanted to make the top cake. You know, the cute little one that the bridal party shares. In my brain, it would be a sweet personal touch. Not everyone shared my opinion that my making the cake was a brilliant idea. By everyone... I mean my entire family plus Mike shouting, "NO!"
And so, like any healthy couple, Mike and I compromised. His argument was the stress factor. If something should go wrong, he knew I would be one fig short of being a fruit cake. Somehow, I managed to convince him to let me do a trial run! He could time it and everything. Should the slightest detail go wrong, I would throw in the white flag.
A co-worker suggested Peach and Champagne as the flavor since the rest of the cupcakes are plain champagne It was serendipity that I stumbled (without even searching) upon this Peach Bellini cake recipe. I whipped it up on a Saturday night with an audience of friends as taste testers!
The verdict? Totally wedding worthy. It's a heavenly cake- light as a cloud when fresh from the oven! I added chopped, frozen peaches to the batter that provided a little surprise in each bite. This was the first time I've used peach shnapps in baking and I was very impressed. A little bit goes a really long way!
The frosting, however, was a touch too sweet for our likes. I gently scraped it off the outer coat and replaced it with 7 minute meringue frosting. If you're feeling frisky, add a pinch of cinnamon to the mix! This variation was instant success. I can only imagine this at a spring or summer dinner party. Ooo... a little shredded coconut perhaps?
When we served the left over cake the next day, it had a slightly denser texture from sitting over night. Much to my delight, my mom greatly enjoyed the cake. Victory at last! Then I made the mistake of saying, "good. We're having this at the wedding." In that moment, all air left the room and I saw flames in my mother's eyes. Uh oh.
Ahem. In conclusion. I will not be making this cake for the wedding. That doesn't mean you shouldn't make it though!
For the Peach Bellini Cake recipe, check out Java Cupcake's yummy blog! If you prefer a lighter, less sweet frosting, I recommend this 7 minute meringue frosting.
Tuesday, March 26, 2013
Crown Royal Cupcakes
As the wedding approaches, the time to blog spreads even thinner than usual. That's right ladies and gentleman. We are 54 days to go! Woo hoo! I am determined to sneak a few posts in here between now and then. So let's all take a deep cleansing breath... and focus on cupcakes.
Recently, we attended a surprise birthday party for an old friend of mine. (Happy Birthday again Tito! I'm sure your birthday wish was to beat me at Smash Brother's one day! It's okay, don't cry- you can't be the best at everything.) I collaborated with his cousin on what tasty treat to bring. Thai Iced Tea Cupcakes? Apple, Blueberry, and Ginger Shortcrust Pie? How about Irish Car Bomb Cupcakes or Blue Moon Cupcakes? At the sound of booze, his cousin instantly perked up. Booze was one thing this crowd could handle. Apparently the birthday boy has a thing for Crown Royal.
Crown Royal is a Canadian whisky and quite frankly... I've never touched the stuff. Without a clue of its flavor profile, I turned to ye old trusty internet for a few recommendations. The cupcake of choice is from Java Cupcake! Hooray!
There are three components to the cupcake: cake, filling, and frosting. That being you said, you know it's going to be just a touch time consuming. In these situations, best practice is to make at least 2 of the components the night before for sanity's sake. So much for sanity! Eh, wedding planning already has taken the majority of it anyway!
The cake has a cocoa powder base giving it a light chocolate flavor. There's also a generous 3/4 cups of Crown Royal! Before pouring it in... Mike and I tried a lick of straight whisky. It made the hair stand straight up on the back our necks and we both declared our disgust. Mix it into batter though, and oh my. Chocolate can make anything amazing.
The filling is essentially chocolate frosting with a touch of cinnamon. The cinnamon pairs surprisingly well with the whisky and I think it helped to bring out the flavor. You know that face you make when you have some strong liqueur? The cinnamon tries to replicate that feeling but in a good way.
Last but not least is the frosting. This element, in my humble opinion, is what makes or breaks the flavor of a boozey cupcake. It's the first thing your taste buds experience. Too much, and it's overpowering. Too little, and people have no idea what the flavor is supposed to be. It's a thin line to walk. Tread carefully and use your own judgement as you add the whisky. This recipe is almost a buttercream except there is just a touch of cream cheese to smooth things out.
Overall, I was pleased with these cupcakes even though I'm not a whisky kinda gal. Java's version used Crown Royal Reserve. I stuck with 2 teensy bottles of the standard issue Crown Royal from the ABC store. Mike said that to get the full effect, you have to eat all three elements together. Whisky lovers, let me know what you think!
For the full recipe, check out Java Cupcake's fun and yummy blog!
Subscribe to:
Posts (Atom)