Showing posts with label Meals. Show all posts

Wednesday, April 1, 2015

Mariscada { Seafood }


My mother is a magician in the kitchen. I'm pretty sure she was born wielding a colher de pau (wooden spoon) or, as we lovingly knew it as children, "o colher POW!" The pow part was aimed at your bottom but we did a good job of staying away from those types of situations. Ahem!

Like I was saying, she's an amazing cook thanks to a lifetime of practice. She's the second eldest daughter from a family of ten surviving children. That's a lot of responsibility and hungry mouths to help feed. They didn't grow up eating anything fancy on the farm in Portugal - mostly rice, beans, bread, and boiled vegetables. A lot of things that I take for granted at the grocery store had to be grown or butchered. She can peel a potato in 20 seconds with a blade. Bad @$$.


It wasn't until she married and things settled down that she began cooking the more iconic meals of her country, like carne de porco à Alentejana, bolos bacalhau, and paella.  I was lucky enough to be raised enjoying these dishes for special occasions and holidays. If there was shrimp in the fridge, you knew people were coming over. Thanks mom!

That being said, this post centers around my brother's birthday! Mom and I pulled out all the stops with mariscada (mix of seafood- what did I say about that shrimp!) and her version of fried chicken. I was able to find some frozen pasteis de nata at the European Foods Import store and whipped up a tasty Rum-Kissed Banana Butterscotch Cream Tart.

In this post, I'm going to focus on the mariscada but don't sleep on the chicken- Mike's infatuated with mom's recipe. The bird is seasoned with salt, red pepper, and black pepper, coated in flour, dipped in egg, then coated tempura. Fry that bad boy slow and slow. That's it. It's really simple and keeps the meat tender and juicy. 


In this version of mariscada, we kept the rice and seafood separate because it's not paella or arroz con marisco. In those recipes, the rice is cooked with the water used to boil the clams and mussels then everything is mixed together in one big pot. I prefer keeping the seafood separate because it's nice to control the ratio. Plus, it's awesome to grab a big hunk of bread and scoop up all of the olive oil at the bottom of the pot. 

The following are general guidelines as cooking is less of a science and more of a "pinch here" and a "dash there" in our house. 

Mariscada
serves 4

Cooked long-grain rice of your choosing, enough to serve 4
2 (5 ounce each) lobster tails, shell on
1 pound large shrimp
1 pound sea scallops
olive oil
1 medium white onion, chopped
3-4 garlic cloves, chopped
1/2 teaspoon white pepper
1 teaspoon crushed red pepper, add more if you like it hot
sea salt
1-2 bay leaves
pinch of yellow saffron (optional)
1/2 cup chicken bouillon cube mix preferably, but chicken broth could work (optional)

Per the directions for the rice of your choosing, make the rice first since it takes the longest to cook. 


Make the sofrtio: coat the bottom of a heavy bottom pan or dutch oven in olive oil on medium-low heat. Add the chopped onion until it beings to very lightly brown, then add the garlic, bay leaf, and crushed red pepper. Cook until the garlic starts to golden. 

Add 1/4 cup water. Split each lobster tail in half and place with the meat-side down into the olive oil and cook through, 4-5 minutes. You'll know it's done when the meat turns white and the shell turns a vibrant shade of red (see the last photo of this post as a reference). 

Add the shrimp and sea scallops. Season with white pepper, about 1/2 a teaspoon. Cook evenly so that both side of the shrimp are a nice shade of pink. Add a pinch of saffron if you crave that beautiful yellow color; season with salt to your liking.

If you want the base to be more saucy, heat enough water to cook a chicken boullion cube. Pour 1/2 cup to the seafood mix as a starting point. Don't add too much or it's going to become a bowl of soup!

Serve with rice, crispy bread, and salad. 

Friday, August 29, 2014

The Fried Chicken Battle of 2014: Momofuku vs. Bon Appétit


Last year, the husbun and I started compiling a list of restaurants that served the best fried chicken in the DMV. Bonus points were given if it was served with a waffle. It is a culinary weakness of his that needs to be satiated from time to time. In the number one slot stood "Eat Bar," an American gastropub located in Arlington, VA. He was so impressed with their rendition that he ordered it twice in one sitting. 

Then one day, much to his horror, they stopped serving fried chicken and waffles. The waitress said it had to do with the waffle iron. I could hear the depressing movie music playing in Mike's head as he stared blankly at the menu, the wind stolen from his fried-chicken-eating sails. 

This would not do. This would not do at all.

We took matters into our own hands and started looking over recipes. For years, I have had my eye on Momofuku's version. It was like no other fried chicken that I had ever read! For starters, there's no breading on the bird- does that even count as fried chicken? It is steamed first, then fried, and served with a side of vinaigrette. I kept pushing away the idea because we don't own a frier. This was the ammunition that I needed to suck it up and fry up some bird!

Just as I was about to put the grocery list together, a new Bon Appétit magazine came in the mail and lo, what was on the front cover? A tantalizing picture of fried chicken covered in spices and red with desire. Well, that's the hot sauce slathered on top but we'll get to that later.

It appeared that we were at a cross road: fancy fried chicken from Momofuku or traditional American from Bon Appétit? We decided that we'd push the burden onto our friends. It was time for a Fried Chicken Battle to see "whose cuisine reigns supreme." 

Making two different kinds of fried chicken for one sitting turned out to be not as traumatic as we anticipated. Mike and I thoroughly read the recipes over and it was clear that the key to success was timing.


Momofuku's chicken needs to brine for 1 to no more than 6 hours. It is then steamed for 40 minutes and needs to cool down completely, preferably over night.  Plus, before you can fry, the chicken needs to rest outside of the fridge for another 30 minutes to get back to room temperature. By doing the brine and steaming the day before, you will save yourself a significant chunk of time on game day. I also highly recommend making the Octo Vinagrette the day before because chopping the garlic and ginger can be time consuming.

While all that noise was going on, we found that Bon Appétit's "Nashville-Style Hot Chicken" is more straightforward. This chicken needs rest in salt and pepper for at least 3 hours before being fried. So, while the Momofuku chicken cooled over night in the fridge, we let the Nashville bird marinate alongside it. We prepped the flour and dipping batter so it would be ready to go at a moment's notice.


With the foundation laid the night before, all we had to do was heat the oil and dip. For a clean taste, we used grapeseed and peanut oil. I couldn't tell the difference between these two in terms of their effect on the bird. My brother generously loaned us his fryer to ensure there was no cross contamination in flavor; the other was cooked in a good ol' fashioned pot and thermometer.

The end results were both outstanding. These recipes couldn't be more different in terms of texture and flavor. Momfuku's vinaigrette made my taste buds rejoice while the hot crispy crust of Bon Appétit's made angels sing.

We put it to the vote and the winner was.... (insert drum roll)


Bon Appétit's Nashville-Style Hot Chicken

This is a crowd of fire eaters; everybody at the table loves spicy food and the Nashville-Style had the right amount of heat to be flavorful but not overpowering.  Serve with pickles and toasted white bread for an American classic. Personally, however, I voted for Momofuku because man oh man, that vinaigrette!

So grab some friends, an old fold out table, a cheap table cloth, and put these recipes to the test. They're easy to make and completely worth the time and effort.

Special thanks to my all-star sous-chef and husbun for holding it down as always. There was a moment where I got crazy eyes but he kept things in perspective.  

Momofuku's Fried Chicken recipe can be found in their self-titled cook book, Momofuku, as well as online. Bon Appétit's Nashville-Style Hot Chicken can be found in their June 2014 edition as well as on their site.

Tuesday, June 17, 2014

Summer Nights: The Burrito Bowl Potluck

There's something magical about a summer night... how a scorching sun can transition perfectly into a peaceful twilight studded with stars and the caress of a cool, nostalgic breeze. The changing seasons makes things feel new; it's always the same tune but never the same song.

To celebrate the beautiful weather, we decided to have friends and family over for dinner. My intentions were not entirely selfless. Let me explain. 


I found this awesome recipe a few months back for beer braised carnita burrito bowls via Taste Love & Nourish. It looked very tasty but I balked at the thought of having to prepare all the fixings. How could I enjoy this dish without having to do all the work.... That's when the idea struck: potluck! 

The recipe was sent out and dibs were placed. As my mom says, people rather be told what to bring- it's less stressful.  It was a win-win situation, no?


There are six key components of the burrito bowl:

Cilantro-Lime Brown Rice
Jalapeño Corn Salsa
Fresh Tomato Salsa
Beer Braised Pork (or protein of your choosing)
Black Beans
Guacamole or sliced avocados

As with any recipe, adjust to your needs. Both salsas came out hotter than expected- the jalapenos packed a surprising punch- so watch out! It's a good thing that we're a tribe of spice eaters. Instead of making pork, we went with a slow-cooked, pulled-chicken as well as a batch of scrambled tofu for the vegetarians. 


Everything came together beautifully! Way to go team! Each element was well seasoned and complemented the rest of the bowl. We threw in some flour tortillas for those who wanted more of burrito than a bowl. Mike and I designated the black beans as the MVP; I would make them as a side for a number of dinners. 

To end the evening, there was Vietnamese Iced Coffee Sundaes- one of my earliest (ugliest) and favorite posts. It's freaking crack man! Sorry there aren't more pictures of food- the focus was on eating (as it should be).


So find a nice spot of shade this summer. Contact some friends- old and new. And enjoy time spent together. It's good for you! 

For the break down of the recipes, check out this post on Taste Love & Nourish. Or, you can get frisky and make up your town themed potluck! Have fun!

Thursday, April 10, 2014

Smokey Sweet Potato Bánh Mì


Back in 2007, the college roomies and I decided to enjoy spring break West coast style. As luck would have it, Yen-Nei's sister lived in Orange County and graciously agreed to play tour guide/host. She mapped out almost every culinary detail of our visit. We enjoyed bubble tea daily, authentic Chinese food, plenty of sushi, and sweet treats galore. Oh how I will never forget thee, magical black sesame bubble tea. 


It was during this trip that my taste buds became acquainted with a Vietnamese staple: bánh mì.  It is a sandwich that marries the best of two culinary cultures with a French baguette and Vietnamese fillings. The most common version that I have seen is filled with an assortment of meats (thinly sliced pork, head cheese, liver pâté) and topped with cilantro, a splash of fish oil, and pickled carrots/radishes. What really blew our minds was how these incredibly delicious sandwiches were so affordable; they were being sold at $3.50 a pop. It was a college kids dream come true! 

Until recently, finding good bánh mì in Virginia had been a struggle. We have found two spots that serve them right, Bánh Mì DC and Caphe Bánh Mì. It was my pleasure to introduce Mike to this tasty samich and anything with good bread is a win for this guy. We make a lemon-grass tofu version on a regular basis at home (one day I'll get around to documenting it). This post for Smokey Sweet Potato bánh mì piqued my curiosity. I love sweet potato but really... in a sandwich? Isn't that kind of like starch on starch on starch?  Only one way to find out.

Much to my surprise, this is recipe is satisfying and tasty. The sweetness of the potato becomes slightly caramelized in the baking process.  I tried to make even, thin slices but ended up with a few chunky parts as well. We kept these bulky ones to the side and treated them like fries, dipping them into a side bowl of extra sriracha-canola oil mayo.


The fillings were easy to make and basic- just chop up some carrots and radish and let them soak in white vinegar. I love the vibrancy that the radish provides in any dish with its blazing pink exterior. We chopped these toppings rather than do the common match-stick variety. They feel like more of a side salad. It's a matter of preference.

The recommended sauce (a white-miso and soy base) failed. I'm not sure if the miso went bad, the expiration was fine, but we felt that combination was no good. It was super salty and went straight to the sink. Instead, we busted out our "old faithful" of sauces as mentioned above: sriracha-canola oil mayo. It's so easy to make, easy to customize, and easy on the taste buds. As far as garnish, the peanuts were a little out of place. When I think of peanuts in Asian cuisine, it's more Thai-based in curries and dipping sauce. Try a handful and adjust from there.

Thanks to Earthly Feast for this wonderful dinner! Follow the link below for original recipe; below is our minor tweeks.


Smokey Sweet Potato Bánh Mì
slightly modified from Earthly Feast
generously serves 2

Quick Pickle Carrots 
3 carrots, cut into matchsticks or thinly sliced
4 radishes, cut into matchsticks or thinly sliced
1 cup water
1/2 tablespoon salt
1 tablespoon sugar
1/4 cup white vinegar

Smokey Sweet Potatoes 

2 sweet potatoes, peeled and sliced into strips about 1/4 inch thick
2 tablespoons high heat oil (i.e. olive oil)
Pinch of sea salt
Black pepper
Red pepper flakes
Dash of liquid smoke

Spicy Mayo 
2 tablespoons canola oil mayonaise
1 teaspoon srichacha or canned adobo pepper sauce

Sandwich Assembly 
1 baguette
1 jalapeño
cilantro
lime

Start by making the quick pickle. Bring water, vinegar, salt and sugar to a boil. Let cool for a minute. Pour liquid over the sliced carrots and radishes into a clean jar with a lid. Cover and chill for at least 30 minutes.

Preheat oven to 425F and line baking sheet with aluminum foil.  

In a medium bowl, toss the sweet potato with oil, salt, black pepper, red pepper, and a dash of liquid smoke to evenly coat. Spread evenly across the baking sheet. Bake for 15 minutes and check the tenderness of the sweet potato. Depending on how thinly you sliced the potato will determine how long it needs in the oven. If they're still too hard, give it another 10 minutes and check again. 

For the spicy mayo, simply combine the canola oil mayo and hot sauce. Adjust to your heat preference.

To assemble, slice the baguette and spread a thin layer of mayo. Top with the carrots and radishes so that they stick to the samich. Top with sweet potatoes, add a splash of lime, and garnish with cilantro and jalepeno.

Friday, December 27, 2013

Chouriço and Egg Sandwich

I have always been fascinated and humbled listening to my mother's childhood stories; it almost feels like she comes from another planet. She grew up in the back woods village of Bragada, located in the Northern province of Trasmontes, Portugal. Even though she immigrated to the United States as a teenager, she raised my brother and I with the same basic principles and food of her roots.

This chouriço (sausage) and egg sandwich is one of our childhood classics. Mom would make this in a pinch for lunch or as a snack to share. Everybody loved it because it was so simple yet filled with tons of flavor. I can easily see this being served in my grandparents home overseas because it's basic farm fare and filling.


The ingredient list is very short: chouriço, eggs, parsley, pepper, olive oil, and a hunk of good bread. Let's face it, chouriço, much like bacon, makes anything tasty! The one pictured in this post comes from European Foods located in Arlington, VA. My only qualm was the one I procured had a lot of fat in it- you can tell by the white spots. Fat equals flavor but I like mine with a little less. If you cannot find any chouriço, the closest substitute in terms of flavor is Spanish chorizo or andouille sausage.


Hope you enjoy this little slice of nostalgia.

Thanks again mom for coming over and making it for us!

Chouriço and Egg Sandwich 

6 eggs
1 chouriço, sliced into half inch pieces
1 tablespoon chopped parsley
splash of olive oil
black pepper, red pepper, and salt for seasoning
sturdy bread (i.e. French baguette)

In a large bowl, whisk together the eggs until well combined and a few bubbles appear on top. Stir in the parsley and generous amount of black pepper and a pinch (1/8 teaspoon- the meat has plenty of sodium) of salt. Red pepper flakes optional. Set aside.

Lightly coat a large skillet with olive oil and set to medium heat. Add the sliced chouriço and cook until the juices start coming out, about a 3 minutes, then flip. Make sure that they are evenly distributed in the pan.

Keep the heat at medium low and poor in the egg/ parsley mixture. Continue cook until the eggs firm. If your a G like my mother, flip it on a plate and immediately slide it back into the pan to cook the other side. If you're less confident like me, throw it under the broiler like a frittata for a few minutes, until the top has cooked.

Serve between bread (mom likes to butter hers) or as a stand alone omelette.

Monday, December 2, 2013

Salmon with Chraimeh Sauce


This post is going to be short and sweet! It's been a hectic schedule with the holidays. This poor blog is backed up like 95 South on a Sunday afternoon in Northern VA. 

Before bed, I wanted to share this quick snap shot of tonight's dinner: Salmon coated in delicious Chraimeh. Chraimeh is a combination of garlic, cayenne pepper, cinnamon, cumin, caraway seeds, and sweet paprika blended together into a thick paste. Simply heat the paste in a sauce pan with lemon juice and tomato paste with a touch of black pepper and sugar. 

This sauce can be served with many main dishes and even as a dip for appetizers. We were expecting utter punishment in terms of the level of spice- the color of the sauce is a vibrant red and was beautifully intimidating. We were delightfully surprised at the restrained spice. It is full of flavor and a mature refinement; the hubby and I were cleaning the plate with bread. Fortunately, I doubled the amount of recipe in anticipation of such a situation! 

Best of all, this is a quick and easy recipe- perfect for a Monday. Spice up your night!

For the full recipe, I strongly encourage you to check out Yotam Ottolenghi and Sami Tamimi's book, "Jerusalem: A Cookbook." 

Thursday, September 19, 2013

Oven "Fried" Maple Chicken


Oven "Fried" Maple Chicken- yet another delicious and creative twist to a classic, brought to you by Candice Kumi. She is the author of one of my favorite cookbooks, "Pretty Delicious." If you've been following this blog, this is the same source as the Pumpkin Pie Pancakes with Apple Butter,  Black Bean and Banana Empandas, SoCal Quinoa and Cranberry Protein Plate, and Pearl Barley with Peas and Edamame. I've never been a cheerleader but I enjoy the simple, healthy, and straightforward recipes in this book.  


Now about this chicken.

I will be direct: if you have a serious craving for fried chicken- this is not the recipe for you. Just get it over with and make some good old fashioned fried bird.  As stated, this recipe is a creative twist to a classic; there's simply no substitute for the real deal. Don't let that deter you from giving it a shot; the hubby is a huge lover of chicken and even he was impressed with this version. It's flavorful and fun! 


What this Oven Fried Maple Chicken lacks in the oily crunch, it makes up for in time and nutrition. You don't have to brine for hours or deal with an angry frying machine. Simply marinate the chicken in a mix of maple syrup and low-fat buttermilk, coat in panko, and then bake till it's a lovely toasted brown. It reminds me of the Japanese dish, Katsu, but dressed up for breakfast. The sweetness of the maple compliments the savory crunch of the panko beautifully. Throw it on top of waffles or pancakes and top with a lil more maple syrup. We enjoyed ours with blueberry pancakes

Voila! An elegant addition to spice up your usual Sunday brunch routine. For the recipe, check out Pretty Delicious (or take a peek at Cooking Claire's site as a little cheat-cheat). 

Saturday, August 10, 2013

Beet Raviolis filled with Parmesan and Goat Cheese


Recently, this crazy craving for ravioli seized my soul. You know the universe is having a hiccup when I crave Italian food. It's not that I don't like Mediterranean food, but after working in Italian restaurants from the ages of 15 to 22- one needs a break. A serious break. I avoided Italian cooking for years and it wasn't until the husband dropped, "by the way, I love chicken fettuccine alfredo" did I entertain the idea of making it my own kitchen. 

As with most foreign cuisine, it's extremely difficult to find a restaurant that reflects their true native flavor. The American version of pizza, for example, has a ton more cheese and grease than what you'd find overseas. The Armetta family taught me well as a waitress in their mom and pop style restaurant in Woodbridge, VA. Some of the best flavors were not even on the menu but shared in the back on a slow week day shift.  Customers would come in and challenge the cook with a "real" Italian dish that wasn't on the menu like frutti di mar pizza. No funny business- I've rolled with Sicilians.


After some mediocre raviolis at Carrbbas (no offense- love the grilled chicken), it became clear that matters had to be taken into my own hands. The sheer thought of making pasta dough is exhausting. We don't have a big food processor because our kitchen is already a tight squeeze nor is there a pasta roller. It's fore arms, a rolling pin, and a big, floury mess all over my favorite t-shirt (as demonstrated above). Hence, my dough is rolled out a little too thick. Ah well!

The fates recognized my predicament and sent two gifts: a beautiful recipe from The Italian Dish and a ravioli mold pan (thanks big brother!) for my birthday. Talk about serendipitous. 


This recipe for Beet Raviolis filled with Parmesan and Goat Cheese is fantastic. I was extremely impressed with the unique and creative flavor profile. The dough incorporates three roasted beets that are then pureed to mush. The amount of flour to beet ratio is a bit of a guessing game because there are no approximate measurements; add the flour slowly to the point that it's still just a little sticky. If you're roller is sticking to the dough, rub the roller down with flour- not the actual dough. Too much flour and it will dry it; this had me paranoid at first and I was treating the dough as if it were made of glass. It's pasta- just go to town. The taste of beet is very subtle and it gives raviolis a stunning rustic hue

As for the filling, it's a simple combination of cheese, a single egg, and some chives. You can make this filling ahead of time and leave it in the fridge until the time is ready (sans chives, don't let them wilt). Topped with roasted hazelnuts and chives, these raviolis are classy and elegant. I'm head over heals!

For the recipe, check out The Italian Dish's lovely blog! It's full of tempting recipes, culinary insights, and mouth-watering photography! Thanks Elaine for sharing!

Wednesday, July 17, 2013

Swiss Chard and Chickpea Fritters


In the midst of the cloud of powdered sugar that is our kitchen, there is an abundance of healthy activity. Cakes are generally made for special occasions and thus have a few minutes of mercy before they're enjoyed. This permits a 10 minute photo shoot in whatever part of the house happens to have the best lighting.

Dinner, on the other hand, does not get to enjoy such luxuries.


Every Sunday, I try to find at least three meals to help us get through the week. It's a difficult line to walk. I don't want to get too many groceries because one of my biggest pet peeves is finding expired food in the fridge. Nothing should go to waste. It's also important to know what you're getting into before you invest. Sure, that curry looks delicious! But how long does it need to marinate? Is there a ton of prep involved? I have started meals only to throw my hands up seeing the dreaded "chill in fridge for 4 hours" in mid-saute. Get the phone Autumn- we're ordering pizza!


Once the noms have been selected, Mike and I try to prep as far in advanced as possible. We chop veggies, marinate meats, and wash everything. In the past, I've as gone as far as to mix the dry ingredients in one bowl and the wet ingredients in another so that when the time comes, all that needs to be done is the mixing. Prep work is half the battle! 

Dinner last week consisted of this lovely Swiss Chard and Chickpea Fritter from Real Simple magazine. If you have a good sized food processor, this recipe is a walk in the park and takes less than 30 minutes. Ours is on the teensy side so the chard needs to be worked in batches. 


What makes this recipe is the yogurt sauce on the side. I've been on a sauce kick after realizing the potential of Greek yogurt and canola mayonnaise. All you do is take a little Greek yogurt and mix in some sriracha- voila! A tasty condiment!

The fritters themselves are light and tasty. The feta adds a Mediterranean feeling and while the chickpeas provide a touch of density.  I incorporated a bunch of black pepper and dash of crushed red pepper to add some more heat. They can be a little difficult to form into fritters- it all depends on the moisture from the chard. Just get your hands in there and squeeze it together! Overall, a quick and easy meal that we enjoyed with a big helping of avocado on the side and a slice of pita bread! Oo maybe a slice of lemon?

For the recipe, check out the article from Real Simple Magazine!

Friday, June 28, 2013

Norham Kale and Garlic, Purple Mashed Potatoes


I never ate kale until the past two years. It was popping up all over the blogosphere as an amazing health food trend. It's a nutritional powerhouse, full of vitamin C, vitamin K, vitamin A, and calcium. Research indicates that this combination can help prevent cancer as well as reduce cholesterol. Plus, a friend of mine swears up and down that it's great for losing and maintaining a healthy weight.  Though those are all great reasons to eat kale, i didn't know any of them!


Our greens were in need of a little spruce up so at the recommendation of a co-worker (thanks MP), I decided to give baked kale chips a shot. They were an instant hit! After several other fantastic recipes like kale with sweet potato, it slowly became a weekly staple. It's a pretty merciful vegetable and has great taste. I'm not sure how to explain it... some say it's bitter but I never got that impression. It plays nice in the kitchen and pairs well with most savory dishes.


One evening, it was a "everything but the kitchen sink" type of feeling. I threw a few things together and came up with a dish the hubby (tee hee... hubby) and I call "Norham Kale." It's quick, easy to make, and healthy (just don't go crazy on the sausage!) Never would I expect a primarily veggie dish would be such a beloved meal in our home! There are only a handful ingredients involved: kale (regular or baby leaf), red onion, chicken sausage (go with the least amount of sodium), honey crisp apples, olive oil, red pepper, garlic, and black pepper. That's it. Not terribly wild! Feel free to toss other veggies in! I think of it as a warmed salad.


If you're looking for a little starch to balance it out, may I recommend purple mashed potatoes? Purple potatoes are very good for you as well! They're packed with antioxidants. It seems anything that's red or purple is beneficial to blood pressure. They're very similar to red potatoes in flavor and texture. 

Hope you enjoy these simple noms!

Norham Kale

5 ounces Kale or Baby Kale
1 honey crisp apple, thinly sliced
1 chicken sausage link, chopped into quarter width slices
1/2 red onion, sliced 
1/4 cup olive oil
couple cloves finely chopped garlic; we love garlic!
crushed black pepper and red pepper to season

In a small bowl, pour olive oil. Add the finely chopped garlic, a generous amount of black pepper, and some red pepper for heat. Give it a good stir and set aside.

Set the oven broil (high). In a 9x13 baking pan, line bottom with chopped sausage. Broil for about 3 minutes and then flip. Let it cook for an additional 3 minutes; you want that juicy flavor of the sausage as the base. Remove from oven. Add the kale, apples, and onion to the pan and toss carefully (don't touch the pan, it's still warm!). Drizzle enough olive oil to give a very light coat to the kale. Too much olive oil, and the kale becomes soggy. Return to oven and let it broil for another 5 minutes. It's done with the apples have softened and the kale is tender. Ready to go!

Garlic, Purple Mashed Potatoes

1 small bag of small, purple potatoes, halved (about 2lbs)
head of garlic (yup, the whole thing), chopped
1/2 teapsoon salt
2 tablespoons unsalted butter
1/4 cup heavy cream or milk
generous amount of black pepper

In a medium pot, add the halved potatoes. Add enough water to cover the potatoes. Bring to a boil over high heat and add the chopped garlic and salt. Reduce the heat to a simmer and cover with lid. Cook until the potatoes are tender and easy to crush, 15-20 minutes. Pour potato mix into strainer to discard water. Immediately place hot potatoes in a deep serving bowl and add butter. Mash until softened; add 2 tablespoons of cream/milk. Continue to mash. Add more cream/milk until reaching desired consistency. Season with black pepper. If you're a real garlic lover, add a little dried garlic!
Wednesday, April 17, 2013

Poached Salmon with Avocado Sauce


Salmon. Good ol' salmon. Olive oil, pepper, salt, and crushed red pepper. This is the way my mother taught me to cook our family favorite fish. It's rich in Omega 3's, healthy oils, and tastes amazing.  My recent adaptions include the omission of salt and the occasional sprinkle of flax-seed.  I also have branched out and started purchasing "wild salmon" instead of the farm raised variety. The intent is to eat healthier; who knows what the heck they're feeding the farm raised fishies. Why society... why do you make it so difficult to eat healthy!?


I decided to shake things up a bit and try this recipe from Bon Appetit magazine. Chunks of salmon served on a bed of arugula with avocado sauce! There wasn't an ingredient in the list that I didn't like.... Salmon salad? Sure. Let's get crazy!


All you seasoned chefs will have a good chuckle on this note: I didn't realize what "poached" salmon met. I've poached an egg! As I read the directions and heated the vegetable broth, there was a moment of confusion. Dump the boiling broth on the fish? What- no oven?  This was such an event, even Mike was dragged into the kitchen to witness. It is also noteworthy to mention that poaching the salmon does not fully cook it- so if you don't trust sushi- use an alternative method.


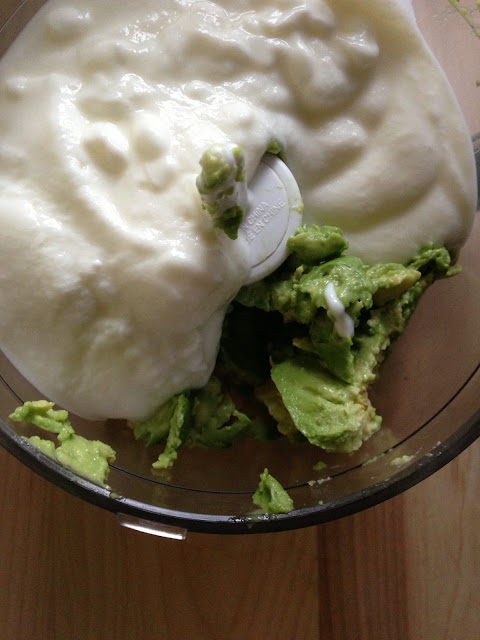
The avocado sauce is simple enough! It's a combination of low-fat yogurt, avocado, and spices. If you don't have a food processor, don't fret! Just do a good a job smashing the avocado and whisk into the yogurt. Season to taste. It's essentially the dressing; you can omit it and stick with olive oil if preferred.


We packed it up and had the salad for lunch in the office the following day. Sorry it's not most flattering picture- check out that blue carpet! Even after sitting in the fridge, this is an incredibly fresh salad! The crispness of the arugula flirts with the smoothness of the avocado sauce while the salmon perches as the taste bud mediator. It's light, healthy, and flavorful. Get some!

For the full recipe, check out Bon Appetit's recipe for Poached Salmon with Avocado Sauce.

Monday, January 28, 2013

Won Ton Soup


It's finally chilly in Northern VA! We had our first dusting of snow last week. We were all crossing our fingers for more, but it was just enough to make getting to car precarious. The fact it took until January to get here makes me a little wary of the planet's health. Bundle up!


To help us cuddle in the sweatah weathah, we decided to make a feel good soup many people overlook: won ton. It's a Chinese-American takeout classic. It's essentially dumplings floating in delicious broth. My favorite part is knowing what goes into the pot! You can add more veggies if you want, but we stuck with bok choy, green onions, and peas. 


The Chinese-American traditional version consists of ground pork with shrimp. We went to two grocery stores and neither carried ground pork! I didn't realize this was a hard product to find or maybe it's just the season. I substituted with a healthier alternative of ground turkey cooked in bacon grease  mixed with the crumbled bacon. Don't go crazy on the bacon- a strip or two will do! Just enough to add some flavor. And don't forget the crispy won ton wrappers on top! You can buy these in the international section or make them yourself


Now I must warn you... the recipe and ingredients are simple and easy to work with. Actually forming the won tons is time consuming. It's a bite sized portion of meat in each dumpling. This yields an army of delicious tasty dumplings that will be gobbled up in a pinch. Make sure you have back up or else you're going to spend a lot of time in the kitchen. Make it a date night! Invite a friend over for dinner and movie! Tag team!

For the delectable recipe, check out Starry Night's post on allrecipes!

Tuesday, January 15, 2013

Everything Healthy Soup


When the hubby-to-be catches a cold, it's time to bust out the big guns. It pains me to watch him shuffle about the house and have no energy. Where did this nasty cold come from? I blame the disease incubator that is our office building. It's unsettling how colds roll through a department like a passing wave. You can slowly watch an entire team get taken down, one by one, in the winter. 


My mother's response to any cold was soup and lots of rest. I'm usually a stickler for Canja because that's what I was raised on and it's comforting. This soup started off as Canja... and then transformed into something else entirely.


We lovingly call this, "Everything Healthy Soup." If it's good for you, it was thrown into the pot! Nothing in the kitchen was safe. There are carrots, celery, garlic cloves, grated ginger, onion, spicy pepper flakes, and zucchini. It was a rampage of yummy vegetables. This past year, I discovered avocado in soup and fell in love with the smooth texture. Is there NOTHING it can't be served with?

You determine what goes in the pot. Just make sure it's healthy! Stay well and cold free!


Everything Healthy Soup

1 small whole chicken, rinsed in cold water and cleaned
olive oil
15 whole garlic cloves
large zucchini, chopped
2-3 carrots, chopped
1/2 onion, sliced
1 avocado, chopped into bite size pieces
2 cups spinach
1 celery, chopped
1/2 inch fresh ginger, grated
dried red pepper flakes
black pepper
sea salt

Coat the bottom of a large pot with olive oil. Set to medium heat. Add at least a teaspoon of crushed red pepper and the garlic cloves. Let it cook until slightly fragrant, about a minute or two. Add 4 cups of water and bring to boil. Season with salt but go easy- you don't want to oversalt. 

Clean the bird. Rinse in cold water and drain. Add to pot; there should be enough water so that the bird is just barely submerged so add all the water you need. Let cook at a boil for about 5 minutes. Lower heat to low-medium and put the lid on. Leave there for at least one hour- until the meat easily pulls off. 

Carefully remove the bird. DO NOT DRAIN THE POT. You are looking at home made chicken stock. Leave it be! Let the bird cool until it's easy to handle and go to town. I usually don't include the skin because i'm not a fan of its texture.

While the bird is cooling, add the carrots and celery to the pot and keep at low heat. They take the longest to soften but you don't want mush!

Once the bird is easy to handle, shred the chicken to pieces and throw back in the big pot of chicken stock. Set the heat to medium and add the rest of the vegetables. Season to taste with crushed red pepper, pepper, and salt. Add healthy splash of olive oil when done.

Monday, November 19, 2012

Curry In a Hurry


This recipe is fantastic! It's super quick, versatile, and most importantly- delicious. There are many different kinds of curry but I have found this to be my favorite one to make at home. The base is simply coconut milk and curry paste. 


You can find curry paste in the "Asian" section of your local grocery store. The original recipe suggests green curry paste but that never seems to be in stock, so we went with our usual red. It all depends on your preference. Green tends to be spicier and paired with eggplants, bamboo shoots, etc. Red curry winds up with peppers and onions. At least that's the trend that I have seen- don't lie to me Thai restaurants. 

Honestly, the last time I made this recipe, it included boiled red potatoes so don't feel limited by the recipe.  Use what's available in the salad bar if you're running short on time. Spice it up! I cook the base with red pepper flakes. Anything goes!


This meal is actually brought to you by Tropical Storm Sandy. We were very lucky in Virginia. Our house didn't lose power. In a recent trip to New York (trust me, it was not for happy reasons), we saw the ramifications all over Long Island. The gas lines were ridiculous and I felt very blessed to have a family that would never leave us hanging. Muito obrigada Tia Rose e Tio John, te amo. It's hard to believe a storm in the states could cause such damage. Please offer assistance if you're able.

With a simple grocery list and 15 minutes, you too can enjoy this warm and comforting meal. The only "modification" I made was a little less water because Mike likes his curry thick. It still wasn't "thick" enough, so I am going to try reducing the coconut milk next time to concentrate the flavor.  And honestly, this recipe could not come at a better time. Life's been busy. That doesn't mean you have to sacrifice dinner.

Serve with/without ride or bread if you need them carbs.

For the recipe, check out 101cookbooks!