Thursday, July 28, 2011

Red Velvet... Bigger and Badder

If you have been following this blog, you know my sentiments towards red velvet cake: bleh!

Red velvet cupcakes were made ONCE last year per the request of my dear friend Young with mediocre results. I didn't foresee making them ever again, until the boyfriend promised his church youth group some. How convenient it is to have a baking-fiend for a gf, hmm?

Seriously... who could say no to a grill like that, cheesing at 8AM on a Sunday? Too effing cute man. Alright, alright. Red velvet cupcakes they want- red velvet cupcakes they shall have!

After a break dance jam in DC hosted by Words, Beats, and Life, I went straight to the lab (aka kitchen). Nothing quite like a Saturday night of baking and breaking. Real gangsta, nah mean?

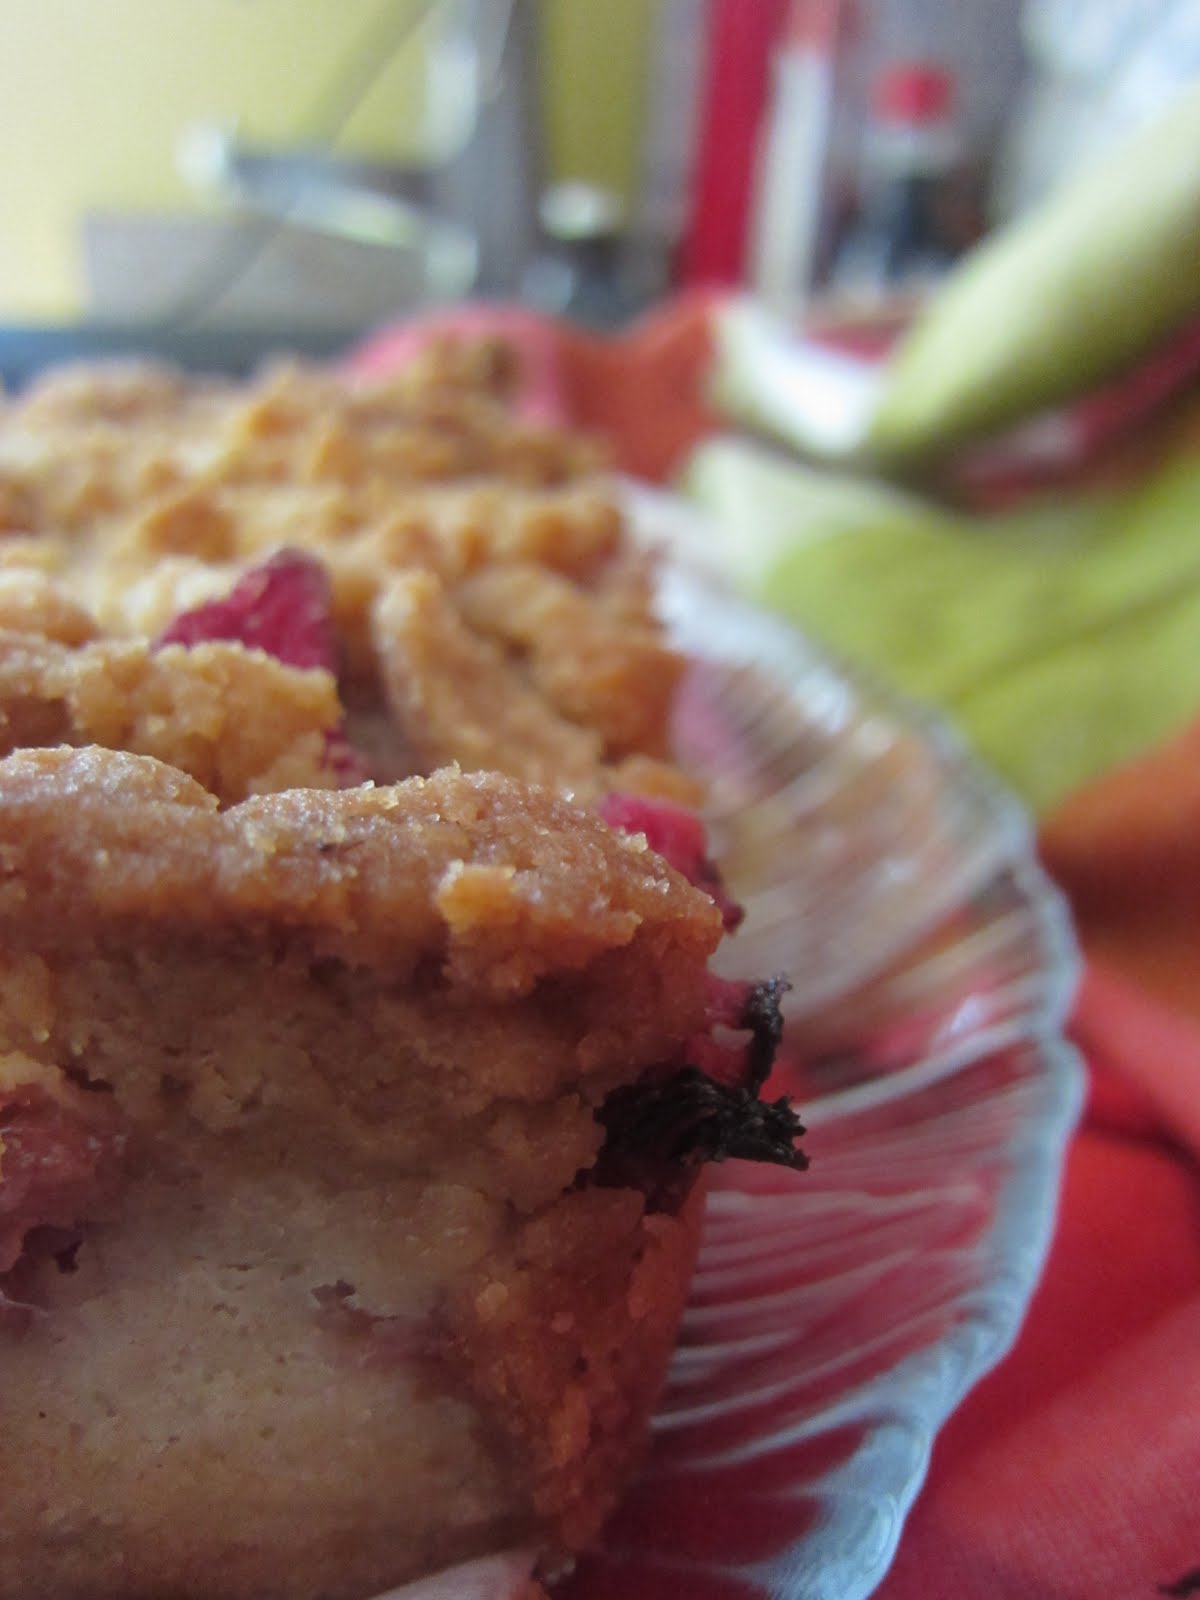
I took it as an opportunity to try a different red velvet cake recipe. These immediately caught my eye. First, look at the texture on top and how incredibly smooth it is! The red velvet in the past produced a very cratered cake top. Second, I associate an oily after taste with red velvet. The inside is light and fluffy, with no vegetable oil in the batter. SAY WHAT!? I needed to know the magic.

The epiphany struck that pairing an oil based cake with a greasy frosting like cream cheese probably doesn't help- even though that seems to be the most popular combination. Buttercream is in second place- but I can only stomach a dash of buttercream.

That's when 7 minute frosting came into the my life, and the stars aligned. What's 7 minute frosting? Well, the texture is almost like marshmallow fluff. It can hold its own, super soft, and goes with just about everything. Plus, it takes... you guessed it- 7 minutes!

Optional garnish includes a dusting of cinnamon, toasted coconut, and super cute sprinkles.

Let it be shown on the record that I now LOVE red velvet cupcakes. At least these. Get on it!

Red Velvet Cupcakes
by Hummingbird Bakery

4 Tablespoons unsalted butter, at room temperature
3/4 cup sugar
1 egg
3 Tablespoons unsweetened cocoa powder
2 Tablespoons red food coloring
1/2 teaspoon vanilla extract
1/2 cup buttermilk
1 cup plus 2 Tablespoons all-purpose flour
1/2 teaspoon salt
1/2 teaspoon baking soda
1 1/2 teaspoons distilled white vinegar

Place a rack in the upper third of the oven and preheat oven to 350 degrees F.

In the bowl of a stand mixer fit with a paddle attachment, cream the butter and sugar until light and fluffy, about three minutes. Turn mixer to high and add the egg. Scrape down the bowl and beat until well incorporated.

In a separate bowl mix together cocoa, vanilla and red food coloring to make a thick paste. Add to the batter, mixing thoroughly until completely combined. You may need to stop the mixer to scrape the bottom of the bowl, making sure that all the batter gets color.

Turn mixer to low and slowly add half of the buttermilk. Add half of the flour and mix until combined. Scrape the bowl and repeat the process with the remaining milk and flour. Beat on high until smooth.

Turn mixer to low and add baking soda and white vinegar. Turn to high and beat a few more minutes.

Spoon batter into a paper lined cupcake baking pan and bake at 325 F for 20-25 minutes or until a skewer inserted into the center cupcake comes out clean.

Let rest in the pan for 10 minutes, then place them of a cooling rack to cool completely before frosting.


Fluffy 7 Minute Frosting
by epicurious.com

1 cup plus 2 tablespoons sugar
3 large egg whites
1/4 teaspoon cream of tartar
1/8 teaspoon salt
1 tablespoon pure vanilla extract

In large metal bowl, whisk together 1/3 cup water, sugar, egg whites, cream of tartar, and salt. Set bowl over pan of barely simmering water and mix with handheld electric mixer at low speed. Gradually increase speed to high, beating until mixture holds stiff peaks, about 5 minutes.

Transfer bowl from pan to folded kitchen towel on counter and continue beating until mixture is cool and billowy, about 2 minutes more. Beat in vanilla. You will have extra, so use plenty!

Frosting can be made 4 hours ahead and chilled, covered.

Saturday, July 23, 2011

Chef Poptart: Portuguese Páscoa Paelha Pandemonium

As you may have gathered, Squirrel comes from Portuguese descent and loves every culinary minute of it. The same goes for me, Poptart; Squirrel and I are family. Brothers from another mother, if you will. Both mothers are Portuguese and think you look skinny. Seriously. Eat something.

If you come over to a Portuguese person’s home, and they haven’t tried to stuff your face with food, snacks, and booze, then most likely you’ve wandered into some sort of Twilight Zone. I suggest you bend over, grab your ankles, and wait for the wormhole to take you back to your normal dimension of choice.

If you’re lucky, the Twilight Zone hasn’t befallen you, and you’ve been lucky enough to wander into a proper Portuguese gluttony fest. I just hope you’re hungry. God forbid you don’t eat; I’m pretty sure that counts as the 8th Deadly Sin if you don’t gorge. If you’ve managed to come over during a holiday meal, then I hope you haven’t eaten in several days. I believe the Portuguese word for “holiday” actually derives from the ancient Latin words for “Eat until your pants violently burst off your waist.” True story.

Portuguese Paelha differs from its Spanish relative Paella in that the Portuguese version is all seafood all the time. There are some versions which add sausage or chicken, but the main focus is always seafood. The version we make takes clams, mussels, lobster, scallops, and shrimp. A small ecosystem must die to satiate the needs of this dish; its a delicious price to pay.

Paelha is one of those dishes my mom does for big events and holidays. If a lot of people are coming over to eat, this is one of her favorite things to do. Its actually pretty simple to make. You boil a lot of seafood, cook rice with seafood stock and saffron, combine together, and add garnish. Simple right? Well we had a lot of people coming over, and I had a hankering for seafood at our Easter party, so I dove right into my first Paelha.

The results were great! I opted to use whole lobsters instead of lobster tails (that option tends to be a little cheaper, and using the lobster bodies as presentation was pretty awesome to look at). None of the seafood overcooked, and I managed to have most of everything finish cooking around the same time so that everything was combined all at once and it hit the table super fresh. Cheers folks, and happy cooking - may the lobster be with you.

Serves about 10 people.

Portuguese Páscoa Paelha Pandemonium

5 lobster tails (or 3+ full lobsters - with full lobster, you have to cook them like the clams and mussels beforehand and also save that water)
3-4 lbs shrimp (more the merrier)
1 lb large scallops
18 clams
18 mussels
4-5 cups rice
bijol (possibly found in a latino market) or saffron
tabasco/pepper
1 large onion, or 2 smaller onions - diced
lots of garlic - diced
olive oil
1 cup white wine
1 bunch of parsley, chopped
3 bay leaves

Garnish (optional)

canned peas
roast red pepper slices


Prepare the seafood. Put clams and mussels into ice water for about an hour (separate containers). Clean shells. If using just the lobster tails, cut lobster tails lengthwise. Peel shrimp.

Steep the saffron in warm water (if you’re not using bijol)

All the seafood can be boiled in the same pot/water, but it will take more time. Boil clams until they open (save water). Boil mussels until they open (save water). If using whole lobsters - boil the lobsters (save water).

Once cooked, separate the tails and cut lengthwise, remove the legs and claws. The main body of the lobster isn’t great to eat, but it makes a great decoration, so save’em. Strain the water from lobster, clam, and mussels. (I actually skipped this step)

Prepare the rice. Dice half the onion, and cook in olive oil until golden. Add garlic, tobasco, bijol/saffron, water from lobster, mussels, and clams, salt to taste. Add the rice.

While rice is cooking, dice the rest of the onion, put in main paella pan with olive oil. Cook until golden. Add bay leaf, parsley, bijol/saffron, garlic, white wine.

Let simmer for about 5-10 minutes. If using just lobster tails, add lobster tails to main paella pan for about 5 minutes. Add shrimp and scallops 5-10 minutes. Add the rest of the seafood to the main pan. Add some clams/mussels water to keep everything from dying out if needed.

Wait for guests to arrive.

When ready to serve, mix in the rice. Add garnish.

Monday, July 18, 2011

Chicken Fettuccine Alfredo

Truth be told, I don't like Fettuccine Alfredo.

I am a red sauce kind of girl. Half the time I don't even want the pasta, just a big hunk of toasted bread for scooping. Sorry Italian food- but after working in Italian restaurants from the ages of 15-22, litttttttle burn out.

The boyfriend on the other hand- loves Italian food something fierce. His favorite is my nightmare-- Fettuccine Alfredo. Why God, why? It doesn't taste bad... but my tummy turns when I think of all that freaking cheese and cream smothering the plate.

After a crazy work week for the boy... this was an attempt of a small token of affection for all his effort and positivity. I truly do admire and appreciate his eternal sunshine. This new school Fettuccine with delicious berry tiramisu (post to come) is a delightful food coma after putting in some long hours. You rock meu amor!

This is not your traditional Fettuccine because it incorporates multiple types of cheeses. It's thick because of a dusting of flour in the mix. The flavor is similar to the traditional version- but you can tell there's more dynamic. It's heavy and evil... exactly how cheesy pasta should be.

If you're an Alfredo fan... you have to try this recipe!

Chicken Fettuccine Alfredo
adapted from allrecipes.com

3 skinless, boneless chicken breast cut into cubes
3 tablespoons butter, divided
4 cloves garlic, minced, divided
1/2 tablespoon Italian seasoning
1/2 pound fettuccine pasta
1/4 onion, diced
1/2 cup broccoli
1/6 cup all-purpose flour
1/2 tablespoon salt
1/2 teaspoon ground white pepper
1 1/2 cups milk
1/2 cup heavy cream or half and half
1/3 cup grated Parmesan cheese
4 ounces shredded Colby-Monterey Jack cheese
1/4 cup sour cream

In a large skillet over medium heat combine chicken, 1 tablespoon of butter, 2 cloves garlic, and Italian seasoning. Cook until chicken is no longer pink inside. Remove from skillet and set aside.

Bring a large pot of lightly salted water to a boil. Add pasta and cook for 8 to 10 minutes or until al dente; drain.

Meanwhile, melt 2 tablespoons butter in the skillet. Saute onion, 2 cloves garlic, and broccoli until onions are transparent. Stir in flour, salt and pepper; cook 2 minutes. Slowly add milk and heavy cream/half-and-half, stirring until smooth and creamy. Stir in Parmesan and Colby-Monterey Jack cheeses; stir until cheese is melted. Stir in chicken mixture, tomatoes and sour cream.

Serve over cooked fettuccine.

Tuesday, July 12, 2011

Rhubarb Crumb Bars

Rhubarb crumb bars are a cross between coffee cake and a fruit crumble... which can only mean one thing: yum!

I have been dying to try this recipe for awhile. It was worth the wait- especially if you're rhubarb fiend. I never would have thought to use it in this form so the result was a pleasant surprise.

The rhubarb maintains its freshness; the long baking time ensures a tender texture. There's not as much of a zest flavor like the the Rhubars, so feel free to slip in some lemon juice.

The cake is thick but not dense. It has a very neutral flavor in order to soak up the juices from the rhubarb. Don't worry... that's where the crumble on top comes in.

As with any crumble... it's sugary goodness. Brown sugar and butter is a guarantee for crack. Use less crumble if you want to taste more rhubarb.

The original recipe is for strawberry and rhubarbs- but I wanted to use all the beautiful rhubarb in the fridge. If you want strawberries, split the rhubarb in half and substitute with the strawberries (1/2 lb rhubarb; 1/2 lb strawberries- cleaned, hulled, and sliced).

Note: when you bake this, you may want to put aluminum foil on top to prevent crisp.

Serves 16.

Rhubarb Crumb Bar Recipe
by White on Rice Couple

Streusel

1/2 c (115g) unsalted Butter, melted, plus room-temperature butter for pan
3/4 c (160g) packed Golden Brown Sugar
1/4 t (2g) Sea Salt or Kosher Salt
1 1/4 c (160g) all-purpose Flour, plus more for pan

Bars

1 lb (450g) Rhubarb, cut into 1/2″ pieces
1 1/2 T (15g) Golden Brown Sugar
1 1/3 c (200g) all-purpose Flour
3/4 t (3g) Baking Powder
1/2 t (3g) Sea Salt or Kosher Salt
3/4 c (170g) unsalted Butter, room temperature
1 1/4 c (140g) Confectioners’ Sugar
2 large Eggs, beaten
3/4 t (3ml) pure Vanilla Extract

Whipped Cream Topping (optional)

1 c (240ml) Whipped Cream
1 T (9 g) Confectioners’ Sugar
1 t (5ml) pure Vanilla Extract
confectioners’ sugar for dusting the top

Preheat oven to 350° F. Line a 9″ square baking pan with parchment paper, leaving a 2″ overhang on two sides (use a swipe of butter on edges of pan to help keep parchment flush with pan. Butter and flour parchment and pan, tapping out excess flour.

Make Streusel. Whisk together butter, brown sugar, and salt. Add flour and mix together using a fork or your fingers to create large crumbs. Refrigerate until ready to use.

Make Cake. In a medium bowl, combine rhubarb, strawberries, brown sugar, and 1/3 c (50g) of flour. Sift or whisk together remaining flour, baking powder, and salt, then set aside.

In a mixer, beat butter and confectioners’ sugar until light and fluffy. Slowly add eggs and vanilla extract. Stir in flour mix until just incorporated.
Spread batter in prepared pan, top with rhubarb/strawberry mix then top with streusel topping.

Bake 50-55 minutes or until golden and a toothpick comes out clean. Let cool in pan, then remove from pan using the overhanging parchment tabs.

While bars bake, whisk together whipped cream, confectioners’ sugar, and vanilla extract to firm peaks. Set aside in refrigerator until ready to serve.

Slice bars to preferred size, dust with confectioners’ sugar and serve or top with whipped cream and serve.

Thursday, July 7, 2011

Hello Gorgeous: Pull Apart Cinnamon-Sugar Bread

Introducing pull apart cinnamon-sugar bread... cousin of the legendary Monkey Bread.


My sister came up with perfect analogy to describe this bread: Monkey Bread is like the gooey center of the Cinnamon Bun; pull apart cinnamon bread is the rest of the cinnamon bun.

Now before you boo and hiss with "the center is the best part"- gives this a shot. You will be FAR from disappointed. This bread is really neat to make because you roll out the dough, cut it, and pile the sheets of dough on top of one another like a flip book. It takes on a life of its own in the pan. Mine came out in this beautiful twist- totally unintentional.

The outside has a nice crisp thanks to the butter coating the pan and brushed onto the sheets of dough.

The inside remains soft and delectable. Just imagine dipping that into a cup of coffee over brunch. Purrrrr....

Did I mention every inch is rubbed down with cinnamon, sugar, and a hint of nutmeg? Moo ha ha!

If you want, make a little cream cheese dip on the side. Nothing fancy now, just some cream cheese with confectioners sugar, vanilla extract, and milk. If you're feeling naughty, a smidge of unsalted butter wouldn't hurt.

The directions say cut into 6 columns vertically, stack, and cut horizontally 6 times, thus making 36 sheets of dough (6 piles of 6 sheets). I ended up making it 5 by 5 and it turned out perfect- so don't sweat it! Your slices will be a little thicker, but that doesn't take away from the flavor. Also-- have a pizza cutter on hand! This will making slicing the dough far easier than with a knife!

Also, I thought there was a large amount of cinnamon-sugar topping, so sprinkled some of the left over amount on top before baking. Go for it.

Cinnamon-Sugar Pull Apart Bread
from Joy the Baker

2 3/4 cups plus 2 tablespoons all-purpose flour, seperated
1/4 cup granulated sugar
2 1/4 teaspoons (1 envelope) active dry yeast
1/2 teaspoon salt
2 ounces unsalted butter
1/3 cup whole milk
1/4 cup water
2 large eggs, at room temperature
1 teaspoon pure vanilla extract

1 cup granulated sugar
2 teaspoons ground cinnamon
1/2 teaspoon fresh ground nutmeg
2 ounces unsalted butter, melted until browned

In a large mixing bowl, whisk together 2 cups flour, sugar, yeast, and salt. Set aside.

Whisk together eggs and set aside.

In a small saucepan, melt together milk and butter until butter has just melted. Remove from the heat and add water and vanilla extract. Let mixture stand for a minute or two, or until the mixture registers 115 to 125 degrees F.

Pour the milk mixture into the dry ingredients and mix with a spatula. Add the eggs and stir the mixture until the eggs are incorporated into the batter. The eggs will feel soupy and it’ll seem like the dough and the eggs are never going to come together. Keep stirring. Add the remaining 3/4 cup of flour and stir with the spatula for about 2 minutes. The mixture will be sticky.

Place the dough is a large, greased bowl. Cover with plastic wrap and a clean kitchen towel. Place in a warm space and allow to rest until doubled in size, about 1 hour. *The dough can be risen until doubled in size, then refrigerated overnight for use in the morning. If you’re using this method, just let the dough rest on the counter for 30 minutes before following the roll-out directions below.

While the dough rises, whisk together the sugar, cinnamon and nutmeg for the filling. Set aside. Melt 2 ounces of butter until browned. Set aside. Grease and flour a 9x5x3-inch loaf pan. Set that aside too.

Deflate the risen dough and knead about 2 tablespoons of flour into the dough. Cover with a clean kitchen towel and let rest for 5 minutes. On a lightly floured work surface, use a rolling pin to roll the dough out. The dough should be 12-inches tall and about 20-inches long. If you can’t get the dough to 20-inches long… that’s okay. Just roll it as large as the dough will go. Use a pastry brush to spread melted butter across all of the dough. Sprinkle with all of the sugar and cinnamon mixture.

Slice the dough vertically, into six equal-sized strips. Stack the strips on top of one another and slice the stack into six equal slices once again. You’ll have six stacks of six squares. Layer the dough squares in the loaf pan like a flip-book. Place a kitchen towel over the loaf pan and allow in a warm place for 30 to 45 minutes or until almost doubled in size.

Place a rack in the center of the oven and preheat to 350 degrees F. Place loaf in the oven and bake for 30 to 35 minutes, until the top is very golden brown. The top may be lightly browned, but the center may still be raw. A nice, dark, golden brown will ensure that the center is cooked as well.

Remove from the oven and allow to rest for 20 to 30 minutes. Run a butter knife around the edges of the pan to loosen the bread and invert onto a clean board. Place a cake stand or cake plate on top of the upside down loaf, and carefully invert so it’s right side up. Serve warm.

This bread is best served the day it’s made, but it can also be wrapped and kept at room temperature for up to 2 days.

Tuesday, July 5, 2011

Rhubarb Pancakes

Life is so random it comes off as planned. Does that make any sense?

My usual commute is as follows: get on the blue Line in Springfield, switch to yellow, and hop onto the red line for Van Ness. It's a handful but neat how you pick up on small details. For example, always try to get seated in one of the first trains when you ride the red line because the exits are at the end of the station. Tricks like this shave time and the aggravation of walking through the crowd.

Hoped on the train as usual. At the Woodley stop, I recognized someone entering the car and sat directly behind me. It was my friend Lam from highschool that I have not seen in years. We started catching up when the intercom announced someone had jumped on the tracks (they're okay!) at Dupont. We gave it a few minutes and decided to take action.

As luck would have it, Lam lives in the area and knew where to go. A group of his friends just so happened to be at stop we got stuck at and joined our caravan. We caught the bus and went to the yellow line. I tried to rush ahead and catch the train... and missed it. Good thing I did- because at that moment- my cell phone died.

Lam caught up and let me use his phone to make sure I had a ride home... which again... happened to be on the way to where he was going to help a friend move!

What should have been a catastrophe turned into an ironic and fun adventure. We rode all the way to Alexandria together and the boyfriend was kind enough to scoop us both up. Small world, no?

Below is a little recipe I conjured up. If you can think of improvements, please share! These are fluffy rhubarb pancakes- yes rhubarb! I was determined to make the most of the rhubarb season! I used about one stalk and some change, the flavor was subtle and it gave the pancake a slightly blue color.

For the syrup, I made some fancy poached rhubarb. Very simple to make! It's meant to be served with rice pudding but I think it made a very elegant topping. I think it would be great on top of vanilla ice cream. With the leftovers, save in a container and use as a jam substitute.

Rhubarb Pancakes

1 cup milk
1 cup all-purpose flour
2 tablespoons white sugar
1 teaspoon baking powder
1/2 teaspoon baking soda
1/2 teaspoon salt
2 egg yolks, beat till fluffy
2 tablespoons butter, melted
1 and 1/2 large, bright red rhubarb stem
2 tablespoons water
1/2 teaspoon cinnamon, plus more for garnish
1/2 teaspoon lemon zest (optional)
cooking spray

Chop the rhubarb into bite sized pieces. Place in small sauce pan over medium heat with the 2 tablespoons of water. If it begins to stick to the bottom of the pan, add a little more water. Add the egg yolks, butter, and milk. Add lemon zest (optional).

In a separate bowl, combine flour, sugar, cinnamon, salt, baking soda, and baking powder.

Combine wet and dry ingredients. Do not over stir.

Cook over medium low heat.

Sprinkle with cinnamon!

Poached Rhubarb
adapted from Food and Wine (May 2009)

1 cups water
3/4 cup sugar
1/2 cup dry red wine or rosé
1 tablespoons fresh lemon juice
1 cinnamon stick
1/2 vanilla bean, split, seeds scraped
1/2 pound rhubarb, cut into 1-inch lengths

In a small pan, heat water with sugar until sugar dissolves. Add the rhubarb and bring to boil. Lower heat; add wine, lemon juice, vanilla bean, and cinnamon stick. Let sit about 10 minutes or until cooled.