Showing posts with label Asian. Show all posts

Tuesday, August 20, 2019

Samosa Empandas {Baked, Vegetarian}


In celebration of the latest addition to our family, we threw a little shindig to hang out while we still had the energy. I didn't want to expend too much energy so the majority of snacks were outsourced in the most spectacular fashion possible. Mini pies from Pie Sisters. Cupcakes from Baked and Wired. Fresh rolls from Bangkok 54. Mint Tea from Al Zaytoun. It was like the greatest hits of Noms + Bun gastronomy.

There was one item missing.... samosas.

Monday, June 10, 2019

Nailed It: Panda Creme Puffs with Nutella-Mascarpone Filling


Not going to lie... these creme puffs had me and my husband laughing for a good 5 minutes straight. They didn't come out exactly how I had pictured them. Maybe next time - it's always a learning experience! In the interim, I'll take the "A" for effort and enjoy their delicious flavor.

Tuesday, January 19, 2016

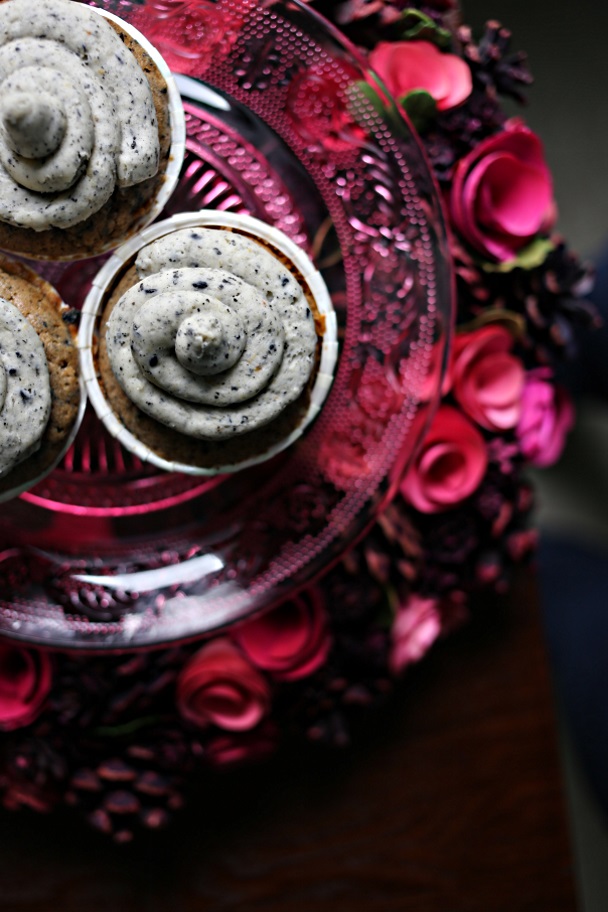
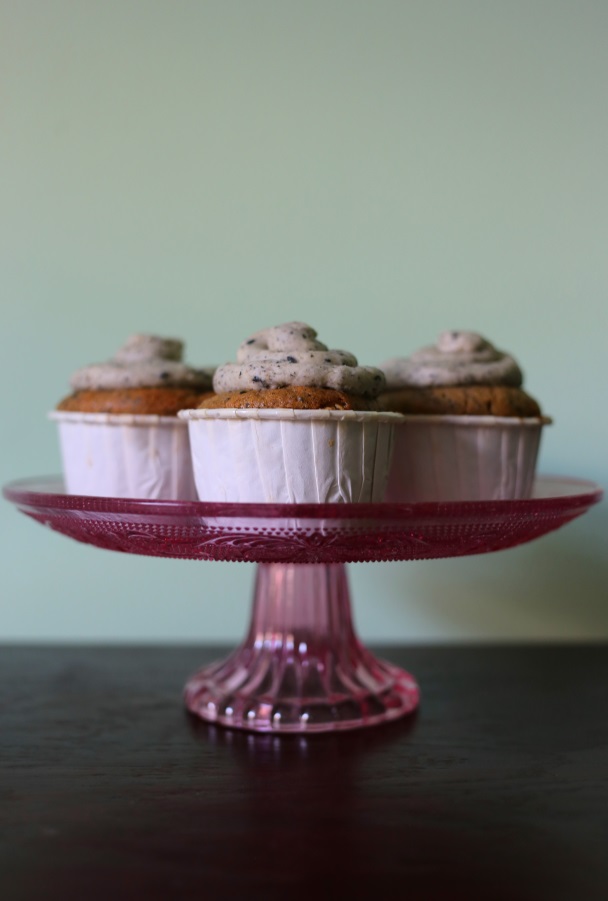
Black Sesame Cupcakes


One of my favorite flavors in the whole wide world is black sesame. Call me crazy, but it actually reminds me of peanut butter. The only other person I've met that feels the same way is my brother so maybe it's in the genes. Regardless, I love its aromatic fragrance when it's being toasted and how it adds a subtle, nutty flavor.

From my limited knowledge, the difference between black and white sesame seeds (aside from the color of the shell) is that the dark variety has a slightly stronger flavor. The rest is a mystery to me. Whatever the voo doo, it tastes amazing in desserts because it's so demure. It's ideal for people that do not like super sweet desserts - like my friend Young. 


My buddy Young doesn't do sweet. He has a more refined palette, which is shocking as I've seen this guy drink hot sauce and eat dog kibble as punishment for losing in competitions. Games were never fun for him in college if there wasn't something at stake. He and our friend Johnny came up with some cruel consequences for losing in Cranium or a hand of cards.  Such sweethearts. We love him all the same!

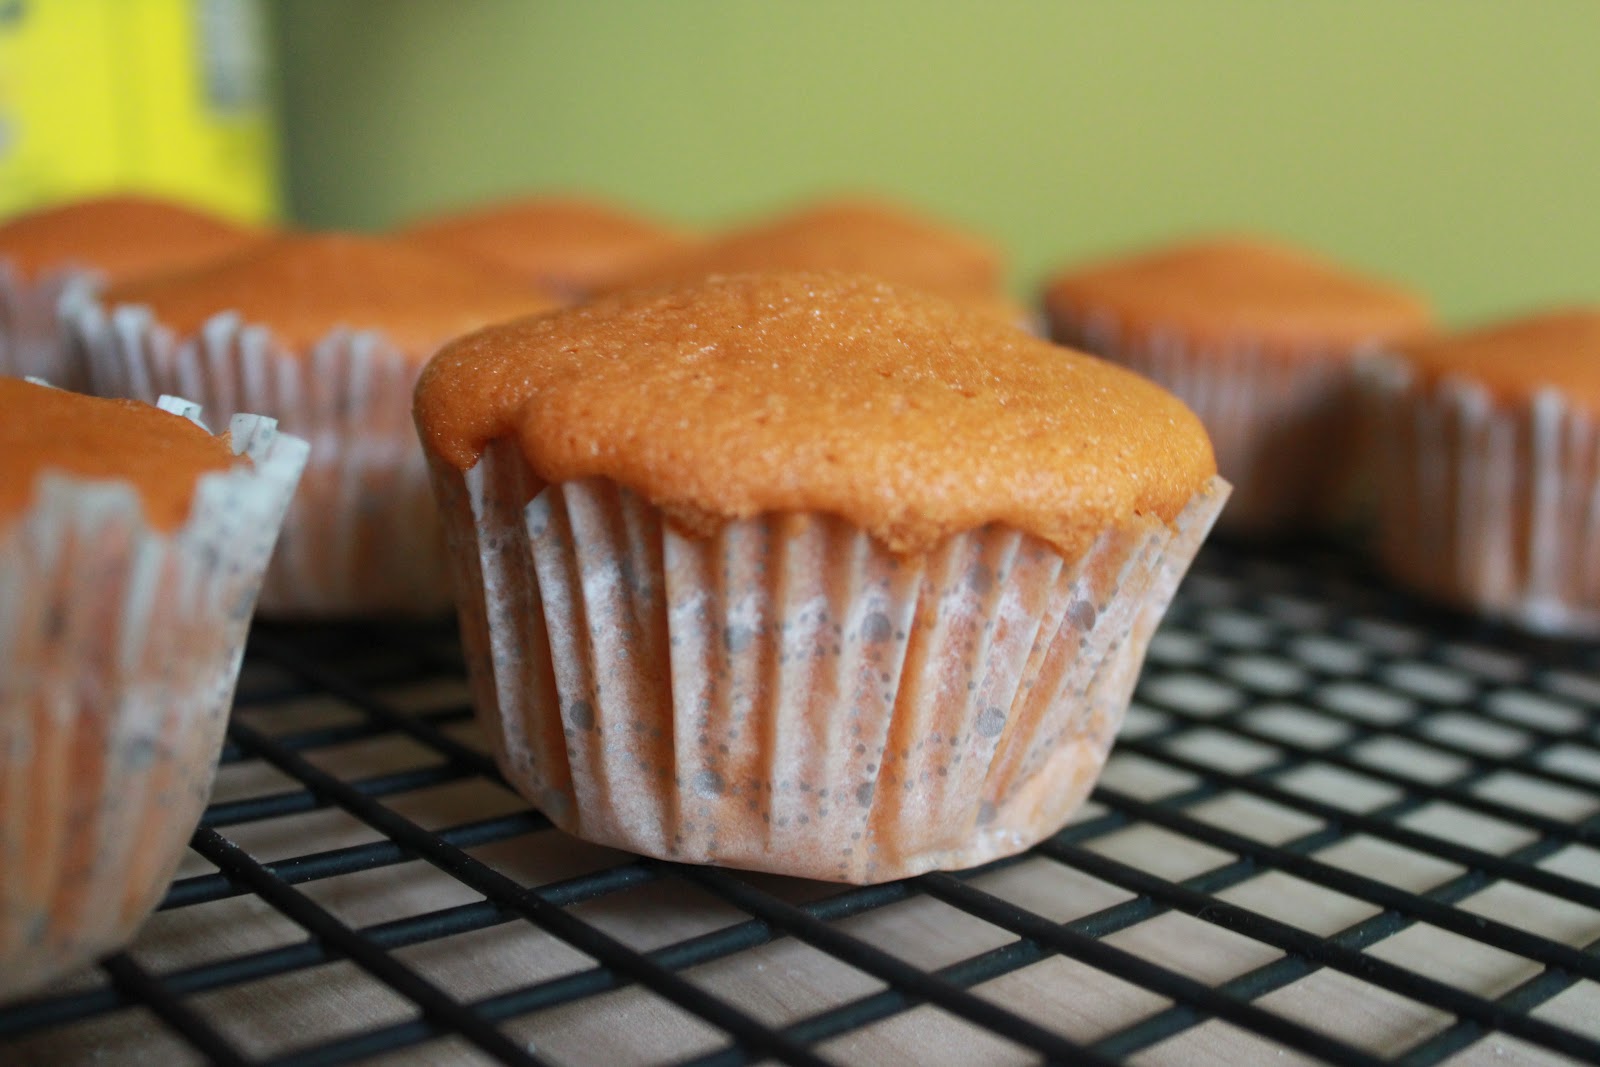
For his birthday, I made these lovely Black Sesame Cupcakes. It's not as simple as adding toasted black sesames to some vanilla cake- this recipe actually has tahini (sesame paste) in the batter. How exciting is that? There is a kiss of unsweetened cocoa to mellow out the flavors and vanilla extract to bring it all together. The result is a heavenly smelling, slightly brown, and moist cupcake.  These cupcakes get a gold star. My husband, whose not a fanatic like me, enjoyed them as did other non-sesame devotees. 


Where I struggled was the frosting. What goes with black sesame? Recommendations included matcha or vanilla buttercream; I even saw people pair it with lemon curd. The idea of citrus with sesame offended me at a fundamental level. The notion of a cream cheese base or meringue rattled in my brain but ultimately derailed.

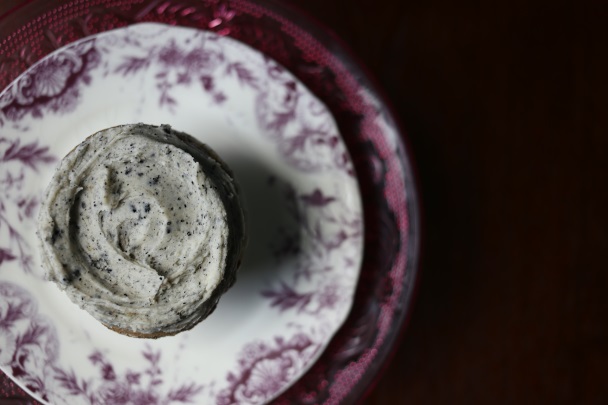
In the end, I decided to play it safe. Sesame on sesame. It's a basic buttercream with a little ground black sesame added. You do not need a lot of frosting on top, I preferred only a smear because the cake can hold its own. Remember, this isn't supposed to give a toothache with sugar!


If you really wanted to lose your mind and add to the sesame extravaganza, you could core a little space in the middle of your cupcake and add a sesame rice ball (jian dui) or store-bought sesame mochi, then cover it with frosting. But that's just madness.

Note: to grind the sesames, I used a coffee grinder because I knew this was out of my food processor's league. If you don't have a fancy piece of equipment, do not lose hope. Go for the good old pestle and morter method like you're making guacamole. They don't need to be powder perfect.

Black Sesame Cupcakes
Recipe from My Name is Yeh
These don't rise terribly high in the oven so feel free to fill them past the 3/4 mark in the cupcake tin. 

Black Sesame Buttercream Frosting
lightly frosts 24 cupcakes

8 tablespoons unsalted butter, room temperature
3 cups confectioners sugar
3 tablespoons ground black sesame seeds + 1 teaspoon water
3-4 tablespoons milk of your choice (almond, soy, coconut, etc.)
1/4 teaspoon vanilla extract


In a food processor or coffee bean grinder, pulverize the black sesames. Place in a small bowl and add water, 1 teaspoon at a time, until you create a paste. Set aside.

Beat the butter until smooth; add the confections sugar, 1 cup at a time, and the salt. Add the black sesame paste and vanilla extract. Add the milk 1 tablespoon at a time until you reach your desired consistency. You can always add more confectioners sugar if it's too thin.

Thursday, April 23, 2015

Potatoes and Peas Samosas


Let me tell you... making samosas from scratch... is an incredibly frustrating and rewarding experience. When I first saw this recipe for Potatoes and Peas Samosas from Playful Cooking, I thought, "well that doesn't sound so bad." I've made empanadas and dumplings before, how bad can it be? 

Three attempts later and I am still baffled. 

The filling is not the issue; that part is actually easy. We used the filling from the Picky Eater Blog because it sounded more like our kind of party with the addition of red onion and fresh ginger. We like our samosas to be bold. Mike made the filling the first time and were both eating it by the spoonful from the bowl. Always a good sign! Adjust accordingly to the amount of dough you're making and flavor to your spice level.

The dough takes patience. It can be stiff so keep adding water until it's manageable. We had a small adventure locating "carom seeds" and found them at an international market. There are plenty of recipes that do not incorporate the seeds into the dough but I surprisingly enjoyed the flavor.  They smell like thyme and give a slight edge to the flavor similar to anise. 

Ensuring that the samosas hold their form while frying is the issue. A big issue. 


During round one, I let the dough rest for way too long and it became incredibly tough and elastic. Most of the samosas fell apart in the oil which was deserved. Only a handful survived and our Nepali friends kindly raved about them. Their words of encouragement fueled my determination.

The second round is the one pictured in this post. I let the dough rest the exact amount of time and was not shy about adding water. Following Playful Cooking's directions, the oil started at room temperature.  I sealed the seams meticulously with a lil extra water and pinched, pinched, pinched! I was generous with the overlap of the dough and didn't heat the oil until after the samosas were added. 

As you can see, it turned out quite lovely! Perfect, crispy samosas. My work here is done!


Not so fast, young grasshopper. The third time I made these, my ego got checked. I followed the directions to the letter and did exactly what I had done the time prior. Over half of them opened while frying thus ruining the filling and oil. What a mess! How is this possible!? There's nothing worse than watching the oil bubbles seep into the seams of the dough and gently, relentlessly push them apart. Gurus of the Samosa world, I implore you... tell me what I keep doing wrong to incur the wrath of the evil vegetable oil? 

Maybe next time, I will use a different recipe for the dough to see if there's a difference. Another option is to bake them which is healthier... and I'm sure less stressful. Until the next episode!

For the tasty combination that is "Potatoes and Peas Samosas," check out the dough and methodology from Playful Cooking and the filling from Picky Eater Blog.

Friday, August 29, 2014

The Fried Chicken Battle of 2014: Momofuku vs. Bon Appétit


Last year, the husbun and I started compiling a list of restaurants that served the best fried chicken in the DMV. Bonus points were given if it was served with a waffle. It is a culinary weakness of his that needs to be satiated from time to time. In the number one slot stood "Eat Bar," an American gastropub located in Arlington, VA. He was so impressed with their rendition that he ordered it twice in one sitting. 

Then one day, much to his horror, they stopped serving fried chicken and waffles. The waitress said it had to do with the waffle iron. I could hear the depressing movie music playing in Mike's head as he stared blankly at the menu, the wind stolen from his fried-chicken-eating sails. 

This would not do. This would not do at all.

We took matters into our own hands and started looking over recipes. For years, I have had my eye on Momofuku's version. It was like no other fried chicken that I had ever read! For starters, there's no breading on the bird- does that even count as fried chicken? It is steamed first, then fried, and served with a side of vinaigrette. I kept pushing away the idea because we don't own a frier. This was the ammunition that I needed to suck it up and fry up some bird!

Just as I was about to put the grocery list together, a new Bon Appétit magazine came in the mail and lo, what was on the front cover? A tantalizing picture of fried chicken covered in spices and red with desire. Well, that's the hot sauce slathered on top but we'll get to that later.

It appeared that we were at a cross road: fancy fried chicken from Momofuku or traditional American from Bon Appétit? We decided that we'd push the burden onto our friends. It was time for a Fried Chicken Battle to see "whose cuisine reigns supreme." 

Making two different kinds of fried chicken for one sitting turned out to be not as traumatic as we anticipated. Mike and I thoroughly read the recipes over and it was clear that the key to success was timing.


Momofuku's chicken needs to brine for 1 to no more than 6 hours. It is then steamed for 40 minutes and needs to cool down completely, preferably over night.  Plus, before you can fry, the chicken needs to rest outside of the fridge for another 30 minutes to get back to room temperature. By doing the brine and steaming the day before, you will save yourself a significant chunk of time on game day. I also highly recommend making the Octo Vinagrette the day before because chopping the garlic and ginger can be time consuming.

While all that noise was going on, we found that Bon Appétit's "Nashville-Style Hot Chicken" is more straightforward. This chicken needs rest in salt and pepper for at least 3 hours before being fried. So, while the Momofuku chicken cooled over night in the fridge, we let the Nashville bird marinate alongside it. We prepped the flour and dipping batter so it would be ready to go at a moment's notice.


With the foundation laid the night before, all we had to do was heat the oil and dip. For a clean taste, we used grapeseed and peanut oil. I couldn't tell the difference between these two in terms of their effect on the bird. My brother generously loaned us his fryer to ensure there was no cross contamination in flavor; the other was cooked in a good ol' fashioned pot and thermometer.

The end results were both outstanding. These recipes couldn't be more different in terms of texture and flavor. Momfuku's vinaigrette made my taste buds rejoice while the hot crispy crust of Bon Appétit's made angels sing.

We put it to the vote and the winner was.... (insert drum roll)


Bon Appétit's Nashville-Style Hot Chicken

This is a crowd of fire eaters; everybody at the table loves spicy food and the Nashville-Style had the right amount of heat to be flavorful but not overpowering.  Serve with pickles and toasted white bread for an American classic. Personally, however, I voted for Momofuku because man oh man, that vinaigrette!

So grab some friends, an old fold out table, a cheap table cloth, and put these recipes to the test. They're easy to make and completely worth the time and effort.

Special thanks to my all-star sous-chef and husbun for holding it down as always. There was a moment where I got crazy eyes but he kept things in perspective.  

Momofuku's Fried Chicken recipe can be found in their self-titled cook book, Momofuku, as well as online. Bon Appétit's Nashville-Style Hot Chicken can be found in their June 2014 edition as well as on their site.

Thursday, April 10, 2014

Smokey Sweet Potato Bánh Mì


Back in 2007, the college roomies and I decided to enjoy spring break West coast style. As luck would have it, Yen-Nei's sister lived in Orange County and graciously agreed to play tour guide/host. She mapped out almost every culinary detail of our visit. We enjoyed bubble tea daily, authentic Chinese food, plenty of sushi, and sweet treats galore. Oh how I will never forget thee, magical black sesame bubble tea. 


It was during this trip that my taste buds became acquainted with a Vietnamese staple: bánh mì.  It is a sandwich that marries the best of two culinary cultures with a French baguette and Vietnamese fillings. The most common version that I have seen is filled with an assortment of meats (thinly sliced pork, head cheese, liver pâté) and topped with cilantro, a splash of fish oil, and pickled carrots/radishes. What really blew our minds was how these incredibly delicious sandwiches were so affordable; they were being sold at $3.50 a pop. It was a college kids dream come true! 

Until recently, finding good bánh mì in Virginia had been a struggle. We have found two spots that serve them right, Bánh Mì DC and Caphe Bánh Mì. It was my pleasure to introduce Mike to this tasty samich and anything with good bread is a win for this guy. We make a lemon-grass tofu version on a regular basis at home (one day I'll get around to documenting it). This post for Smokey Sweet Potato bánh mì piqued my curiosity. I love sweet potato but really... in a sandwich? Isn't that kind of like starch on starch on starch?  Only one way to find out.

Much to my surprise, this is recipe is satisfying and tasty. The sweetness of the potato becomes slightly caramelized in the baking process.  I tried to make even, thin slices but ended up with a few chunky parts as well. We kept these bulky ones to the side and treated them like fries, dipping them into a side bowl of extra sriracha-canola oil mayo.


The fillings were easy to make and basic- just chop up some carrots and radish and let them soak in white vinegar. I love the vibrancy that the radish provides in any dish with its blazing pink exterior. We chopped these toppings rather than do the common match-stick variety. They feel like more of a side salad. It's a matter of preference.

The recommended sauce (a white-miso and soy base) failed. I'm not sure if the miso went bad, the expiration was fine, but we felt that combination was no good. It was super salty and went straight to the sink. Instead, we busted out our "old faithful" of sauces as mentioned above: sriracha-canola oil mayo. It's so easy to make, easy to customize, and easy on the taste buds. As far as garnish, the peanuts were a little out of place. When I think of peanuts in Asian cuisine, it's more Thai-based in curries and dipping sauce. Try a handful and adjust from there.

Thanks to Earthly Feast for this wonderful dinner! Follow the link below for original recipe; below is our minor tweeks.


Smokey Sweet Potato Bánh Mì
slightly modified from Earthly Feast
generously serves 2

Quick Pickle Carrots 
3 carrots, cut into matchsticks or thinly sliced
4 radishes, cut into matchsticks or thinly sliced
1 cup water
1/2 tablespoon salt
1 tablespoon sugar
1/4 cup white vinegar

Smokey Sweet Potatoes 

2 sweet potatoes, peeled and sliced into strips about 1/4 inch thick
2 tablespoons high heat oil (i.e. olive oil)
Pinch of sea salt
Black pepper
Red pepper flakes
Dash of liquid smoke

Spicy Mayo 
2 tablespoons canola oil mayonaise
1 teaspoon srichacha or canned adobo pepper sauce

Sandwich Assembly 
1 baguette
1 jalapeño
cilantro
lime

Start by making the quick pickle. Bring water, vinegar, salt and sugar to a boil. Let cool for a minute. Pour liquid over the sliced carrots and radishes into a clean jar with a lid. Cover and chill for at least 30 minutes.

Preheat oven to 425F and line baking sheet with aluminum foil.  

In a medium bowl, toss the sweet potato with oil, salt, black pepper, red pepper, and a dash of liquid smoke to evenly coat. Spread evenly across the baking sheet. Bake for 15 minutes and check the tenderness of the sweet potato. Depending on how thinly you sliced the potato will determine how long it needs in the oven. If they're still too hard, give it another 10 minutes and check again. 

For the spicy mayo, simply combine the canola oil mayo and hot sauce. Adjust to your heat preference.

To assemble, slice the baguette and spread a thin layer of mayo. Top with the carrots and radishes so that they stick to the samich. Top with sweet potatoes, add a splash of lime, and garnish with cilantro and jalepeno.

Monday, January 28, 2013

Won Ton Soup


It's finally chilly in Northern VA! We had our first dusting of snow last week. We were all crossing our fingers for more, but it was just enough to make getting to car precarious. The fact it took until January to get here makes me a little wary of the planet's health. Bundle up!


To help us cuddle in the sweatah weathah, we decided to make a feel good soup many people overlook: won ton. It's a Chinese-American takeout classic. It's essentially dumplings floating in delicious broth. My favorite part is knowing what goes into the pot! You can add more veggies if you want, but we stuck with bok choy, green onions, and peas. 


The Chinese-American traditional version consists of ground pork with shrimp. We went to two grocery stores and neither carried ground pork! I didn't realize this was a hard product to find or maybe it's just the season. I substituted with a healthier alternative of ground turkey cooked in bacon grease  mixed with the crumbled bacon. Don't go crazy on the bacon- a strip or two will do! Just enough to add some flavor. And don't forget the crispy won ton wrappers on top! You can buy these in the international section or make them yourself


Now I must warn you... the recipe and ingredients are simple and easy to work with. Actually forming the won tons is time consuming. It's a bite sized portion of meat in each dumpling. This yields an army of delicious tasty dumplings that will be gobbled up in a pinch. Make sure you have back up or else you're going to spend a lot of time in the kitchen. Make it a date night! Invite a friend over for dinner and movie! Tag team!

For the delectable recipe, check out Starry Night's post on allrecipes!

Monday, November 19, 2012

Curry In a Hurry


This recipe is fantastic! It's super quick, versatile, and most importantly- delicious. There are many different kinds of curry but I have found this to be my favorite one to make at home. The base is simply coconut milk and curry paste. 


You can find curry paste in the "Asian" section of your local grocery store. The original recipe suggests green curry paste but that never seems to be in stock, so we went with our usual red. It all depends on your preference. Green tends to be spicier and paired with eggplants, bamboo shoots, etc. Red curry winds up with peppers and onions. At least that's the trend that I have seen- don't lie to me Thai restaurants. 

Honestly, the last time I made this recipe, it included boiled red potatoes so don't feel limited by the recipe.  Use what's available in the salad bar if you're running short on time. Spice it up! I cook the base with red pepper flakes. Anything goes!


This meal is actually brought to you by Tropical Storm Sandy. We were very lucky in Virginia. Our house didn't lose power. In a recent trip to New York (trust me, it was not for happy reasons), we saw the ramifications all over Long Island. The gas lines were ridiculous and I felt very blessed to have a family that would never leave us hanging. Muito obrigada Tia Rose e Tio John, te amo. It's hard to believe a storm in the states could cause such damage. Please offer assistance if you're able.

With a simple grocery list and 15 minutes, you too can enjoy this warm and comforting meal. The only "modification" I made was a little less water because Mike likes his curry thick. It still wasn't "thick" enough, so I am going to try reducing the coconut milk next time to concentrate the flavor.  And honestly, this recipe could not come at a better time. Life's been busy. That doesn't mean you have to sacrifice dinner.

Serve with/without ride or bread if you need them carbs.

For the recipe, check out 101cookbooks!

Friday, August 17, 2012

Baked Mini Green Tea Donuts


Years ago, I fell in love in Hong Kong. He was warm, sweet, and green. I didn't expect to meet him but the moment our eyes locked- we knew- this is happening. At least that's how it played out in my head. After all, I'd never seen a green tea donut before.


As super lame as this may sound... it was a Krispy Kream donut. It's crazy how chain restaurants offer better food outside the states! In Hong Kong, McDonalds has spicy chicken wings and Starbucks serves red bean pastries. Come on USA- we're a melting pot! Offer some of these international tasties!


The only donut I get at Krispy Kream is the standard issue glazed and it has to be fresh out of the frier. They taste like buttery clouds. What I loved about the Green Tea version was the simplicity. It had the texture of a cloud, but without the thick butter/sugar taste. Matcha isn't an overpowering flavor, it provides a beautiful balance. Loves!


Ever since that chance encounter overseas, I've wanted another Green Tea donut. I took a chance and modified these mini donuts with matcha power and coconut milk.  The result was a super cute and addictive treat! They're moist and subtle with a hint of matcha. There was no heavy coconut flavor, but taste the batter to regulate how much matcha you want to incorporate.


And yes, they're baked. It's a little healthier and eliminates the hassle of oil. The glaze has a confectioners sugar base, but feel free to add a little more matcha! Green tea, all day every day!


Baked Green Tea Donuts
makes 24 mini donuts

2 cups all-purpose
1/2 cup natural cane sugar or granulated sugar
1 1/2 teaspoons baking powder
2 generous teaspoons matcha powder
1 teaspoon vanilla extract
1/2 teaspoon salt
1/4 teaspoon baking soda
1 cup unsweetened coconut milk
1/4 cup milk
2 eggs
1/4 cup butter, softened
1/2 cup confectioners sugar
1 teaspoon matcha powder (optional)
1 tablespoon milk or water

Preheat the oven to 375 degrees. Grease a donut pan or regular cookie sheet.

In small sauce pan, bring coconut milk to a boil then lower heat to medium-low. Cook for about 15 minutes, stirring occasionally, until coconut milk is reduced to 1/2 a cup. Set aside to cool to room temperature.

In the bowl of your stand mixer, mix together the dry ingredients.

Beat in the cooled reduced coconut milk, eggs, milk, and butter until well combined.

Fit a pastry bag with a large tip and fill with the donut batter. Alternately, fill a large ziploc bag and snip off the end.

Pipe into the donut maker, donut pan, or just pipe in circles on a greased cookie sheet. The dough is thick enough that it should stay in the general shape you pipe it in while in the oven.

Bake for about 10-12 minutes or until golden brown and cooked through.

Cool on a wire rack.

Mix together powdered sugar, matcha, and milk/water in a second dish for dipping or drizzle on top.

Store in an air-tight container.

Friday, August 10, 2012

Skinny Pad Thai


Is it bad that our current TV fix is The Cosby Show? Yeaaa boiee! We're already up to season 3- the one with the crazy salsa music in the theme song. I need doses of wholesome content that real life doesn't necessarily provide. For example, last night leaving the grocery store parking lot, a little blonde middle school girl seated in the passenger side of her mommy's car flicked me off at the intersection. Apparently my stop wasn't up to her standards. I wanted to bust a U-turn and say something to her mother, then realized she probably got those manners from her. Charming.


Yes indeedy, I NEED shows like Cosby. It's a little treat to look forward to. I love it when we get home after work. Kick off my shoes. Put on the radio (yes, the radio not ipod). And immediately start to cook something yummy, like this Lite Shrimp Pad Thai. Mike hovers around and helps, or knows to get out of the way and plays video games in the living room. It's very soothing. Then we get to plop on the couch, unwind, and watch an episode. The good life, no?


This recipe is an adaption of Candice Kumai's Skinny Pad Thai. The key difference is she uses firm tofu (heck yes) and mine uses shrimp. I didn't have peas on hand so I substituted with edamame which I think paired well. Oh, and no almonds in my version either- just slightly toasted, unsalted peanuts and a few crushed in the food processor as garnish. I've always associated pad thai with peanuts.


Note: If you want to substitute with shrimp or any other meat for that matter, be sure to halve the amount of tomato paste and soy sauce, so 1 1/2 tablespoons instead of 3. If you don't, it will kind of taste like Asian spaghetti. The tofu helps absorb and disperse the paste, you only want a thin coat. I used the full amount and found it too much without the tofu.


My favorite part was cooking the egg in sesame oil instead of olive oil. Ooo man so good! Mike was pleading for more egg but I stuck to the book. Make adaptations as your tummy see's fit! Leave out the egg and you got a vegan dish. This recipe satisfies the craving for thai food and you can feel good about making healthy food choices. 

For the Candice's version, just click here.

Have a fantastic weekend. Sleep in late, wear fuzzy slippers around the house, treat yourself to yummy coffee (Caribou here we come!), take a long walk, live in the present, and seriously, bump this track.

Wednesday, April 4, 2012

Vegan Red Curry: Tofu, Red Pepper, and Sweet Potato


Lately, my family has been teasing me to turn in my "ethnic" card. I love vegetables and don't pine for meat the way they do. Growing up, there were three components to every meal: 1) rice or small noodles with red beans; 2) a dead animal; and 3) a salad with olive oil and vinegar for dressing. Dinner was on lock.


As I got older, I started to say foreign words, like sushi and gluten. An entire meal could be a spruced up salad. Scandalous, right? Don't get me wrong- I love my mom's cooking and it was very healthy. Nothing was fried (minus octopus and some desserts) and it was all home-made. We cook frequently, but I will never be able to match what mom used to do every single day.

This vegan red curry dish is great for those with limited time and are health conscious. It's from Men's Health Magazine but with a lot of modifications. For starters, the steak is substituted with semi-firm tofu, one of those weird things my family doesn't believe in. There is additional seasoning, vegetables, and peanuts! Without the spices, we found the red curry terribly bland. The heat is cranked up with complimentary spices. I love the soft, smooth texture of the sweet potatoes (chop them small or else it will take forever to tenderize) with the subtle crunch of the red pepper.


The curry pictured above is from the next day and a bit thicker. The longer you cook the coconut milk, the more concentrated it becomes. If you want it thinner, hold off on adding it until the last 10 minutes of cooking. We like it thick! 

Serve with some fluffy brown rice instead of plain jasmine.


Vegan Red Curry: Tofu, Red Pepper, and Sweet Potato
adapted from Men's Health Magazine
4 large servings

1 tablespoon peanut oil
1 large shallot
1 medium sweet potato, peeled and cubed (about the size of a sugar cube)
1/2-1 red pepper, sliced
1 tablespoon freshly grated ginger
1 teaspoon lime zest
1 1/2 tablespoons red curry paste, divided
1 package (14 ounce) semi-firm tofu, drained and crumbled
*1 tablespoon fish oil (optional for non-vegans)
1 can (13.5 ounce) coconut milk (lite or regular)
1 tablespoon minced garlic paste
2 teaspoons cayenne pepper
1/2 teaspoon crushed red pepper
1/4 teaspoon crushed ginger
3/4 teaspoon black pepper
2 kaffir leaves (optional)
1 tablespoon ground cilantro or fresh chopped cilantro to garnish
Juice of 1/2 a lime

1/4 cup unsalted, toasted peanuts (crushed if so desired in a food processor)

Marinate the tofu in a medium bowl with the 1/2 tablespoon red curry paste, coconut milk, lime zest, and fish oil. Add cayenne pepper, crushed red pepper, and ginger. Set aside and marinate for about 10 minutes.

Heat a large skillet with peanut oil. Add shallots and ginger; let it cook till fragrant, about 3 minutes. Stir in 1 tablespoon red curry paste for about 30 seconds. Add tofu mixture.  Heat for about 2 minutes.

Add the chopped sweet potatoes, sliced red pepper, kaffir leaves (optional), and garlic paste. Bring mix to a boil and then reduce to a simmer. Cover and cook until potatoes are tender, about 10 minutes, stirring on occasion. Add the black pepper and cilantro. Let it go for another 5 minutes. Add in lime juice and give it a good stirring!

Serve with toasted peanuts on top and some fluffy brown rice! Yay for vitamins!

Monday, March 26, 2012

Thai Iced Tea Cupcakes


This is a batch of cupcakes I've been dying to post: Thai Iced Tea Cupcakes.  I've had the idea for quite a while, but no drive to make them until my girlfriend's birthday came up. She loves iced Thai tea (personally, I'm a Thai iced coffee kind of girl) and I love making treats for people I care about. The search commenced for a confectionery version of this tasty beverage. 


In my search across the vast internet, recipes for this flavor are few and far between.  So. I decided to take a crack at it and crossed my fingers.


The result was this lovely cupcake. I truly hope that you like it as much as we did. 


Thai tea is made from strongly brewed black tea mixed with other spices such as crushed tamarind, star anise, cardamom, etc. Condensed milk or sugar is used to to sweeten things up and topped with heavy cream or some other rich form of milk. The most distinct attribute is the rich amber color.


To ensure the flavor was not obstructed, I went with my go-to white cake recipe and made some modifications. Got to love white cake, it's like working with fresh fallen snow. I used over a cup of brewed thai tea- not the instant stuff either! I randomly selected this one, Hand Brand, while at the global market. Simply follow the directions, but double the amount of tea leaves to make it more potent. Just opening the bag is aromatic!

This cake is super fluffy and moist. The flavor is not overly sweet, it's mild and dreamy.

Thai Iced Tea Cake

As for the frosting, it was a difficult toss up. Option 1: a butter cream flavored with more Thai iced tea, or Option 2: condensed milk icing. I really wanted to incorporate condensed milk as that's one of its distinct features. We tried out both. 

Honestly... you cannot go wrong either way.  My recommendation is to use both. You can drizzle the condensed milk frosting on top and let it drape across the cake, or you can use an apple corer to make a well in the center of the cake. Drop a spoonful in the middle to make a sweet surprise center! Give the condensed milk some time to firm up- it's will stop dripping, I promise. Then, top it off with a swirl of the butter cream for a truly beautiful and delicious creation.

Top with beautiful, peach colored sprinkles to really set out that distinct amber color!


In the end, I never got to share these cupcakes with the birthday girl. Instead, I made them for my beloved college room mate's visit to VA this past weekend. She just signed her offer letter and is graduating from the University of Michigan with a PhD in Chemistry. I am SO PROUD of you Asako! You guys have to understand how HARD she worked. It takes one hell of a person to remain so persistent. You truly are amazing hun. 


It was only fitting to add a cute little flag to the victory!


Squirrel from Sofie Skein.


Thai Iced Tea Cupcakes

Cake
2 3/4 cups cake flour
1 1/4 cup brewed thai tea, at room temperature (brew with twice the amount of recommended tea and the optional whole star anise)
6 large egg whites (3/4 cup), at room temperature
1 teaspoon star anise extract
1 teaspoon vanilla extract
1/2 teaspoon cardamom
1 3/4 cups granulated sugar (12 1/4 ounces)
4 teaspoons baking powder
1 teaspoon table salt
12 tablespoons unsalted butter (1 1/2 sticks), softened but still cool

Glaze (optional)
1/4 cup thai tea, at room temperature

Option 1: Buttercream Frosting

3 cups confections sugar
1 stick unsalted butter, at room temperature
1 teaspoon star anise extract
2 tablespoons thai tea, at room temperature
a dash of cardamom

Option 2: Condensed Milk Icing (from Martha Stewart)
4 tablespoons unsalted butter, room temperature
7 ounces of sweetened condensed milk
dash of course salt
3/4 cups confectionery sugar, sifted


Preheat oven to 350. Line 24 cupcake tins. Set rack in middle position.

Pour cooled tea, egg whites, and extracts into 2-cup glass measure, and mix with fork until blended.

Mix cake flour, sugar, baking powder, and salt in bowl of electric mixer at slow speed. Add butter; continue beating at slow speed until mixture resembles moist crumbs, with no powdery streaks remaining.
Add 1/2 of tea mixture to crumbs and beat at medium-high speed for 1 1/2 minutes. Add remaining 1/2 cup of tea mixture and beat 30 seconds more. Stop mixer and scrape sides of bowl. Return mixer to medium (or high) speed and beat 20 seconds longer.

Fill tins until about 3/4's full. I love using the ice cream scoop for this. Bake until thin skewer or toothpick inserted in the center comes out clean, 17-19 minutes.

Let cakes rest in pans for 3 minutes. Loosen from sides of pans with a knife, if necessary, and invert onto wire racks. Let cool completely.

If you want, you can brush on some extra tea with a baster. 

For the icing, 

For the buttercream frosting, beat the butter until smooth. Add the sugar until well incorporated. Add the extract, spice, and Thai tea.

For the icing, whick together butter, milk, and salt with an electric mixer on medium speed. Whisk in sugar 1/4 cup at a time until combined. Then whisk on high speed until thick and smooth. Use immediately.

Saturday, September 24, 2011

Pork and Napa Dumplings

Dumplings. That's what's up. If you're not on that dumpling tip, you need to be. They're delicious and nutritious, a delightful treat that's yummy for the tummy.


At first, the thought of making dumplings was intimidating. The dough looked magical and elusive- it was a mystery that I left to the pro's and restaurants.

Then I purchased "Asian Dumplings" by Andrew Nguyen during Border's going out of business sale (that never seems to go out of business). Sound familiar? That's because it's the same book I got the Incredible Chinese Chile Oil recipe. It is also the same sauce you see drizzled all over the dumplings... so good.


The book is very reader friendly and has simple illustrations to break down all the wrapper styles. In short, it's a gem for every level of dumpling maker. The recipes are delicious and the instructions are merciful. Don't have a food processor? It's cool. There are directions for every type of kitchen set up as well.


This is my first attempt and I stuck it out with 2 of the most basic recipes in the book: basic dumpling dough with pork and napa cabbage. This dough is the foundation of many Chinese dumplings and has a medium thickness; it's flexible and easy to work with. And do not freak out when you see the directions. It's flour and water. Done. You can make it ahead of time and leave it in the fridge or use it immediately.

 
As for the filling, it's hard to go wrong with pork and vegetables. The ground pork meat is hard to over cook and napa cabbage is amazing at absorbing flavor- especially if you cut it with the leaves stacked on one another and at a sharp angle. Don't go chop chop chop crazy. Put a lil love into it!


Don't fear the dumpling. I forbid it. Nobody cares if they're not picture perfect. The taste is what matters. Just give it a try and you'll be amazed with the results.

Basic Dumpling Dough
from Asian Dumplings

10 ounces (2 cups) unbleached all pupose flour
About 3/4 cups just boiled water
*dash of turmeric powder for that golden color (optional)

Yields: makes 32 medium dumplings and 24 fatty dumplings

To prepare the dough in a food processor, put the flour in the work bowl. With the machine running, add 3/4 cup of water in a steady stream through the feed tube. As soon as all the water has been added, stop the machine and check the dough. It should look rough and feel soft but firm enough to hold its shape when pinched. If necessary, add water by the teaspoon or flour by the tablespoon. When satisfied, run the machine for another 5 to 10 seconds to further knead and form a ball around the blade. Avoid overworking the dough.

Alternatively, make the dough by hand (which I did). Put a bowl atop a kitchen towel to prevent it from slipping while you work. Put the flour in the bowl and make a well in the center. Use a wooden spoon or bamboo rice paddle to stir the flour while you add 3/4 cup water in a steady stream. Aim to evenly moisten the flour. It is okay to pause to stir or add water—it is hard to simultaneously do both actions. When all the water has been added, you will have lots of lumpy bits. Knead the dough in the bowl (it is not terribly hot) to bring all the lumps into one mass; if the dough does not come together easily, add water by the teaspoon. 

Regardless of the mixing method, transfer the dough and any bits to a work surface; flour your work surface only if necessary, and then sparingly. Knead the dough (it is not hot) with the heel of your hand for about 30 seconds for machine-made dough, or about 2 minutes for handmade dough. The result should be nearly smooth and somewhat elastic; press on the dough; it should slowly bounce back, with a light impression of your finger remaining. Place the dough in a zip-top plastic bag and seal tightly closed, expelling excess air. Set aside to rest at room temperature for at least 15 minutes and up to 2 hours. The dough will steam up the plastic bag and become earlobe soft, which makes wrappers easy to work with.

After resting, the dough can be used right away to form the wrappers. Or, refrigerate it overnight and returned it to room temperature before using.

Pork and Napa Cabbage Filling
from Asian Dumplings

2 cups lightly packed finely chopped napa
1/2 teaspoon plus another 1/2 teaspoon salt
1 tablespoon finely minced fresh ginger
1/4 cup chopped Chinese chives or scallions
2/3 pounds ground pork (fattier kind is better)
1/8 teaspoon ground white pepper
1/4 cup Chicken stock or water
1 1/2 tablespoon light soy sauce
1 tablespoon shaoxing rice wine or dry sherry
1 tablespoon canola oil
1 1/2 tablespoons sesame

Put cabbage in a bowl and toss with the 1/2 teaspoon salt. Set aside for about 15 minutes to draw excess moisture. Drain in mesh strainer, flush with water, and drain again. Dry thoroughly.

Transfer cabbage to bowl and add ginger, chives, and pork. Stir until it comes together.

In a small bowl, stir together remaining ingredients. Pour over pork mixture and stir until there are no visible chunks. To develop flavors, set aside at room temperature for 30 minutes. It should be about 2 cups of filling.

Now would be a good time to make the wrappers if you haven't already.

Before assembling, line a baking sheet with parchment paper. For each dumpling, hold a wrapper in a slightly cupped hand and scoop about a tablespoon of filling. Place it slighly off center towards the upper half of the wrapper, pressing and hsaping it into a flat mound and keeping it 1/2 inch from all sides. Fold and pleat to to enclose filling.

Place finished dumplings on baking sheet and cover with dry kitchen towel. Repeat with remaining wrappers.
Once all are assembled, you can refrigerate in plastic wrap, freeze in ziplock, or cook immediately.

To cook, half fill a large pot with water and bring to a boil over high heat. Add half the dumplings, gently dropping into water. Nudge dumplings apart with wooden spoon to keep them from sticking together. And/or to the bottom of the pot. Return water to simmer and lower heat to mantain the simmer and gently cook; a hard boil can make a dumpling burst. Cook for about 8 minutes, or until they float to surface, look glossy, and are puffed up and a tad translucent. Use slotted spoon or skimmer to scoop up the dumplings. Cover serving plate with a bowl to keep dumplings warm. 

Return water to a boil and bring it back down to a simmer. Let it reheat for a minute or two and start all over again. Personally, as one dumpling finished I would another one to expediate the cooking process.

Serve with soy sauce, hoisin, etc.