Thursday, May 30, 2013

Margarita Cupcakes - Lime & Tequila!


This past Cinco de Mayo, my girlfriend and her hubby invited us over for a delicious Mexican-inspired dinner and margaritas. While none of us are of Mexican descent, we couldn't possibly pass up an opportunity to get together and enjoy delicious food! (Plus, if you read about that day in history- the significance is inspirational) I asked Ashley what I could bring to the festivities and she threw me a curve ball: margarita cupcakes.


The issue with making a margarita cupcake is, well... I've never had a margarita! The basic elements are tequila and lime; sometimes they throw in a little citrus. I was a bit weary of using tequila only because of the fantastic stories a friend in college used to tell me. Apparently, the kid could drink with the best of them but something about tequila caused them black out every time. 

Geez, that's exactly what I want to be serving friends and loved ones! Everything in moderation.


This version is a marriage of several ideas and crossed fingers. The base is from Bon Appetit and the frosting is my standard 7 minute frosting. I really liked the rimmed frosting technique by Love From the Oven but didn't want to use cream cheese out of fear it would over power. Instead, I sprinkled sea salt on top.


Mike bought two tiny bottle of tequila from the ABC store. I gingerly sniffed the bottle and shook my head. Potent! After making the mix, there was a little bit left in the bottle. Mike thought it would be good idea to take a sip; the look of disgust was priceless. And I quote, "that stuff is disgusting." I guess we're not tequila lovers. 


The base is a light, soft yellow cake with just a touch of lime. It came out perfectly! I omitted the food coloring from the original recipe and used regular limes instead of key lime. I think in this scenario they're interchangeable. The frosting, as always, came out lovely. I don't know if I will ever be able to go back to butter cream! 7 minute Frosting is just so cloud like!


What really defines this cupcake, in my opinion, was the little sliver of lime and sprinkle of salt. As you eat the cupcake, suck on the lime for a hit of sour. It's fantastic with the dusting of salt on top!  The crowd claimed they made the margarita flavor cut. You be the the judge! Either way, it's a yummy treat! 

Margarita Cupcakes

For the Cupakes
by Bon Appetit

1 cup all purpose flour
3/4 cup self-rising flour
1/2 cup (1 stick) unsalted butter, room temperature
1 1/4 cup sugar
2 large eggs
2 1/2 tablespoons fresh lime juice
1 tablespoon finely grated lime peel
3/4 cup buttermilk

Glaze
1/4 cup tequila


Preheat oven to 350°F. Line standard muffin pan with 12 paper liners. Whisk both flours in medium bowl. Beat butter in large bowl until smooth. Add sugar; beat to blend. Beat in eggs 1 at a time, then next 3 ingredients (batter may look curdled). Beat in flour mixture in 3 additions alternately with buttermilk in 2 additions. Spoon scant 1/3 cup batter into each liner.

Bake cupcakes until tester inserted into center comes out clean, 20 to 25 minutes. Cool 10 minutes. Remove from pan; cool. 

Dip a pastry brush into the tequila. Brush on top of each cupcake. Allow it to absorb for a minute and then apply a second coat. If there's any left over, leave it for for the frosting. 


7 Minute Frosting

1/2 cup plus 1 tablespoons sugar
1 1/2 large egg whites
1/4 teaspoon cream of tartar
dash of salt
1-2 teaspoons tequila, to taste

Garnish
1-2 key limes, thinly sliced
1 tablespoon of sea salt

In large metal bowl, whisk together 1/6 cup water, sugar, egg whites, cream of tartar, and salt. Set bowl over pan of barely simmering water and mix with handheld electric mixer at low speed. Gradually increase speed to high, beating until mixture holds stiff peaks, about 5 minutes.

Transfer bowl from pan to folded kitchen towel on counter and continue beating until mixture is cool and billowy, about 2 minutes more. Fold in tequila, tasting as you go to make there's enough for your palette.

Garnish with a light sprinkle of sea salt, about a pinch per cupcake. I focused on the edges! Add a little slice of lime; I used key limes because they looked so freaking cute. 

Thursday, May 23, 2013

No-Bake Nutella Cheesecake with Oreo Crumble Crust


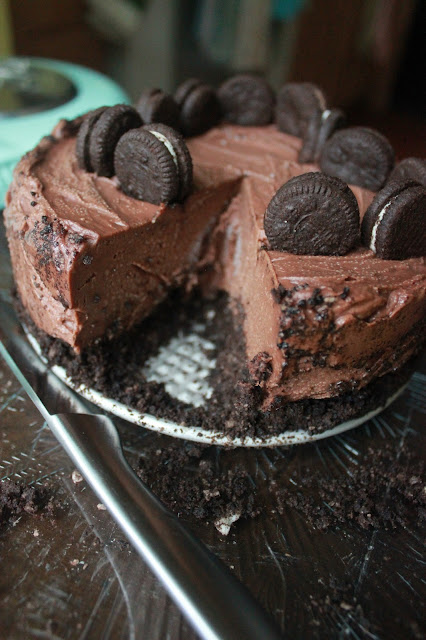
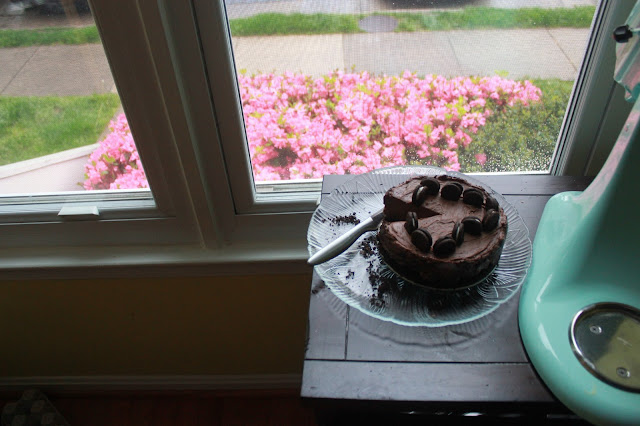
Evil has a face. Well... more like a cheesecake. Specifically speaking, this No-Bake Nutella Cheesecake with Oreo crumble crust is one for the books. And the scale! Grab a glass of milk and get ready!


I made this sweet surrender for Mike's birthday last month. In keeping with tradition, Oreos had to be involved but I tried to use them as an accent instead of the main of focus. I started browsing recipes and this little number caught my eye. Nutella? Oreos? Heck yah. 

Mike and I are both Nutella lovers- a connection we made back in 2009 as the fat-kids after dance practice. He's the only guy I'd met who openly salivated at the sight of Nutella. This is the stuff that real friendships are made of!  When I saw this recipe on Cuisine en Scene, it only seemed appropriate to give it a shot.


This cake is extremely easy to make and the ingredient list is very simple. All you need is cream cheese, nutella, dark chocolate, oreos, and a touch of butter. That's it! First you make the crust by crumbling the cookies with some butter and pressing it to the bottom of a springform pan. Then, you mix the rest together, pour into the pan, and let it firm up the fridge. The result is 100% sinful. Luscious, rich, and decadent all in one pan! It's a neat little mix because the sweetness of the chocolate is balanced by the cream cheese. You literally can only handle eating a sliver at a time because it's so intense.


There are a number of variations that come to mind after making this cake. In terms of ingredients, I would like to try using a low fat alternative to cream cheese like neufchâtel. Same texture overall and mitigated calories! I don't think there's such thing as a low fat version of nutella.  Because of it's density, this would make a divine mini dessert for a party! You could use cupcake or square tins with parchment paper lining to make ensure it doesn't stick. These could even be made into small balls, rolled in oreo crumbs like a cake pop! Get crafty! Make sure you check it out! 


By popular request, here is the translation of this recipe. Please note, you can also use Google Translate whenever you're in a pinch. I am not fluent in French and it's a great resource! There are so many wonderful recipes from other countries, it really does come in handy.

Merci beaucoup à Cuisine En Scéne pour cette recette dangereux! C'est magnifique! Nous avons mangé tout ça! Et pardonez-moi si ma français est mal. J'ai étudié la langue quand j'étais jeune! Bon appétit!

{Thank you very much to Cuisine on Scene for this dangerous recipe! It's magnificent! We ate all of it! And pardon me if my French is bad. I studied the language when I was young. Bon appétit!}

No-Bake Nutella Cheesecake with Oreo Crumble Crust
from Cuisine En Scéne

Lightly butter a 6 to 8 inch spring form pan, depending on how thick you like it. I used a 6-inch spring form pan.

Crust
154g Oreos, powdered (I used a food processor)
1 tablespoon butter, melted

Filling
400g cream cheese
270g Nutella
70g dark chocolate chips (preferably bittersweet)

Decoration
A bag of mini Oreos

Mix Oreos and melted butter, press firmly onto the bottom of the spring form pan to make crust.

Place the dark chocolate in a microwave safe bowl. Add the nutella. Heat on low in 10 second increments, until chocolate is melted. Add the cream cheese and mix well to obtain a smooth cream.

Carefully pour the cream on the oreo base crust, starting with the center and spreading the cream to the edges with the back of a spoon. Decorate with the mini Oreos and chill overnight.

Saturday, May 18, 2013

Pre Wedding Muse


As I sit in the living room, petting Autumn, I cannot help but take it all in. I am more than happy to be marrying my best friend. I know that's cliche but it's honest. We met doing something we both love- dancing- and formed a great friendship over the years. It was filled with car rides to practice, epic long emails, sharing songs, trash talk, laughing at the lengths we'd go to all hang out, letting our creativity bounce off the walls (the muse & interpreter), hoping "she dreams of me", wishing on stars in Costa Rica, and unconditional encouragement. That's one of the things that really caught my heart about Mike.... his positivity. All we've ever wanted was the other to be happy and we pushed each other to be better people (just "keeping the honest people honest!"). I knew from the moment I heard his laugh that this guy was special and I wanted him in my life. I just can't believe I would be so lucky to have this engagement ring on my finger. 

Te amo.

Friday, May 17, 2013

Apple Cream Cake


This cutie cake was made for my mother in celebration of her 21st birthday (wink wink). She's the spunky sort. Honestly, her direct manner sometimes makes me put my head under the table. For that reason, I love making her baked goods. There is no question that her feedback will be blunt. When i ask, "what do you think?"- I'm not fishing for compliments. I enjoy the assessment and dialogue thereafter because it's chance to learn. 


The go-to delights for the little lady are tiramisu, dark chocolate, and bread pudding. She has a sweet tooth which she tries to curb with fruits. This year, my brother said, "let's switch it up." Fortunately, this Apple Cream Cake has been on the watch-list and she is an apple lover. When we were kids, she used cut the apple with one hand and hand us the slices with the other. That's what a lifetime of peeling potatoes in Portugal gets you!


I was a bad baker and didn't read the recipe in full before getting started. My first revelation was this is the first non-vegan cake I have ever made that has no butter. How awesome is that? The cake comes out just right- not too sweet and not too bland. It makes for a great base!


My second revelation was the frosting is apple butter mixed with whipped cream. I got through the entire apple cooking process and realized that was nothing more than home-made apple butter! So if you're being lazy, use the store-bought stuff! The benefit of making the apple butter yourself is the frosting will come out smoother but it's not a deal breaker.

Update: I made this cake again for a co-worker and was more meticulous this round. In a large skillet, I cooked the apples over a medium heat until they were tender, drained any excess water, and then tossed them immediately into the blender with the vanilla bean and powdered sugar. The result was a far smoother texture.


Of courses, I made a few personal touches here and there. I added a little rum to the cake itself (about 1-2 tablespoons) and cinnamon to the apple butter. Can't have apples without some cinnamon! As noted on Irena and Dots, the batter can be dense. I found a splash of almond milk went a long way. 


Note, get those apples, vanilla, and sugar in the blender before the apples cool down. The heat from the oven plus being blended should make it melt down into a creamier texture. My mix cooled too much (room temperature- woops!) and had a slight grain to it. 

In conclusion, this cake is darling. It has a sophisticated and mature flavor. The fam crushed it with little guilt. I adore any cake that's smaller than a 9 inch round! It has a European feel and holds itself above the usual sugar rush. Plus, it's easy to make. Make the frosting the day before if you're looking to save time. Loves!

Update: 

For the recipe, check out Irena and Dots!

Thursday, May 9, 2013

America's Test Kitchen Cinnamon Buns


I'm not going to play coy... this is another post about Cinnamon Buns. Surprise? The saga continues as I hunt for my favorite rendition! I wanted to make these for Mike's parents as a teensy show of thanks for their continuous wedding planning support.  When I asked him what I should make- I already knew the answer. One of Mike's fondest memories is his mom bringing home Cinnabuns from the airport after a business trip. He and his pops would fight to claim the heavenly smelling white and blue box. All right cinny buns, time to pull out the big guns: American's Test Kitchen.


Before I delve into describing the rolls, I have to give a warning. I ended up making these rolls TWICE. I made the dough the night before, let it rise, formed the rolls, and let them sit in the fridge over night. The intent was to save time in the  morning and have oven fresh cinnamon buns ready to go!


The issue arose the next day when the rolls refused to reach room temperature. The directions states "let sit at room temperature for about an hour." Well they sat there for 2 hours and still did not rise fully. I touched the pan and it was still chilled. In retrospect, I should have heated the oven a bit and let them rise in there like I usually do when making rolls. Being a shmuck, I put them in the oven anyways (not fully risen) and hoped for the best.


Well. As we say in Portuguese, toma! The result was a stiff and tough cinnamon bun. The flavor was still there at least! We cheated and zapped them in the microwave for a few seconds to lighten them up before serving. It was frustrating but hey- I KNEW the rolls had not doubled in size the second time. Learn from my mistakes! So make sure the bread has fully risen! If it hasn't, either your yeast has gone bad or there's not enough heat. 


And yet... that left the lingering question... what was their real potential? You know... sans screwing up and being impatient. 

The next day, the ever stubborn self went at it again- this time sticking around for the entire process. I am happy to report a delicious cinnamon bun! The rolls were tight and bread had a soft but solid texture. Honestly, we were content without the frosting! They were slowly addicting. You thought after the initial bite, "oh well that's nice." Then suddenly you realized half the pan was missing. Woopsy!


I did make two teensy itty bitty adjustments to the second rolls. I nearly doubled the amount of filling (go hard or go home) and added a bit of lemon zest to the cream cheese frosting. Trust, that touch of zest makes a big difference.

For the full recipe, check out the America's Test Kitchen Feed!